
Zel's Fleet Blog - BX, Jag XJ-S, Sinclair C5, Mercedes 208D & 230TE, AC Model 70.
-
Hell Razor5543
- (Donor 2023)
- Posts: 14308
- Joined: 01 Apr 2012, 09:47
- x 3296
Re: Zel's Fleet Blog - BX, Jag XJ-S, Sinclair C5, Mercedes 208D & 230TE, AC Model 70.
The concern was not the contamination. It was the fact that the whole unit was scorched (including the disk pack) and repairs had been necessary for the thing to work once. The overriding worry was that components could be on the edge of failure, and WOULD fail the next time the unit was powered up, with no certainty they could get it to work again.
James
ex BX 1.9
ex Xantia 2.0HDi SX
ex Xantia 2.0HDi LX
ex C5 2.0HDi VTR
ex C5 2.0HDi VTR
ex C5 2.2HDi VTX+
Yes, I am paranoid, but am I paranoid ENOUGH?
Out amongst the stars, looking for a world of my own!
ex BX 1.9
ex Xantia 2.0HDi SX
ex Xantia 2.0HDi LX
ex C5 2.0HDi VTR
ex C5 2.0HDi VTR
ex C5 2.2HDi VTX+
Yes, I am paranoid, but am I paranoid ENOUGH?
Out amongst the stars, looking for a world of my own!
-
Zelandeth

- Donor 2024
- Posts: 5312
- Joined: 16 Nov 2014, 23:36
- x 1599
Re: Zel's Fleet Blog - BX, Jag XJ-S, Sinclair C5, Mercedes 208D & 230TE, AC Model 70.
It's a bit sad that I'm going to have to wait a fair while to see if this will spin up, but it won't do anything without the 4MHz master clock from the host system. So until I've got a controller card running and all the leads hooked up it won't do anything.
I should be able to do a proof of life test though once I've checked out the power supply, as it should power up and show a fault condition, and after ~30 seconds release the disc loading cover latch. From what I've read though aside from the obvious physical maladies which can afflict them, especially if they've got damp that these drives are actually pretty robust electronically speaking.
I really ought get the VT-100 on the bench and at least have a look at what state that's in (aside from predictably scruffy). I'm also going to need to get a bunch of bits to make a keyboard adapter as I don't particularly fancy paying £200 for a probably broken keyboard missing a bunch of keys! However without a keyboard I'm not really going to be able to do much.
If I had half a brain I'd just use a terminal emulator on a modern machine, but where's the fun in that? I'm fairness I probably will, especially when we're initially trying to get things up and running just to eliminate as many unknown variables as possible. However actually in use using something era appropriate seems more attractive. Plus I like the idea of just because I can, using something that ancient to control my desktop workstation. Not every day, but just as a silly project to prove I can do it.
I should be able to do a proof of life test though once I've checked out the power supply, as it should power up and show a fault condition, and after ~30 seconds release the disc loading cover latch. From what I've read though aside from the obvious physical maladies which can afflict them, especially if they've got damp that these drives are actually pretty robust electronically speaking.
I really ought get the VT-100 on the bench and at least have a look at what state that's in (aside from predictably scruffy). I'm also going to need to get a bunch of bits to make a keyboard adapter as I don't particularly fancy paying £200 for a probably broken keyboard missing a bunch of keys! However without a keyboard I'm not really going to be able to do much.
If I had half a brain I'd just use a terminal emulator on a modern machine, but where's the fun in that? I'm fairness I probably will, especially when we're initially trying to get things up and running just to eliminate as many unknown variables as possible. However actually in use using something era appropriate seems more attractive. Plus I like the idea of just because I can, using something that ancient to control my desktop workstation. Not every day, but just as a silly project to prove I can do it.
Current fleet:
07 Volvo V70 SE D5, 85 Sinclair C5, 84 Trabant 601S, 73 AC Model 70, 62 Rover 110.
07 Volvo V70 SE D5, 85 Sinclair C5, 84 Trabant 601S, 73 AC Model 70, 62 Rover 110.
-
Zelandeth
- Donor 2024
- Posts: 5312
- Joined: 16 Nov 2014, 23:36
- x 1599
Re: Zel's Fleet Blog - BX, Jag XJ-S, Sinclair C5, Mercedes 208D & 230TE, AC Model 70.
Long term readers of this blog may recall that going waaaaay back to when I first got the Trabant that there was always something amiss with the wipers. Aside from the horrifically worn and corroded spindles which made getting the wipers to stay on in the right position a pain. The driver's side one only wiped about 2/3rds of its intended travel and there was a tonne of slop in the mechanism.
A week or so back the spring clip holding the linkage onto the motor pinged off (again), leaving the wipers stuck here.

Not ideal.

It was pretty obvious that something was amiss as there was a load of lateral tension trying to force the linkage off the motor. Of course I did the correct thing and decided to investigate rather than pretend I had seen nothing and just jam it back together.
This, in hindsight, was a mistake.

It doesn't matter how generally pleasant a car is to work on - anything involving messing with wiper linkages is going to be hell.
One of the main issues was that the plate the driver's side spindle is attached to has been subject to some serious mutilation. Correct on the right, one off the car on the left.


The bushings were totally missing. Everything was attached to a (loose) bolt in one of those holes - that's both where all the slop was and why I wasn't getting the full sweep on the driver's side.
The linkage had also been assembled incorrectly...however rather than stopping and trying to figure out why things wouldn't fit (it's essentially a three piece jigsaw...), no they just brute forced it and bent things to just about get enough clearance.
In the absence of a correctly assembled unit to compare to, there was a fair amount of trial and error involved in just trying different combinations until everything slotted together properly. Which would have been less annoying if you weren't almost entirely working buried in the bowels of the dash - and of course it's about the only place you can't just reach from underneath because the fuse box is in the way. Oh, and an always live bus bar. I found that with the pliers before I disconnected the battery. That woke me up.
It took me a good few hours of cursing, but I eventually got it to a point where I'm fairly sure that everything is assembled correctly, everything that had been bent out of shape has been more or less corrected, and the linkage seems to be working smoothly and pretty quietly.
Aaaaaaand the head stripped out of the grub screw holding the driver's side arm onto the spindle. Cue a lot of swearing.

Think that unknowingly I picked up an imperial hex bit rather than metric, so only have myself to blame.
Getting that out took me nearly all afternoon on Friday - and it ended up taking the threads with it. That however I can deal with, just not right then. I just had to step away at that point as the frustration level was reaching critical mass and I was going to start throwing things. I need to switch it out for a longer bolt anyway to help compensate for how worn the spindle is. HOPEFULLY I'll get that ticked off soon and I can put the entire interior back together.
Realistically I need to find some secondhand bits in better shape as the whole linkage is still pretty mangled and the spindle bushings are pretty badly worn out. It should work once I get the wiper itself reattached though.
It's been temporarily sidelined though as I've got a temporary visitor.

This was primarily to take along to the BL Show at MK Museum on Sunday, but it won't surprise anyone to know that a bit of tinkering will inevitably happen while it's here.
I always forget how small these cars are until I see them parked next to anything else.
Last time this car was here something I was intending to investigate was a complete lack of night time dash illumination, however ran out of time before I really had a chance to dig into it.
Looked into that and became suspicious when the first two lamps I looked at (started with the heater controls as they're the easiest to get to) were perfectly fine. Sure enough the lamps were all fine. I'm not 100% sure if it was down to a dirty fuse holder, dirty switch contact or a combination of the two. However after both have been cleaned everything sprang to life.

I always wondered what the little holes over the switches on their control panel were for, and half pondered if I could add some illumination for the switches with some LEDs hidden in there. Turns out that on higher trim level cars (like this one) there's a light guide in there to do just that.

Fancy! My lowly HLE didn't have that.
I didn't have a rev counter either.

Just wish all repairs were that easy!
Definitely isn't running 100%. Especially under heavy load it's spitting and sputtering a bit, though it's been forever since the car had a really decent run so that may be all it is. I'll give it a run not stuck in rush hour tomorrow and read the plugs, see what they're telling me. Bit of an exhaust blow from the manifold area made itself known about halfway home, no doubt from those horrible clamps between the downpipes and manifold. I know the head was off this not all that long ago, so one might just need a tweak now things have settled.
I know a lot of people say never to go back to drive your first cars again as they'll never live up to your memories, but I've never found that. I still have a massive soft spot for the Metro and find them huge fun to drive. Are they perfect? Hell no. Is a good one a right giggle to drive though? Absolutely. I think there's some rule that it's simply not allowed to go around a corner in one without attacking it like you're in a go cart.
I mean I'm probably not the best person to ask though...I can enjoy driving most things from an Austin 7 to a Silver Shadow, and have a Trabant as a daily...
I am still slightly scared that one day I'm going to stumble across an early one in Snapdragon yellow for sale somewhere - and I know full well that irrespective of what the price tag is that I'd have a hell of a hard time saying no to buying it.
-- -- --
Some photos from Sunday. May be some more to follow as I took quite a few on film.
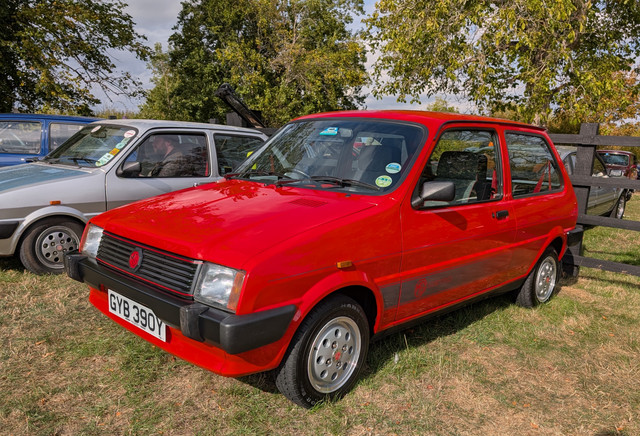


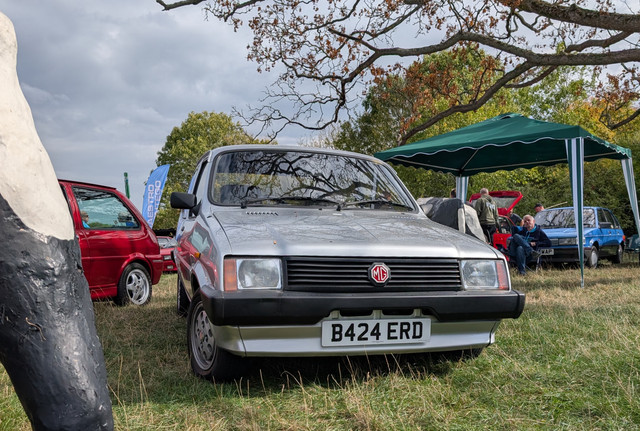
Aside from the extra 300cc and being a year newer (and the colour of course) this is pretty much identical to my last one. It surprised me how many little details changes there were between a W and a Y plate (indicator stalks, seatbelt buckles, rear washer jet location, and deletion of the fasten seatbelt light on the dash are what I've spotted) when actually looking at one. Wasn't a single one there on a W plate that I saw, X was the earliest.
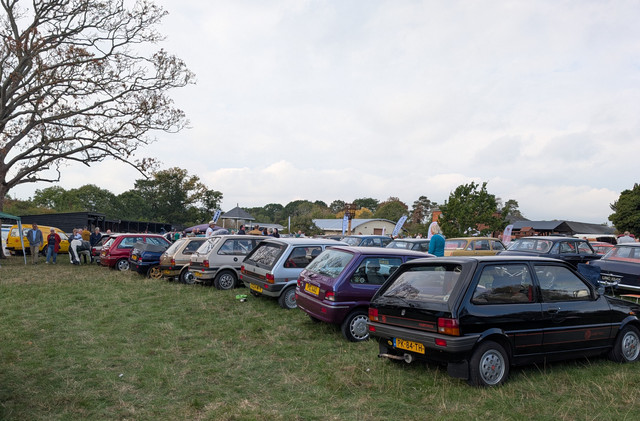
Many Metros.

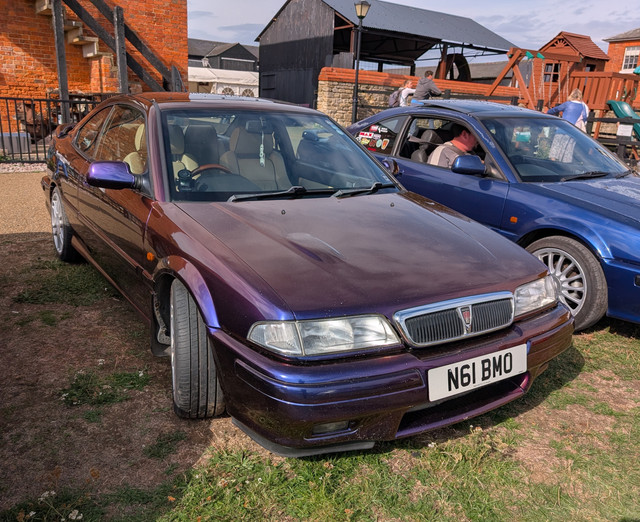
Not as good as XAN71A on a certain Xantia, it I thought this reg was a good effort.
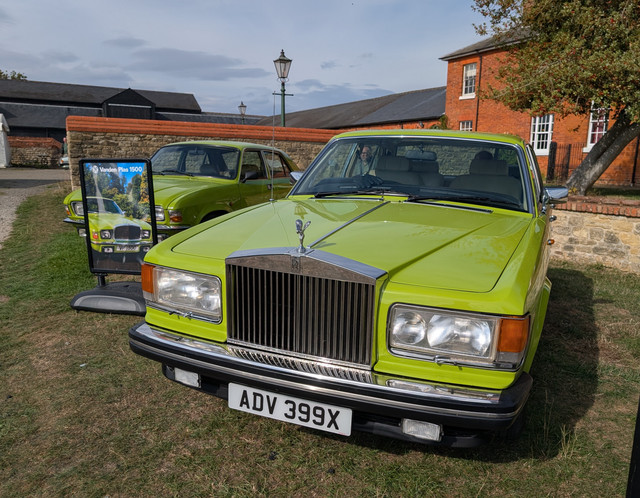
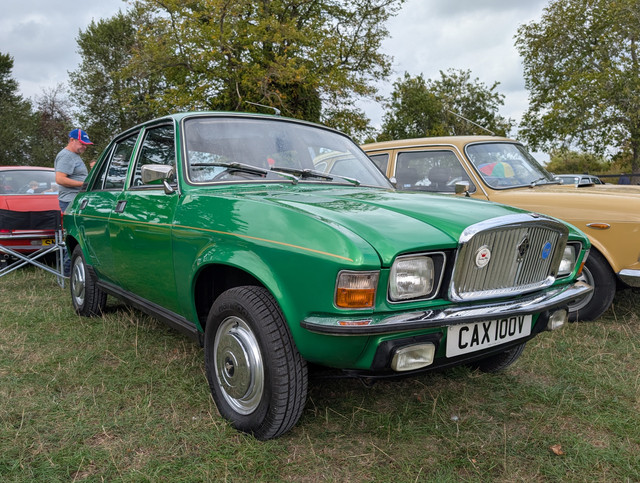
This was a LOT of green...and I thoroughly approved of course given my penchant for brightly coloured cars, especially with its colour matched partner in the background - apparently one of only nine ever sold in that colour, which makes the fact that any survive kind of miraculous.

Definitely had some weather throughout the day, but the showers were pretty brief so it didn't really impact things much.

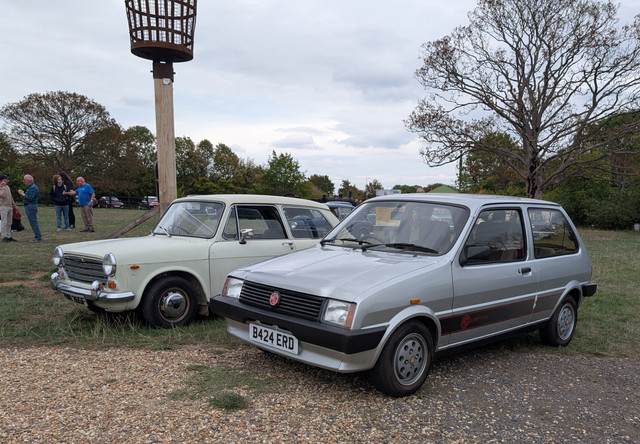
The owner of the Metro was also there in his Morris 1300, so as things thinned out at the end of the day we took the opportunity to get a photo of them together.
Then the owner of the Vanden Plas 1300 which has featured on this page a year or two back also showed up.


In general I usually don't rate single marque shows that much, but BMC covered such a diverse range of the market over so long that there's actually near as much variety as you'd see at any show. Plus it seems to always attract a good number of proper greasy rag cars and motors clearly in regular use as well as the usual the concourse show queens.
A week or so back the spring clip holding the linkage onto the motor pinged off (again), leaving the wipers stuck here.
Not ideal.
It was pretty obvious that something was amiss as there was a load of lateral tension trying to force the linkage off the motor. Of course I did the correct thing and decided to investigate rather than pretend I had seen nothing and just jam it back together.
This, in hindsight, was a mistake.
It doesn't matter how generally pleasant a car is to work on - anything involving messing with wiper linkages is going to be hell.
One of the main issues was that the plate the driver's side spindle is attached to has been subject to some serious mutilation. Correct on the right, one off the car on the left.
The bushings were totally missing. Everything was attached to a (loose) bolt in one of those holes - that's both where all the slop was and why I wasn't getting the full sweep on the driver's side.
The linkage had also been assembled incorrectly...however rather than stopping and trying to figure out why things wouldn't fit (it's essentially a three piece jigsaw...), no they just brute forced it and bent things to just about get enough clearance.
In the absence of a correctly assembled unit to compare to, there was a fair amount of trial and error involved in just trying different combinations until everything slotted together properly. Which would have been less annoying if you weren't almost entirely working buried in the bowels of the dash - and of course it's about the only place you can't just reach from underneath because the fuse box is in the way. Oh, and an always live bus bar. I found that with the pliers before I disconnected the battery. That woke me up.
It took me a good few hours of cursing, but I eventually got it to a point where I'm fairly sure that everything is assembled correctly, everything that had been bent out of shape has been more or less corrected, and the linkage seems to be working smoothly and pretty quietly.
Aaaaaaand the head stripped out of the grub screw holding the driver's side arm onto the spindle. Cue a lot of swearing.
Think that unknowingly I picked up an imperial hex bit rather than metric, so only have myself to blame.
Getting that out took me nearly all afternoon on Friday - and it ended up taking the threads with it. That however I can deal with, just not right then. I just had to step away at that point as the frustration level was reaching critical mass and I was going to start throwing things. I need to switch it out for a longer bolt anyway to help compensate for how worn the spindle is. HOPEFULLY I'll get that ticked off soon and I can put the entire interior back together.
Realistically I need to find some secondhand bits in better shape as the whole linkage is still pretty mangled and the spindle bushings are pretty badly worn out. It should work once I get the wiper itself reattached though.
It's been temporarily sidelined though as I've got a temporary visitor.
This was primarily to take along to the BL Show at MK Museum on Sunday, but it won't surprise anyone to know that a bit of tinkering will inevitably happen while it's here.
I always forget how small these cars are until I see them parked next to anything else.
Last time this car was here something I was intending to investigate was a complete lack of night time dash illumination, however ran out of time before I really had a chance to dig into it.
Looked into that and became suspicious when the first two lamps I looked at (started with the heater controls as they're the easiest to get to) were perfectly fine. Sure enough the lamps were all fine. I'm not 100% sure if it was down to a dirty fuse holder, dirty switch contact or a combination of the two. However after both have been cleaned everything sprang to life.
I always wondered what the little holes over the switches on their control panel were for, and half pondered if I could add some illumination for the switches with some LEDs hidden in there. Turns out that on higher trim level cars (like this one) there's a light guide in there to do just that.
Fancy! My lowly HLE didn't have that.
I didn't have a rev counter either.
Just wish all repairs were that easy!
Definitely isn't running 100%. Especially under heavy load it's spitting and sputtering a bit, though it's been forever since the car had a really decent run so that may be all it is. I'll give it a run not stuck in rush hour tomorrow and read the plugs, see what they're telling me. Bit of an exhaust blow from the manifold area made itself known about halfway home, no doubt from those horrible clamps between the downpipes and manifold. I know the head was off this not all that long ago, so one might just need a tweak now things have settled.
I know a lot of people say never to go back to drive your first cars again as they'll never live up to your memories, but I've never found that. I still have a massive soft spot for the Metro and find them huge fun to drive. Are they perfect? Hell no. Is a good one a right giggle to drive though? Absolutely. I think there's some rule that it's simply not allowed to go around a corner in one without attacking it like you're in a go cart.
I mean I'm probably not the best person to ask though...I can enjoy driving most things from an Austin 7 to a Silver Shadow, and have a Trabant as a daily...
I am still slightly scared that one day I'm going to stumble across an early one in Snapdragon yellow for sale somewhere - and I know full well that irrespective of what the price tag is that I'd have a hell of a hard time saying no to buying it.
-- -- --
Some photos from Sunday. May be some more to follow as I took quite a few on film.
Aside from the extra 300cc and being a year newer (and the colour of course) this is pretty much identical to my last one. It surprised me how many little details changes there were between a W and a Y plate (indicator stalks, seatbelt buckles, rear washer jet location, and deletion of the fasten seatbelt light on the dash are what I've spotted) when actually looking at one. Wasn't a single one there on a W plate that I saw, X was the earliest.
Many Metros.
Not as good as XAN71A on a certain Xantia, it I thought this reg was a good effort.
This was a LOT of green...and I thoroughly approved of course given my penchant for brightly coloured cars, especially with its colour matched partner in the background - apparently one of only nine ever sold in that colour, which makes the fact that any survive kind of miraculous.
Definitely had some weather throughout the day, but the showers were pretty brief so it didn't really impact things much.
The owner of the Metro was also there in his Morris 1300, so as things thinned out at the end of the day we took the opportunity to get a photo of them together.
Then the owner of the Vanden Plas 1300 which has featured on this page a year or two back also showed up.
In general I usually don't rate single marque shows that much, but BMC covered such a diverse range of the market over so long that there's actually near as much variety as you'd see at any show. Plus it seems to always attract a good number of proper greasy rag cars and motors clearly in regular use as well as the usual the concourse show queens.
Current fleet:
07 Volvo V70 SE D5, 85 Sinclair C5, 84 Trabant 601S, 73 AC Model 70, 62 Rover 110.
07 Volvo V70 SE D5, 85 Sinclair C5, 84 Trabant 601S, 73 AC Model 70, 62 Rover 110.
-
CitroJim

- A very naughty boy
- Posts: 55076
- Joined: 30 Apr 2005, 23:33
- x 8385
Re: Zel's Fleet Blog - BX, Jag XJ-S, Sinclair C5, Mercedes 208D & 230TE, AC Model 70.
Loving all the pictures from the BL Show Zel  Wish I'd known it was on; I'd have joined you..
Having owned three, including a Turbo, I have an incredibly soft spot for the MG Metro and indeed, the Metro in general...
Wish I'd known it was on; I'd have joined you..Having owned three, including a Turbo, I have an incredibly soft spot for the MG Metro and indeed, the Metro in general...
Jim
A bit of a Citroen AX fan...
A bit of a Citroen AX fan...
-
Hell Razor5543
- (Donor 2023)
- Posts: 14308
- Joined: 01 Apr 2012, 09:47
- x 3296
Re: Zel's Fleet Blog - BX, Jag XJ-S, Sinclair C5, Mercedes 208D & 230TE, AC Model 70.
The Rolls Royce (and partner) looks like it is in Pistachio Green (I saw a Car SOS episode where they restored a Jenson Interceptor in that colour).
James
ex BX 1.9
ex Xantia 2.0HDi SX
ex Xantia 2.0HDi LX
ex C5 2.0HDi VTR
ex C5 2.0HDi VTR
ex C5 2.2HDi VTX+
Yes, I am paranoid, but am I paranoid ENOUGH?
Out amongst the stars, looking for a world of my own!
ex BX 1.9
ex Xantia 2.0HDi SX
ex Xantia 2.0HDi LX
ex C5 2.0HDi VTR
ex C5 2.0HDi VTR
ex C5 2.2HDi VTX+
Yes, I am paranoid, but am I paranoid ENOUGH?
Out amongst the stars, looking for a world of my own!
-
Zelandeth
- Donor 2024
- Posts: 5312
- Joined: 16 Nov 2014, 23:36
- x 1599
Re: Zel's Fleet Blog - BX, Jag XJ-S, Sinclair C5, Mercedes 208D & 230TE, AC Model 70.
Applejack is the colour name. I think it's actually brighter in person than it looks in the photo.Hell Razor5543 wrote: 29 Sep 2026, 20:38 The Rolls Royce (and partner) looks like it is in Pistachio Green (I saw a Car SOS episode where they restored a Jenson Interceptor in that colour).
Metro has a little tinkering time going on.
First thing I want to deal with is one that anyone who's dealt with the A or A+ Series engines at all will be well familiar with - a blow from the manifold to downpipe joint. These use an honestly daft, fiddly, finicky and just utterly hateful band clamp to hold the downpipes to the manifold. Trying to get these properly lined up and fully sealed is a recipe for frustration (and in my experience, repetition). It was quiet when I picked the car up, and clearly started blowing after about 15 minutes of driving. The head was off about a year ago, so guessing things weren't perfectly lined up back then. Going to see if I can get it to seal a bit better as it's horribly annoying.
The choke light on the dash wasn't working. This one was nice and simple in a dirty switch.

That's the sort of silly thing that will drive me mad. Especially when it's a nice neat and clear panel like this.
I need to have a poke around the engine bay as I'm not convinced there's not a vacuum leak somewhere. Something seems to be whistling, and it's on the wrong side of the engine bay to be from the belts. Hoping it's not the brake servo as it's never fun having to be the bearer of bad news!
The carb I think needs the base mixture tweaked slightly, though I'm not touching that until I've finished hunting vacuum leaks. The carb was apart not long ago to change the bowl gasket, so things might have been moved then. We also could just be dealing with stale fuel as the car is used so rarely - pretty sure what's in there is what I put in there last time I was driving it, and that was in 2022 I think! So I'm going to try to get it down a bit then stick some fresh stuff in to see if that changes anything.
Last edited by Zelandeth on 30 Sep 2026, 10:59, edited 1 time in total.
Current fleet:
07 Volvo V70 SE D5, 85 Sinclair C5, 84 Trabant 601S, 73 AC Model 70, 62 Rover 110.
07 Volvo V70 SE D5, 85 Sinclair C5, 84 Trabant 601S, 73 AC Model 70, 62 Rover 110.
-
CitroJim
- A very naughty boy
- Posts: 55076
- Joined: 30 Apr 2005, 23:33
- x 8385
Re: Zel's Fleet Blog - BX, Jag XJ-S, Sinclair C5, Mercedes 208D & 230TE, AC Model 70.
When you do a road test Zel, drop round my way as I'd love to see an MG Metro again
And you of course
And don't forget I owe you a wedge of money
I'm out today at Safari MK with the girls and cycling on Friday with the boys. Tomorrow I plan to be home all day...
And you of course
And don't forget I owe you a wedge of money
I'm out today at Safari MK with the girls and cycling on Friday with the boys. Tomorrow I plan to be home all day...
Jim
A bit of a Citroen AX fan...
A bit of a Citroen AX fan...
-
Zelandeth
- Donor 2024
- Posts: 5312
- Joined: 16 Nov 2014, 23:36
- x 1599
Re: Zel's Fleet Blog - BX, Jag XJ-S, Sinclair C5, Mercedes 208D & 230TE, AC Model 70.
Last time I owned a Metro and therefore spent any regular time tinkering with one was 21 years ago.
One thing I despised ever having to touch back then was the stupid band clamp between the exhaust manifold and downpipes. They're an absolute git to get properly lined up and fastened together, and everything has to be done blind because the fluffing manifold is buried down the back of the engine.

A good bead of sealant in the groove of the clamp and some patience will usually get it sealed. Though I do remember it being something that had to be revisited now and then.
One or both of the clamps on here started blowing shortly after we got the car out of storage. Being an optimist I attacked the outboard one first as it's immeasurably easier to get at. Of course that's not the one that was blowing, no it's the inboard one that's a swine to get at.

Coming back to that. I'm pretty sure given where the clamp is that it was fitted from under the car just to make it more awkward. On the plus side, I know one branch is sealed now!
The choke light remained functional for precisely one cold start. About situation normal for BL electrics then. I'll try to get in there with a points file to see if I can clean the contacts a bit better. The switch really isn't designed to come apart so I'm not getting too involved there.
Some fresh fuel has definitely helped with general running, though still a bit lumpier than it really should be.
Noticed another very early car difference - the scale on the temperature and fuel gauges is labelled differently. Older car had a solid white bar in the operating range in the temp gauge and didn't have the 1/4 and 3/4 markers on the fuel gauge.
Pointless knowledge, but the sort of nonsense I find interesting.
I really ought get it back to its owner soon!
One thing I despised ever having to touch back then was the stupid band clamp between the exhaust manifold and downpipes. They're an absolute git to get properly lined up and fastened together, and everything has to be done blind because the fluffing manifold is buried down the back of the engine.
A good bead of sealant in the groove of the clamp and some patience will usually get it sealed. Though I do remember it being something that had to be revisited now and then.
One or both of the clamps on here started blowing shortly after we got the car out of storage. Being an optimist I attacked the outboard one first as it's immeasurably easier to get at. Of course that's not the one that was blowing, no it's the inboard one that's a swine to get at.
Coming back to that. I'm pretty sure given where the clamp is that it was fitted from under the car just to make it more awkward. On the plus side, I know one branch is sealed now!
The choke light remained functional for precisely one cold start. About situation normal for BL electrics then. I'll try to get in there with a points file to see if I can clean the contacts a bit better. The switch really isn't designed to come apart so I'm not getting too involved there.
Some fresh fuel has definitely helped with general running, though still a bit lumpier than it really should be.
Noticed another very early car difference - the scale on the temperature and fuel gauges is labelled differently. Older car had a solid white bar in the operating range in the temp gauge and didn't have the 1/4 and 3/4 markers on the fuel gauge.
Pointless knowledge, but the sort of nonsense I find interesting.
I really ought get it back to its owner soon!
Current fleet:
07 Volvo V70 SE D5, 85 Sinclair C5, 84 Trabant 601S, 73 AC Model 70, 62 Rover 110.
07 Volvo V70 SE D5, 85 Sinclair C5, 84 Trabant 601S, 73 AC Model 70, 62 Rover 110.
-
CitroJim
- A very naughty boy
- Posts: 55076
- Joined: 30 Apr 2005, 23:33
- x 8385
Re: Zel's Fleet Blog - BX, Jag XJ-S, Sinclair C5, Mercedes 208D & 230TE, AC Model 70.
Oh what fun Zel  I still bear the scars from my time of owning Metros - mental and physical...
Interesting on the subtle model differences...

I still bear the scars from my time of owning Metros - mental and physical...Interesting on the subtle model differences...
Nah! I'm sure you can find many, many reasons to keep hold of it for a good bit longer
Jim
A bit of a Citroen AX fan...
A bit of a Citroen AX fan...
-
Zelandeth
- Donor 2024
- Posts: 5312
- Joined: 16 Nov 2014, 23:36
- x 1599
Re: Zel's Fleet Blog - BX, Jag XJ-S, Sinclair C5, Mercedes 208D & 230TE, AC Model 70.
Metro is going back to its owner tomorrow. ...To be replaced by an ADO16 in Morris 1300 flavour. I've been after a shot of that one for about the last year, so should be interesting.
On my workbench over the last couple of days we have had a lot of spaghetti.

It looks chaotic but it's controlled chaos. This is the replacement brain for this tank of an air conditioner.

Physically this works well, however the control logic has been becoming increasingly senile over the last few years. I have gone over the logic board with a microscope, recapped it and basically dug as far as I can without schematics which show exactly what the logic inputs/outputs from the microcontroller should be. As far as I can tell it's actually the microcontroller - or more likely the mask ROM burned into it to define the programming - is the issue. It's a custom chip from 1991 from a company nobody has heard of, so spares (or documentation) don't exist.
Honestly, this really is overkill for running an air conditioning unit.

Especially considering that this is using a mechanical thermostat, a mechanical timer, and doesn't have any inbuilt anti cycle timer to protect the compressor. It's basically all there so they could have a fancy pants soft touch control panel as was the trend for electronics in 1991.

You may note in that photo.of the board that there are a bunch of things unplugged, random choc block connectors (this predated me discovering Wagos) present etc. This has been to work around the issues it has developed. However it has in the last few days progressed to randomly shutting the whole thing down when the compressor starts or stops. This is purely a logical issue rather than a voltage drop or anything.
So in sharp contrast to the trend for everything to be controlled by ever more powerful computers, I'm ditching the computer in favour of some good old relay logic. For most of it anyway - two signals I am sourcing by a computerised controller - a proper PID temperature controller. Quite simply because it's designed specifically for heating and refrigeration applications so has everything like hysteresis adjustments and anti cycle timers built in out the box. No reason to reinvent the wheel, and it will be massively more accurate and consistent than the original "0-9" mechanical thermostat ever was.
Before I went disassembling things though I wanted to test whether my logic worked as expected as I drew the schematic at something like 3am one night when I couldn't sleep. So I wanted to wire the whole lot up and see if everything behaved as expected. I deliberately left the wiring far longer than necessary as I don't know exactly how long they will need to be - I can trim things down once the relay bank and control panels have been situated, and of course things will be cable managed to be tidy.
I had to make a couple of minor changes to where I was picking up the signals for the illumination of the mode switches and I noticed that I'd missed the connection to common for one relay coil on the schematic, but somewhat to my surprise it worked exactly as I'd planned.
Shown here in standby mode with just the mains supply turned on (an isolator switch is something I'm also adding).

Then here turned on, in cooling mode, fan on low and with the compressor running.

Finally, a use for the massively over specified Unimax push switch which I've been looking for a home for for the last ten years, and after it spent about 60 years sitting in a box.

If like me you're a bit of an Apollo nerd, this may look strangely familiar. Yes, it is exactly the same buttons that are seen on a bunch of consoles in the Mission Operations Control Room (which any normal person would just call Mission Control). Now one is the power button for my air conditioner.
There are two relay based safety interlocks. One which locks out the compressor if the condensate tank is full (which it will never be under normal circumstances as it drains automatically). The other ensures that even if the temperature controller lost its marbles and output signals calling for both heating and cooling simultaneously, and I had both heating and cooling modes enabled, that it's not possible for both heating and cooling to run together. The signal to the relays for the compressor and heater element passes through the normally open and normally closed contacts of the interlock relay, so if both are on simultaneously it will default to cooling mode. This is an important one to have as running both modes together could overload the power supply, pulling up to (though there is a circuit breaker added as well which will add additional protection there).
I had hoped to actually start putting it in there today, but ended up far longer trying to make.any kind of sense out of the existing start component wiring. Firstly because the schematic on the inside of the back cover of the machine is simply wrong - and that took me quite a while of scratching my head and looking for a non existent capacitor in the condensing unit to figure out. Secondly because I still haven't quite fathomed out what they're doing with the start and run capacitors for the compressor and condenser fans, as there is no start relay...just one single relay contact which powers up the whole lot. I need to sit down and draw out what's connected to what and see how it works. I'd normally expect a potential relay to handle compressor starting at the very least. I have looked on the compressor itself, the only thing attached to it is a thermal cutout, as I did wonder if it might be hiding there. It's worked for the last 34 years, but I need to figure out exactly how it's worked for the last 34 years so I can either replicate or improve on it before I go tearing the PCB out and cutting a big hole in the front of the case.
Probably actually will retain the PCB to be honest. Though purely as an easy source of 24V AC and convenient point to hook things up to as there are already terminations there. It won't actually be doing any of the controlling any more.
I'm learning however why the Italians have such an interesting reputation where electrics are concerned though! Hopefully should have the upgraded control system running soon though.
On my workbench over the last couple of days we have had a lot of spaghetti.
It looks chaotic but it's controlled chaos. This is the replacement brain for this tank of an air conditioner.
Physically this works well, however the control logic has been becoming increasingly senile over the last few years. I have gone over the logic board with a microscope, recapped it and basically dug as far as I can without schematics which show exactly what the logic inputs/outputs from the microcontroller should be. As far as I can tell it's actually the microcontroller - or more likely the mask ROM burned into it to define the programming - is the issue. It's a custom chip from 1991 from a company nobody has heard of, so spares (or documentation) don't exist.
Honestly, this really is overkill for running an air conditioning unit.
Especially considering that this is using a mechanical thermostat, a mechanical timer, and doesn't have any inbuilt anti cycle timer to protect the compressor. It's basically all there so they could have a fancy pants soft touch control panel as was the trend for electronics in 1991.
You may note in that photo.of the board that there are a bunch of things unplugged, random choc block connectors (this predated me discovering Wagos) present etc. This has been to work around the issues it has developed. However it has in the last few days progressed to randomly shutting the whole thing down when the compressor starts or stops. This is purely a logical issue rather than a voltage drop or anything.
So in sharp contrast to the trend for everything to be controlled by ever more powerful computers, I'm ditching the computer in favour of some good old relay logic. For most of it anyway - two signals I am sourcing by a computerised controller - a proper PID temperature controller. Quite simply because it's designed specifically for heating and refrigeration applications so has everything like hysteresis adjustments and anti cycle timers built in out the box. No reason to reinvent the wheel, and it will be massively more accurate and consistent than the original "0-9" mechanical thermostat ever was.
Before I went disassembling things though I wanted to test whether my logic worked as expected as I drew the schematic at something like 3am one night when I couldn't sleep. So I wanted to wire the whole lot up and see if everything behaved as expected. I deliberately left the wiring far longer than necessary as I don't know exactly how long they will need to be - I can trim things down once the relay bank and control panels have been situated, and of course things will be cable managed to be tidy.
I had to make a couple of minor changes to where I was picking up the signals for the illumination of the mode switches and I noticed that I'd missed the connection to common for one relay coil on the schematic, but somewhat to my surprise it worked exactly as I'd planned.
Shown here in standby mode with just the mains supply turned on (an isolator switch is something I'm also adding).
Then here turned on, in cooling mode, fan on low and with the compressor running.
Finally, a use for the massively over specified Unimax push switch which I've been looking for a home for for the last ten years, and after it spent about 60 years sitting in a box.
If like me you're a bit of an Apollo nerd, this may look strangely familiar. Yes, it is exactly the same buttons that are seen on a bunch of consoles in the Mission Operations Control Room (which any normal person would just call Mission Control). Now one is the power button for my air conditioner.
There are two relay based safety interlocks. One which locks out the compressor if the condensate tank is full (which it will never be under normal circumstances as it drains automatically). The other ensures that even if the temperature controller lost its marbles and output signals calling for both heating and cooling simultaneously, and I had both heating and cooling modes enabled, that it's not possible for both heating and cooling to run together. The signal to the relays for the compressor and heater element passes through the normally open and normally closed contacts of the interlock relay, so if both are on simultaneously it will default to cooling mode. This is an important one to have as running both modes together could overload the power supply, pulling up to (though there is a circuit breaker added as well which will add additional protection there).
I had hoped to actually start putting it in there today, but ended up far longer trying to make.any kind of sense out of the existing start component wiring. Firstly because the schematic on the inside of the back cover of the machine is simply wrong - and that took me quite a while of scratching my head and looking for a non existent capacitor in the condensing unit to figure out. Secondly because I still haven't quite fathomed out what they're doing with the start and run capacitors for the compressor and condenser fans, as there is no start relay...just one single relay contact which powers up the whole lot. I need to sit down and draw out what's connected to what and see how it works. I'd normally expect a potential relay to handle compressor starting at the very least. I have looked on the compressor itself, the only thing attached to it is a thermal cutout, as I did wonder if it might be hiding there. It's worked for the last 34 years, but I need to figure out exactly how it's worked for the last 34 years so I can either replicate or improve on it before I go tearing the PCB out and cutting a big hole in the front of the case.
Probably actually will retain the PCB to be honest. Though purely as an easy source of 24V AC and convenient point to hook things up to as there are already terminations there. It won't actually be doing any of the controlling any more.
I'm learning however why the Italians have such an interesting reputation where electrics are concerned though! Hopefully should have the upgraded control system running soon though.
Current fleet:
07 Volvo V70 SE D5, 85 Sinclair C5, 84 Trabant 601S, 73 AC Model 70, 62 Rover 110.
07 Volvo V70 SE D5, 85 Sinclair C5, 84 Trabant 601S, 73 AC Model 70, 62 Rover 110.
-
CitroJim
- A very naughty boy
- Posts: 55076
- Joined: 30 Apr 2005, 23:33
- x 8385
Re: Zel's Fleet Blog - BX, Jag XJ-S, Sinclair C5, Mercedes 208D & 230TE, AC Model 70.
Great work on the aircon Zel
Looking forward to seeing the ADO16
Looking forward to seeing the ADO16
Jim
A bit of a Citroen AX fan...
A bit of a Citroen AX fan...
-
Zelandeth
- Donor 2024
- Posts: 5312
- Joined: 16 Nov 2014, 23:36
- x 1599
Re: Zel's Fleet Blog - BX, Jag XJ-S, Sinclair C5, Mercedes 208D & 230TE, AC Model 70.
Definitely a different sort of car to the MG Metro!

Current fleet:
07 Volvo V70 SE D5, 85 Sinclair C5, 84 Trabant 601S, 73 AC Model 70, 62 Rover 110.
07 Volvo V70 SE D5, 85 Sinclair C5, 84 Trabant 601S, 73 AC Model 70, 62 Rover 110.
-
CitroJim
- A very naughty boy
- Posts: 55076
- Joined: 30 Apr 2005, 23:33
- x 8385
Re: Zel's Fleet Blog - BX, Jag XJ-S, Sinclair C5, Mercedes 208D & 230TE, AC Model 70.
That ADO16 looks lovely Zel and I'm especially liking it because it's a 2-door An early MKII too!
An early MKII too!Jim
A bit of a Citroen AX fan...
A bit of a Citroen AX fan...