
Glad you got it fixed without to much hassle. I’m rarely on the forums these days due to a lack of time, if you need anything like pipes making up, text me as normally I’d be able to do them the same day.
David.
Simon's new Xantia V6 and Leaf blog
-
DHallworth
- (Donor 2025)
- Posts: 2425
- Joined: 20 Nov 2005, 17:05
- x 159
Re: Simon's new Xantia V6 and Peugeot Ion blog
'98 Xantia Activa V6 
'00 XM V6 Exclusive
'09 C5 2.7 HDi Exclusive
‘10 C5 3.0 HDi Exclusive
'12 C6 3.0 HDi Exclusive
'15 C4 BlueHDi Feel
'00 XM V6 Exclusive
'09 C5 2.7 HDi Exclusive
‘10 C5 3.0 HDi Exclusive
'12 C6 3.0 HDi Exclusive
'15 C4 BlueHDi Feel
-
white exec

- Posts: 7445
- Joined: 21 Dec 2015, 12:46
- x 1757
Re: Simon's new Xantia V6 and Peugeot Ion blog
Glad you got the piping fixed, Simon.
There is an extraordinary amount of know-how and help available here, often quickly provided. It's something worth cherishing.
Sometimes feel I should erect a miniature blue plaque, to commemorate Marc and Simon's milestone contributions to the late-Xantia HA regulators thread, and the transformation of Hydractive ride for both Xantia and XM. When asked, at the Pearly Gates, "What Did You Do?" . . . . .
Chris
-
RichardW
- Forum Treasurer
- Posts: 12003
- Joined: 07 Aug 2002, 17:12
- x 1324
Re: Simon's new Xantia V6 and Peugeot Ion blog
Hydraulic pipe looks good.... Exhaust pipe less so!! 
Back to the battery....

Back to the battery....
Timber, 6" wide 2" thick - it's C24 grade or something used to make the roof joists in the extension - it's bloody hard! It will be OK stacked up - it's well machined, and if necessary it can be screwed together.Mandrake wrote: 10 Sep 2019, 23:18Forgive my ignorance, but what is 6x2 structural grade - wood, or metal ?RichardW wrote: 10 Sep 2019, 07:29 I've got lengths of 6x2 structural grade - we can cut to length to span the subframe at the front (and presume there is similar at the rear?) then jack up in centre, set the ends on stands, then add packing (more bits of 6x2!) in the centre to re-jack to get the right height.
I don't think this will be too much of a problem - they should be into blind holes in the chassis, so they should come out easily once they are 'cracked' - although this may need some 'persuasion'! Oddly I can't find them on the parts diagram.... There looks to be a plastic undertray underneath it, and this is probably joined on with the usual flaky small bolts into those daft wire cage 'nuts' which will cause 'issues'Mandrake wrote: 10 Sep 2019, 23:18 I'm also a bit worried about rusty bolts holding the battery chassis into the car - when I had a peak the other day some of the bolts look pretty rusty... and they are all M12 x 1.25 as far as I know.
Richard W
-
Mandrake

- Posts: 8695
- Joined: 10 Apr 2005, 17:23
- x 690
Re: Simon's new Xantia V6 and Peugeot Ion blog
Much appreciated. The logistics of trying to meet up with you to use the pipe former didn't work out this time, between a 3 year old who has been sick for the last week and being swamped with other things I ought to be doing when the Xantia isn't unexpectedly breaking down, ordering a pipe online and getting it delivered to work seemed like the minimum fuss thing to do, and it worked out well in the end even though I was a little apprehensive about only having one chance to get it right with a single pre-cut length of pipe.DHallworth wrote: 15 Sep 2019, 19:46 Glad you got it fixed without to much hassle. I’m rarely on the forums these days due to a lack of time, if you need anything like pipes making up, text me as normally I’d be able to do them the same day.
The exhaust should be "fun", hopefully this one is made a bit more precisely than the one you had to use a blowtorch and pipe to bend the mounting brackets on...
Should work OK though, it worked on the other car as the inner tube on the cat is thick and tough as nails, and there is plenty of overlap length in the pipes for a regular clamp to seal.
Simon
2016 Nissan Leaf Tekna 30kWh in White
1997 Xantia S1 3.0 V6 Auto Exclusive in Silex Grey
2011 Peugeot Ion Full Electric in Silver
1998 Xantia S2 3.0 V6 Auto Exclusive
1997 Xantia S1 2.0i Auto VSX
1978 CX 2400
1977 G Special 1129cc LHD
2016 Nissan Leaf Tekna 30kWh in White
1997 Xantia S1 3.0 V6 Auto Exclusive in Silex Grey
2011 Peugeot Ion Full Electric in Silver
1998 Xantia S2 3.0 V6 Auto Exclusive
1997 Xantia S1 2.0i Auto VSX
1978 CX 2400
1977 G Special 1129cc LHD
-
Mandrake
- Posts: 8695
- Joined: 10 Apr 2005, 17:23
- x 690
Re: Simon's new Xantia V6 and Peugeot Ion blog
I've got several solid sleepers as well, between them something should work. My sleepers are 200mm wide and 100mm thick, as long as the 200mm is wide enough to support an axle stand, four axle stands on one sleeper at each end might be enough to do the job. Still haven't got a chance to measuring it though, but without knowing the precise height of the top cover of the battery enclosure I don't know how much we need to raise the car. I'd hate to be half way through winding it down only discover that it doesn't quite clear the car.RichardW wrote: 16 Sep 2019, 08:19Timber, 6" wide 2" thick - it's C24 grade or something used to make the roof joists in the extension - it's bloody hard! It will be OK stacked up - it's well machined, and if necessary it can be screwed together.Mandrake wrote: 10 Sep 2019, 23:18Forgive my ignorance, but what is 6x2 structural grade - wood, or metal ?RichardW wrote: 10 Sep 2019, 07:29 I've got lengths of 6x2 structural grade - we can cut to length to span the subframe at the front (and presume there is similar at the rear?) then jack up in centre, set the ends on stands, then add packing (more bits of 6x2!) in the centre to re-jack to get the right height.
There are (I think) only about 6 large M12 x 1.25 bolts holding the battery chassis itself, however it's the numerous small bolts on the plastic under tray that I'm worried about, some of which look pretty grotty. After just having had a very bad experience with every single bolt holding the plastic wheel arch liner on the Xantia needing to be destroyed in some way or another to get anything off, (and not having a cutting wheel!) I don't want to run into the same hassles on the Ion.I don't think this will be too much of a problem - they should be into blind holes in the chassis, so they should come out easily once they are 'cracked' - although this may need some 'persuasion'! Oddly I can't find them on the parts diagram.... There looks to be a plastic undertray underneath it, and this is probably joined on with the usual flaky small bolts into those daft wire cage 'nuts' which will cause 'issues'Mandrake wrote: 10 Sep 2019, 23:18 I'm also a bit worried about rusty bolts holding the battery chassis into the car - when I had a peak the other day some of the bolts look pretty rusty... and they are all M12 x 1.25 as far as I know.
As for disassembly, there is some great i-Miev documentation at this site:
http://mmc-manuals.ru/Mitsubishi_i-MiEV ... ce_Manuals
I've used the service manual link (the first one) quite a bit before but I've just noticed there is a full dismantling guide here that I haven't seen before that I should have a read through, it looks very complete!
http://mmc-manuals.ru/manuals/i-miev/ma ... _Guide.pdf
Simon
2016 Nissan Leaf Tekna 30kWh in White
1997 Xantia S1 3.0 V6 Auto Exclusive in Silex Grey
2011 Peugeot Ion Full Electric in Silver
1998 Xantia S2 3.0 V6 Auto Exclusive
1997 Xantia S1 2.0i Auto VSX
1978 CX 2400
1977 G Special 1129cc LHD
2016 Nissan Leaf Tekna 30kWh in White
1997 Xantia S1 3.0 V6 Auto Exclusive in Silex Grey
2011 Peugeot Ion Full Electric in Silver
1998 Xantia S2 3.0 V6 Auto Exclusive
1997 Xantia S1 2.0i Auto VSX
1978 CX 2400
1977 G Special 1129cc LHD
-
RichardW
- Forum Treasurer
- Posts: 12003
- Joined: 07 Aug 2002, 17:12
- x 1324
Re: Simon's new Xantia V6 and Peugeot Ion blog
Richard W
-
RichardW
- Forum Treasurer
- Posts: 12003
- Joined: 07 Aug 2002, 17:12
- x 1324
Re: Simon's new Xantia V6 and Peugeot Ion blog
And I was highly amused that the 'procedure' for discharging the battery if it was damaged, was basically to park it in a pond!!
Richard W
-
Mandrake
- Posts: 8695
- Joined: 10 Apr 2005, 17:23
- x 690
Re: Simon's new Xantia V6 and Peugeot Ion blog
You can see my concern especially after fighting with the fasteners on the Xantia...RichardW wrote: 16 Sep 2019, 21:24
I make that 25.... hope the back fixings are better than PSA's usual ones!!
Yes.RichardW wrote: 17 Sep 2019, 09:51 And I was highly amused that the 'procedure' for discharging the battery if it was damaged, was basically to park it in a pond!!
We won't be doing that...
Simon
2016 Nissan Leaf Tekna 30kWh in White
1997 Xantia S1 3.0 V6 Auto Exclusive in Silex Grey
2011 Peugeot Ion Full Electric in Silver
1998 Xantia S2 3.0 V6 Auto Exclusive
1997 Xantia S1 2.0i Auto VSX
1978 CX 2400
1977 G Special 1129cc LHD
2016 Nissan Leaf Tekna 30kWh in White
1997 Xantia S1 3.0 V6 Auto Exclusive in Silex Grey
2011 Peugeot Ion Full Electric in Silver
1998 Xantia S2 3.0 V6 Auto Exclusive
1997 Xantia S1 2.0i Auto VSX
1978 CX 2400
1977 G Special 1129cc LHD
-
Mandrake
- Posts: 8695
- Joined: 10 Apr 2005, 17:23
- x 690
Re: Simon's new Xantia V6 and Peugeot Ion blog
I've watched this video before and probably posted it here before, but I thought now was a good time to post it again and study it as it pretty much details the entire cell swap process in video!
These guys had access to a 2 post hoist though, lucky buggers....
These guys had access to a 2 post hoist though, lucky buggers....
Simon
2016 Nissan Leaf Tekna 30kWh in White
1997 Xantia S1 3.0 V6 Auto Exclusive in Silex Grey
2011 Peugeot Ion Full Electric in Silver
1998 Xantia S2 3.0 V6 Auto Exclusive
1997 Xantia S1 2.0i Auto VSX
1978 CX 2400
1977 G Special 1129cc LHD
2016 Nissan Leaf Tekna 30kWh in White
1997 Xantia S1 3.0 V6 Auto Exclusive in Silex Grey
2011 Peugeot Ion Full Electric in Silver
1998 Xantia S2 3.0 V6 Auto Exclusive
1997 Xantia S1 2.0i Auto VSX
1978 CX 2400
1977 G Special 1129cc LHD
-
RichardW
- Forum Treasurer
- Posts: 12003
- Joined: 07 Aug 2002, 17:12
- x 1324
Re: Simon's new Xantia V6 and Peugeot Ion blog
Blimey, they like their screws don't they? How many are there???
Richard W
-
Skull

- Donor 2024
- Posts: 1143
- Joined: 02 Aug 2013, 13:35
- x 264
Re: Simon's new Xantia V6 and Peugeot Ion blog
RichardW wrote: 16 Sep 2019, 21:24
I make that 25.... hope the back fixings are better than PSA's usual ones!!
On my 4th Citroën Xantia (X2 HDi (110))
Citroën sAXo Memphis Mk II
Gone
Xantia x3 (2.0i TCT Activa)(2.1 TD SX)(1.9 TD Estate)
Xsara HDi VTR Coupe / Saxo 1.1i / BX 1.9 d / 4 x AX's (1.4D /1.5D)
2 x 406 (1.9 TD Estate/2.1 TD Saloon) 405 1.9 D Estate 306 1.9 XTDT Hatch
Citroën sAXo Memphis Mk II
Gone
Xantia x3 (2.0i TCT Activa)(2.1 TD SX)(1.9 TD Estate)
Xsara HDi VTR Coupe / Saxo 1.1i / BX 1.9 d / 4 x AX's (1.4D /1.5D)
2 x 406 (1.9 TD Estate/2.1 TD Saloon) 405 1.9 D Estate 306 1.9 XTDT Hatch
-
RichardW
- Forum Treasurer
- Posts: 12003
- Joined: 07 Aug 2002, 17:12
- x 1324
Re: Simon's new Xantia V6 and Peugeot Ion blog
That's just on the undertray, if you watch the vid you will see that there are about 1/2 a bucketful holding to top cover on, then there appear to another bucketful when they remove and strip the battery out!
Richard W
-
Mandrake
- Posts: 8695
- Joined: 10 Apr 2005, 17:23
- x 690
Re: Simon's new Xantia V6 and Peugeot Ion blog
Yep there are a lot of bolts holding the plastic cover on the top of the pack all the way around. I'll have to save a few egg cartons for holding all the bolts and keeping them organised...RichardW wrote: 20 Sep 2019, 07:51 That's just on the undertray, if you watch the vid you will see that there are about 1/2 a bucketful holding to top cover on, then there appear to another bucketful when they remove and strip the battery out!
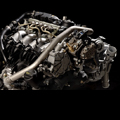
In other news my exhaust arrived yesterday:
I do have some left over clamps from previous exhausts and one of them looks like it will work but I still need a flat pipe (U bolt style) 64mm one for the cat connection - I won't be able to use the original tapered joint as the outer cat tail is about to fall off so I'll have to hacksaw the tapered flange off the new centre silencer pipe, hacksaw some slots into it and use a regular clamp with plenty of sealant...
Simon
2016 Nissan Leaf Tekna 30kWh in White
1997 Xantia S1 3.0 V6 Auto Exclusive in Silex Grey
2011 Peugeot Ion Full Electric in Silver
1998 Xantia S2 3.0 V6 Auto Exclusive
1997 Xantia S1 2.0i Auto VSX
1978 CX 2400
1977 G Special 1129cc LHD
2016 Nissan Leaf Tekna 30kWh in White
1997 Xantia S1 3.0 V6 Auto Exclusive in Silex Grey
2011 Peugeot Ion Full Electric in Silver
1998 Xantia S2 3.0 V6 Auto Exclusive
1997 Xantia S1 2.0i Auto VSX
1978 CX 2400
1977 G Special 1129cc LHD
-
Mandrake
- Posts: 8695
- Joined: 10 Apr 2005, 17:23
- x 690
Re: Simon's new Xantia V6 and Peugeot Ion blog
A long day out under the Xantia today - moments of despair mixed in with moments of triumph and in the end I'm very happy with the days achievements.
First I tackled the cruise control while I still had the wheel and wheel arch guards off. I was hoping it was the pipe split again but nope! I ended up unbolting and removing the entire vacuum pump assembly so I could test it off the car using a bench supply. Turns out it was working perfectly when manually powered and was able to operate the throttle just fine...
I noticed the terminals on the three pin plug for the vacuum pump itself looked a bit green - I though it might have been coated in LHM as it's close to where the leak was, but after cleaning them out I realised it was a bit of corrosion. So plenty of LPS1 on both the connectors and a few mate/unmate cycles to wipe the contact surfaces and I put it all back together along with the wheel arch covers with some new bolts.
A later test drive confirmed that the cruise control is now working again. Result! I think it's been broken for nearly a year now - I don't know for certain what the problem was but I'm going to chalk it up to green corrosion on the connector terminals - unlike the 2 pin connector for the dump valve which is a water tight connector with O-ring, the pins in the three pin plug are visible and unprotected from underneath - bad design Citroen!
  In hindsight I should have wrapped it with some 3M tape to bridge the gap where the terminals are exposed, but didn't think about it at the time as I was in a hurry to get onto the exhaust...maybe next time it's up on stands...
Next I repositioned the car to tackle the exhaust - as I suspected the pipe going to the rear muffler had completely broken in two. The muffler came off easily but the connection to the cat was a fight due to all the rust and I ended up having to hacksaw the old clamp off. I managed to snap off the remaining outer skin of the cat tail to leave me just the inner skin. I sawed the flare off the pipe on the new centre silencer and cut some short slots - just enough for the clamp to bite as there isn't a lot of extra overlap beyond that.
Before fitting the new exhaust I noticed that both pipes coming out of the centre silencer were about an inch shorter than the old one. Whoops! Also one of the mounting arms for the rear muffler had been welded at the wrong angle and when I tried to bend it I noticed the weld was a bit weak as well as it was only welded on one side and looked like it would break if I put too much bending force on it... I guess you get what you pay for...
I tried heating it with my blowtorch to bend it a bit easier but I guess my blowtorch is too puny as it wouldn't get anywhere near red and didn't make any difference! In the end I managed to clamp the mounting bracket in a vice and bend it with a piece of tube without putting strain on the weld, and got it near enough. I went ahead and started fitting it, sceptical about it fitting properly due to the centre silencer section being about 2" shorter in total.
The connection to the cat went well - plenty of sealant instide the overlap region then a regular 63mm U-bolt on the slotted portion - neat and sturdy. The muffler was a right pig to fit. I've never been particularly strong but for some reason I really struggled to lift it into place lying on my back without much room to work, and then had a real fight on my hands fitting the clamp - I had found a bag full of the proper single bolt Citroen clamps that I'd previously ordered and put away, and they're a right royal pig to fit. It took so long to get the clamp right that I had to go back and add fresh paste and start over. Got there in the end though and they are very tight once on. To my surprise despite the shorter pipe everything seem to fit and line up well - better than last time!
I let it idle for a while until the pipe was good and hot to set the sealant - no leaks at all, then took it for a test drive. Sounds normal again and looks good too. Job two completed!
When I'd been searching for the clamps earlier I'd discovered three of the original spheres off the car I'd kept. When I first got it in 2014 I replaced all the spheres with new IFHS ones - I don't have a sphere tester and all the rear spheres and accumulator were totally buggered, so when I get a car like that I just replace all the spheres to start with a fresh slate.
However the front strut and hydractive regulator spheres were actually the "three dimple" Citroen multi-layer types which can in theory last a very long time, so I kept them instead of throwing them away.
Ever since I've fitted the IFHS spheres I've felt that compared to my previous two Hydractive 2 Xantia's the front suspension in hard mode is a bit too stiff to the point where it bounces on the tyres a bit - for example if you're cornering hard in sport mode. More recently the front seems to have got even harder and every time the suspension switches into firm mode during cornering the front becomes very bouncy, almost boy racer like, however it rides OK when it's in soft mode.
After going for a test drive to check the exhaust and being reminded of how bouncy the front is in sport mode especially at high speed I couldn't resist swapping the old multi-layer front strut spheres back into the car as a test - they've sat unused for 5 years but as they're multilayer types they've probably lost next to no pressure in that time while the ones on the car have apparently started with low pressure from day one and lost quite a bit more over that 5 years...
So I swapped them over and went for another drive on the same roads. Wow! What a difference. The bounciness at the front in hard mode is gone. It's firm but well controlled and while I can feel slightly more body roll in sport mode on tight corners it actually handles better and gets around the corner faster as it's not bouncing on the tyres anymore. (Also if the front suspension is too stiff this will tend to increase understeer, so restoring the normal more compliant characteristics at the front will reduce understeer despite increasing body roll slightly)
So apparently the front IFHS strut spheres were never right from day one, (either low in gas pressure, or damper valves wrong) and the old multi-layer ones are still seemingly in perfect working order - who knows how old they are! I didn't swap the Hydractive regulator sphere as I wanted to see what the difference was just swapping the strut spheres. The IFHS regulator sphere still seems to be fine and I'm perfectly happy with the ride in the soft mode, so for now I'll leave it on, as it's a bit of a pig to change. I will of course keep the multi-layer hydractive regulator sphere and maybe one day I will fit that back on too.
So all in all I'm very happy with the results - cruise control fixed, exhaust system fixed, and front riding much better after swapping the strut spheres. And of course the leaky hydraulic pipe fixed last weekend.
I did find another job though - the headlights seem to be pointed down far too much in dip - to the point where it was a bit dangerous driving at night on a country road...and really obvious after driving the Ion, which has much better headlights. I'll need to double check the ride height is correct, (might be a touch low at the front) and then adjust the headlights.
Does anyone know the spec for adjusting dip headlights ? EG how much drop for how much distance ? I can't adjust it at home as I don't have any level ground, so I'll have to find a car park with a wall somewhere to do the adjustment...
First I tackled the cruise control while I still had the wheel and wheel arch guards off. I was hoping it was the pipe split again but nope! I ended up unbolting and removing the entire vacuum pump assembly so I could test it off the car using a bench supply. Turns out it was working perfectly when manually powered and was able to operate the throttle just fine...
I noticed the terminals on the three pin plug for the vacuum pump itself looked a bit green - I though it might have been coated in LHM as it's close to where the leak was, but after cleaning them out I realised it was a bit of corrosion. So plenty of LPS1 on both the connectors and a few mate/unmate cycles to wipe the contact surfaces and I put it all back together along with the wheel arch covers with some new bolts.
A later test drive confirmed that the cruise control is now working again. Result!
Next I repositioned the car to tackle the exhaust - as I suspected the pipe going to the rear muffler had completely broken in two.
Before fitting the new exhaust I noticed that both pipes coming out of the centre silencer were about an inch shorter than the old one. Whoops! Also one of the mounting arms for the rear muffler had been welded at the wrong angle and when I tried to bend it I noticed the weld was a bit weak as well as it was only welded on one side and looked like it would break if I put too much bending force on it...
I tried heating it with my blowtorch to bend it a bit easier but I guess my blowtorch is too puny as it wouldn't get anywhere near red and didn't make any difference! In the end I managed to clamp the mounting bracket in a vice and bend it with a piece of tube without putting strain on the weld, and got it near enough. I went ahead and started fitting it, sceptical about it fitting properly due to the centre silencer section being about 2" shorter in total.
The connection to the cat went well - plenty of sealant instide the overlap region then a regular 63mm U-bolt on the slotted portion - neat and sturdy. The muffler was a right pig to fit. I've never been particularly strong but for some reason I really struggled to lift it into place lying on my back without much room to work, and then had a real fight on my hands fitting the clamp - I had found a bag full of the proper single bolt Citroen clamps that I'd previously ordered and put away, and they're a right royal pig to fit.
I let it idle for a while until the pipe was good and hot to set the sealant - no leaks at all, then took it for a test drive. Sounds normal again and looks good too. Job two completed!
When I'd been searching for the clamps earlier I'd discovered three of the original spheres off the car I'd kept. When I first got it in 2014 I replaced all the spheres with new IFHS ones - I don't have a sphere tester and all the rear spheres and accumulator were totally buggered, so when I get a car like that I just replace all the spheres to start with a fresh slate.
However the front strut and hydractive regulator spheres were actually the "three dimple" Citroen multi-layer types which can in theory last a very long time, so I kept them instead of throwing them away.
Ever since I've fitted the IFHS spheres I've felt that compared to my previous two Hydractive 2 Xantia's the front suspension in hard mode is a bit too stiff to the point where it bounces on the tyres a bit - for example if you're cornering hard in sport mode. More recently the front seems to have got even harder and every time the suspension switches into firm mode during cornering the front becomes very bouncy, almost boy racer like, however it rides OK when it's in soft mode.
After going for a test drive to check the exhaust and being reminded of how bouncy the front is in sport mode especially at high speed I couldn't resist swapping the old multi-layer front strut spheres back into the car as a test - they've sat unused for 5 years but as they're multilayer types they've probably lost next to no pressure in that time while the ones on the car have apparently started with low pressure from day one and lost quite a bit more over that 5 years...
So I swapped them over and went for another drive on the same roads. Wow! What a difference.
So apparently the front IFHS strut spheres were never right from day one, (either low in gas pressure, or damper valves wrong) and the old multi-layer ones are still seemingly in perfect working order - who knows how old they are! I didn't swap the Hydractive regulator sphere as I wanted to see what the difference was just swapping the strut spheres. The IFHS regulator sphere still seems to be fine and I'm perfectly happy with the ride in the soft mode, so for now I'll leave it on, as it's a bit of a pig to change. I will of course keep the multi-layer hydractive regulator sphere and maybe one day I will fit that back on too.
So all in all I'm very happy with the results - cruise control fixed, exhaust system fixed, and front riding much better after swapping the strut spheres. And of course the leaky hydraulic pipe fixed last weekend.
I did find another job though - the headlights seem to be pointed down far too much in dip - to the point where it was a bit dangerous driving at night on a country road...and really obvious after driving the Ion, which has much better headlights. I'll need to double check the ride height is correct, (might be a touch low at the front) and then adjust the headlights.
Does anyone know the spec for adjusting dip headlights ? EG how much drop for how much distance ? I can't adjust it at home as I don't have any level ground, so I'll have to find a car park with a wall somewhere to do the adjustment...
Simon
2016 Nissan Leaf Tekna 30kWh in White
1997 Xantia S1 3.0 V6 Auto Exclusive in Silex Grey
2011 Peugeot Ion Full Electric in Silver
1998 Xantia S2 3.0 V6 Auto Exclusive
1997 Xantia S1 2.0i Auto VSX
1978 CX 2400
1977 G Special 1129cc LHD
2016 Nissan Leaf Tekna 30kWh in White
1997 Xantia S1 3.0 V6 Auto Exclusive in Silex Grey
2011 Peugeot Ion Full Electric in Silver
1998 Xantia S2 3.0 V6 Auto Exclusive
1997 Xantia S1 2.0i Auto VSX
1978 CX 2400
1977 G Special 1129cc LHD
-
white exec
- Posts: 7445
- Joined: 21 Dec 2015, 12:46
- x 1757
Re: Simon's new Xantia V6 and Peugeot Ion blog
You've had a busy and very productive session! Glad it's all back to normal.
With all those serviceble spheres on hand, you deserve some re-gassing kit from Tecnosir. No way of knowing whether even new spheres are actually correct pressure, so it makes it easy to check those too, once the valves are fitted.
Well spotted on the front corners . . . as I read your paragraph, I thought "low on gas".
All good news.
Chris