
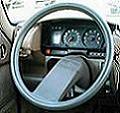
All of the bulbs have blown on the BX's dash, and I'm about to embark on replacing them.
It's all good at the moment, but I'm having trouble removing the vents to replace the 2 heater control bulbs. How the devil do the vents come out?
Also, How do you get to the right hand wing nut tyo remove the instrument binnacle?
Also, when changing the rear spheres, do I have to blled the brakes when I put pressure back in the system?
thanks again chaps[:D]
BX DASH BULBS
Moderator: RichardW
-
RichardW
- Forum Treasurer
- Posts: 10871
- Joined: 07 Aug 2002, 17:12
- Location: United Kingdom
- My Cars: MK2 '17 C4GP 1.6 BlueHDi 120
'13 3008 1.6 HDi GripControl - x 996
Vents - just lever them out with a screwdriver. Then you will find metal clips that hold the front on - note that these work the wrong way and need to pull the tabs out rather than press them in (took a while to work that one out first time!)
RH wing nut - remove the panel where the fog light/mirror switch is (about right knee height if neither fitted!) and you can reach in through there. At least you've got wing nuts and not those god awful spire nuts...
Rear spheres - shouldn't be necessary to bleed the brakes, just do some Citaerobics afterwards. Worth bleeding of course if you get some odd braking behaviour (eg rising at the rear).
A load of Q's [:)]
Here's a load of A's :
1) the vents are retained by clips inside - both sides. It's not the moveable grille - but the whole square plastic housing you have to remove - and is retained by clips.
2) it *should* be able to get at - reaching up from under the dash RHS most. Donno on RHD export vehicles - may be necessary to remove cowling under the wheel.
3) as the rear brakes are fed directly off the rear suspension - and the rear suspension is opened - there is a risc air can reach the rear brakes circuit.
Do the Citaerobics - then bleed the rear brakes - when suspension set to max height (gives the most rear brakes pressure when pedal operated).
-
tomsheppard
- Posts: 1801
- Joined: 19 Dec 2002, 14:46
- Location: United Kingdom
- My Cars:
Pull the knobs off and there are two screws underneath. Remove these before the vents and then lever the right hand clip towards the centre of the car. Pull the escutcheon forward and then do the same with the left hand clip. You'll need to remove the printed circuit board or the control module to get to the bulb holders. I'd suggest the former but you will need to take off the round part on the middle spindle. There is a tiny metal contact within, so use a rag underneath to catch it as it falls out. It is easier than trying to grapple with the module but if you must, these are four screws on the outer edge of the module.
-
tomsheppard
- Posts: 1801
- Joined: 19 Dec 2002, 14:46
- Location: United Kingdom
- My Cars:
Seconding Tom's advice - this is EXACTLY what happened to me recently & it was the lighting rheostat (dimmer).
It happened after a struggle with a cigar lighter that woudln't eject when pushed in (I suspect wiring damage behind the ventilation controls, but have yet to confirm it 100%).
You can just pop out the dimmer control without grovelling around under the wheel shroud too much, and a wire with a crocodile clip at each end does wonders for a dodgy dimmer (in the short term).
Thanks chaps,
Spheres not a problem...Using my nre removal tool it's an absolute doddle!
Heater bulbs...Piece of cake, took 5 mins(thanks again)
Instrument bulbs, got the clocks out OK and decided that cutting the cable tie would give me sufficient clearance to get in there and replace all bulbs.
Well, I've replaced all the bulbs and everything is working now except for the illumination of the fuel gauge, oil level indicator and lower portion of speedo(0-60mph). I cannot for the life of me see any other bulbs to replace...Why aren't they lit up?
Finished for the day now, as it's bloody freezing outside...Looks like snow tonight![:D]
-
ardcorenavint
- Posts: 3
- Joined: 31 Jan 2004, 01:02
- Location:
- My Cars:
For anyone returning to this thread for tips, let me recommend the follwing:
1. Always unplug the speedo cable immediately when working behind the binnacle ... sounds obvious but ther are some mad crazy people out there (such as me) who have delayed disconnection of speedo cable and succeeded in breaking the mountings.
2. Dont forget to change the bulbs that are hidden within the white speedo guage cover ..the haynes manual neglects to mention them. Removal of a panel from the back of the binnacle is neccessary.
Frank