This guide will show how to replace them. Note that the procedure as described was carried out on an S2 Xantia and all the pictures are from a low-specification S2. I have pointed out S1 differences where appropriate.
First, arm yourself with around 30 R286 capless bulbs.. Buy in bulk from well-known Internet Auction sites
Buy more than you need as some will be found DOA.
The S1 and S2 are slightly different in that the steering wheel needs to be removed on an S1 to allow the top steering wheel cowl to be removed. No need on an S2.
The only tools you need is a T20 Torx driver and maybe a small pair of pliers plus a small 12v battery and leads to enable the new bulbs to be tested.
If an S1 you'll need the tools to remove the airbag and steering wheel. Observe normal airbag precautions like waiting 10 minutes after battery disconnection and treating the removed airbag with great care.
On an S1 be careful to ensure the rotary carrying the airbag and radio remote control wires is correctly aligned on reassembly - line up the arrows when the steering is set straight-ahead.
Start by disconnecting the battery.
Drop the steering wheel to its lowest height setting.
Next, remove the top steering column cowl by removing the securing screws in the bottom section and carefully prising upwards...

Next, ease the lower cowl down a little and remove the little side panel containing switches...

To release this panel it will be necessary to drop the fusebox cover a little...
Then remove the radio surround after removing the ashtray...

Remove the radio...
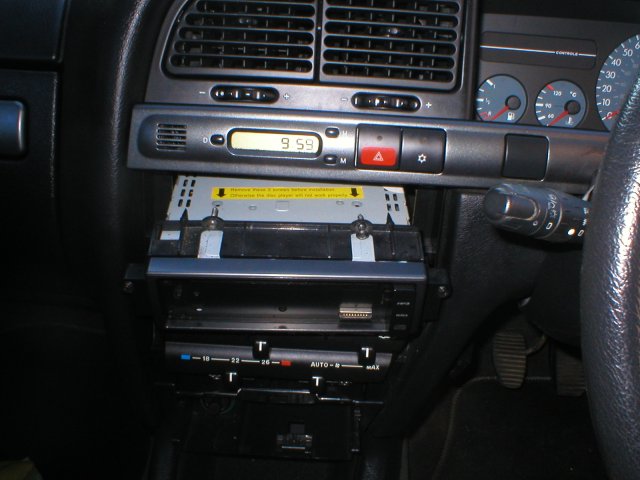
The remove the switch panel below the instrument cluster...

And finally, remove the instrument pod...

Remove all the bulbs from the panel by twisting their black bulb-holders through 45 degrees. Note that some warning lamps are not used on all models and these unused lamp positions may not have bulb holders fitted. make a note of where all the bulbs came from to ensure all the new ones go back in the right places...
Discard all bulbs that look blackened on their glass. Any bulbs that have been in service as lightly used warning lamps may be kept if they test good and are not discoloured. Replace as a matter of course the headlamp main beam and dip beam warning lamp bulbs, the battery warning and the STOP lamp bulb even if they look OK.
Remove the old bulbs from their holders with a sharp tug. Insert new bulbs in the holders after firstly straightening their leads if need be. Test each and every bulb in its holder on a battery and check it lights before replacing it in the instrument pod. Wiggle it to ensure there are no intermittentencies...
Never re-use any discoloured or blacked bulbs... Replace if in any doubt! Throw away all old dead and suspect bulbs to prevent their reuse in the future...
Reassembly is a reverse of disassembly as the BoL would say...