Xantia Door Mirror Removal/Repair

This is the Forum for all your Citroen Technical Questions, Problems or Advice.

Moderator: RichardW

Post Reply
addo
Sara Watson's Stalker
Posts: 7098
Joined: 19 Aug 2008, 12:38
Location: NEW South Wales, Australia. I'll show you "Far, far away" ;-)
My Cars: Peugeot 605
Citroën Berlingo
Alfa 147
x 93

Xantia Door Mirror Removal/Repair

Post by addo »

My NS mirror is showing the signs of numerous close (well, too close actually! :x ) calls at 30MPH in narrow streets, and snagging on the hedge while reversing up my driveway. It was always cracked "somewhere inside" but now it's quite floppy.

I'd like to effect a long term repair before reaching that embarrassing stage of a mirror attached with gaffer tape.

Do I need to remove the door trim, to remove the mirror assembly for remedial work? It's a heated non-indexing mirror.

Any other tips for new players?

Thanks, Adam.
User avatar
Clogzz
Posts: 2115
Joined: 15 May 2005, 18:04
Location: Australia
My Cars:
x 36
Contact:

Post by Clogzz »

Hi Adam,

Just looking into that myself, but on the driver’s side, with the mechanical adjustment that doesn’t work anymore.
According to BoL, access is from inside the door, meaning removal of the lining and seal.
It also says that the glass can be unclipped through the top gap, but without seeing inside, there’s risk of breakage.
Mine may be fixed by squirting holy water into 3 bowden cables visible through the top gap.
2002 C5 2.0i AL4 230,000 km 76372389
RichardW
Forum Treasurer
Posts: 10890
Joined: 07 Aug 2002, 17:12
Location: United Kingdom
My Cars: MK2 '17 C4GP 1.6 BlueHDi 120
'13 3008 1.6 HDi GripControl
x 1002

Post by RichardW »

You need to remove the door panel, because the mounting screws are behind the plastic trim piece with the alarm sensor in, which is in turn behind the door panel. Certainly in the case of manual mirrors, you need also to unscrew the operating lever, as it all comes as one - I guess the connector for electric mirrors will be in the door.

Clogzz you will probably find that the 3 cables are rusted up / broken - mine were on a previous Xantia. Not sure it would fixable....
Richard W
addo
Sara Watson's Stalker
Posts: 7098
Joined: 19 Aug 2008, 12:38
Location: NEW South Wales, Australia. I'll show you "Far, far away" ;-)
My Cars: Peugeot 605
Citroën Berlingo
Alfa 147
x 93

Post by addo »

Thanks both. I will order in advance, replacement nylon plugs for the trim panel to clip into, and a spare lock button. Photos will be taken, too.

Guaranteed there's ¼" of country road dust on everything in there! :lol:

Regards, Adam.
andmcit
Posts: 4299
Joined: 03 Mar 2005, 17:59
Location: Swansea - South Wales
My Cars:
x 30

Post by andmcit »

I'm surprised we're not knee deep in how to's as this is such a common
failing on Xantiae. I'm actually fed up with changing the damned things
on all my Xantiae especially now some evil moron has decided it's "fun"
to decapitate them off my cars on a regular basis and I'm now a reluctant
'expert' at removing/repairing and replacing them.

As Richard states, the whole doortrim needs complete removal to gain
access to two torx headed screws sat behind the alarm sensor. One thing
to bear in mind when removing the door trim is the small separate panel
which mounts the window switches has a tiny vertical torx screw that grips
the arm rest of the trim. The switch cables are quite bulky and short in
their run so be careful handling and disconnecting them.

There are three torx screws holding the area of the trim where the speaker
is mounted but the speaker itself is mounted on the doortrim itself and can
be left on it. The speaker wire feed connector is also vulnerable where it fits
onto the back of the speaker and can easily be broken if roughly handled.

ebay mirror picture showing mounting points (marked in red):
Image

The alarm sensor's plastic plugs are simply pressed into the door and are
very easily broken so care is needed to evenly prise it away off the door.
The electric feed wires to the motor are attached onto multiplugs mounted
forwards on the door and run around through a grommeted aperture into
the door itself and clipped tight under the main mirror with one small clip
to prevent fouling of the door glass when moving up/down. The main
mirror bracket (black triangle) is held by 5 small torx screws and easily
lifts off the door.

I'm about to change one on the silver Activa so will try and take step by
step piccies hoping it will be dry and daylight when I do so.

Andrew
User avatar
Clogzz
Posts: 2115
Joined: 15 May 2005, 18:04
Location: Australia
My Cars:
x 36
Contact:

Post by Clogzz »

RichardW wrote:Clogzz you will probably find that the 3 cables are rusted up / broken
Hi Richard,

Lucky day today … it’s fixed. :D
Got inside without breakages, to find the plastic pivoting plate binding in the socket.
Applied creepy automatic transmission fluid to the sliding surfaces, and gently moved the plate around, while also moving the adjusting knob around.
It’s now operating as it should, within the limitations of the design.

It looks like our hot sticky climate affects the plastics more than the metals.
When the car was 3 years old, the black plastic bumpers turned grey.
Even though heat and humidity cause oxidisation, the cables looked perfectly good.
When I was in Belgium, I was pushing uphill trying to stop car floors and rails from rusting by temperatures of 2 to 10ºC.
2002 C5 2.0i AL4 230,000 km 76372389
andmcit
Posts: 4299
Joined: 03 Mar 2005, 17:59
Location: Swansea - South Wales
My Cars:
x 30

Post by andmcit »

Just replaced a mirror on the silver Activa this evening and it took
10 minutes, less if I hadn't kept taking pictures! :lol:

Apologies for their being a bit shaky, I was holding the cameraphone in
one hand whilst I was almost fixing everything else single handely!! ;)

Speaker trim removed revealing x3 torx screws - they're NOT the visible
ones around the circumference of the speaker but set back into the three
deep round cut outs at 11, 5 and 8 o'clock positions:

Image

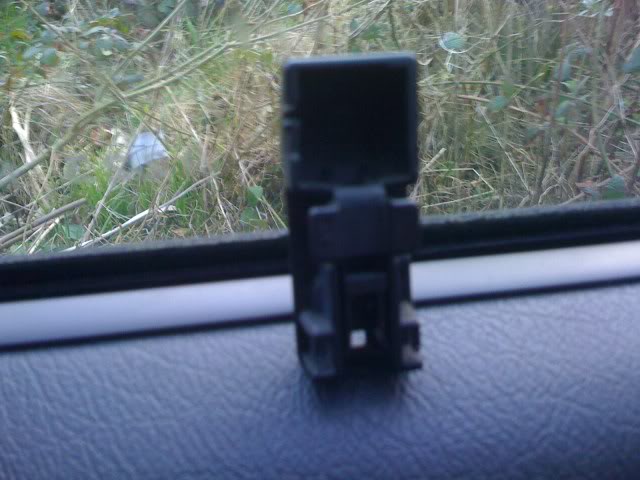
Locking plug removed - you need to CAREFULLY depress the plastic pin
at the bottom just enough to allow it to ungrip the metal rod:

Image
Image
Image

Undo the doortrim x2 screws in the armrest:

Image

There's a small single torx gripping the electric window panel; once loosened
off the panel simply ungrips by hand working from the lower edge;

Image
Image
Image

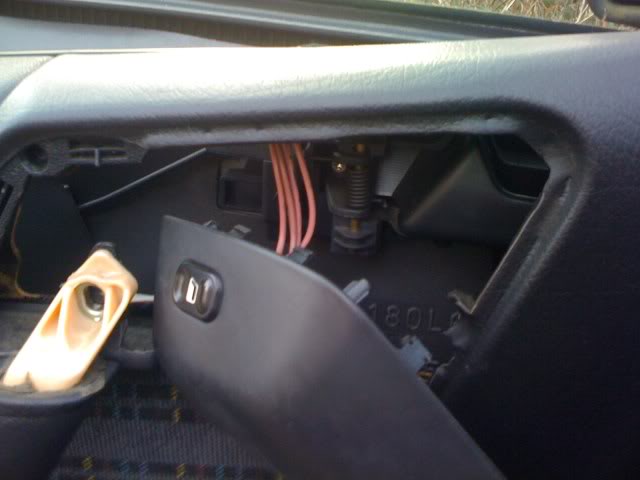
You can leave the switch panel attached to the door's loom as it will feed
through the opening in the doortrim.

Then remove the two torx screws revealed under the window switch trim
that retain the doortrim:

Image

You can them prise the doortrim off popping the plastic grip plugs as evenly
across the bottom width of the door and carefully lift the trim enough to
undo the speaker wire:

Image
Image

You then have access to remove the alerm sensor panel that is a press fit
via x3 plastic plugs into the door:
Image

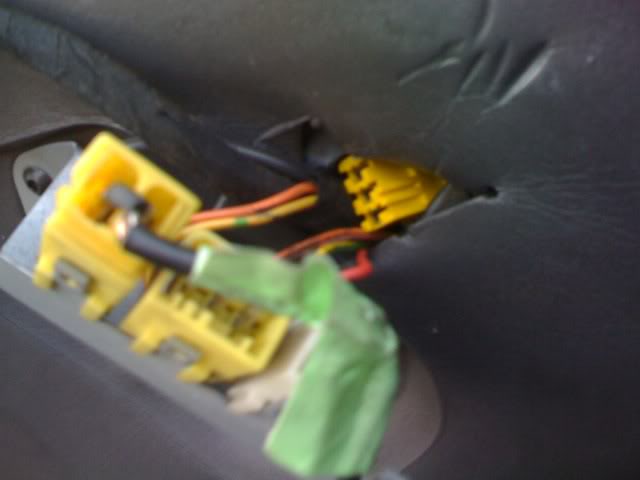
Disconnect the x2 multiplug connectors on the end of the mirror electrics
and feed them out into the door by getting access for your hand
(and arm) through the speaker aperture in the door:

Image

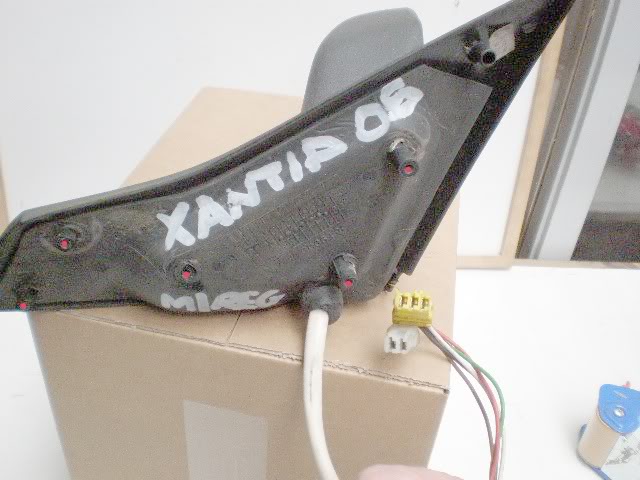
Undo the x5 torx screws fastening the mirror onto the door:

Image

Then feed the wire out as the mirror is lifted off the door:

Image

When fitting it all back together the main thing to consider is the routing
of the wiring around the door without fouling the track/movement of the
door glass.

The only pain is the locking plug pin faff about. I've found you need to
close the door and from the inside depress the pin down into the locked
position and offer the plug up engaging the slot it runs in and then gently
press the little pin in that is lining up with the lower of the two cut out
square windows and press firmly down.

= job's a good'un!!

Andrew
arkweld
Posts: 59
Joined: 18 Feb 2007, 19:19
Location: Hertfordshire
My Cars: Xantia Activa

Post by arkweld »

Good description there ! Can you recall if the outside temp sensor has the routing to the the door panel fixing , also i am after the sensor which is priced at 19.93 pound from AEP .
andmcit
Posts: 4299
Joined: 03 Mar 2005, 17:59
Location: Swansea - South Wales
My Cars:
x 30

Post by andmcit »

The only wiring off the mirror runs through the yellow and white multiplugs
so I'd expect the feed of the sensor is incorporated in them rather than be
another connection. The replacement mirror was removed off another Activa
and the renewal was like for like.

I didn't realise the alarm sensors could fail!

Andrew
arkweld
Posts: 59
Joined: 18 Feb 2007, 19:19
Location: Hertfordshire
My Cars: Xantia Activa

Post by arkweld »

It's not the alarm sensor ,was refering to it's the "outside temp sensor" which is under the drivers side mirror .. this is the one thats failed just showing ---- on the dash . I expect it has it's own plug, though the one selling for 19 pound on the AEP Direct does not show with a connector .
What i did notice is that some of the full aftermarket mirror units are a good fit , although the glass itself in these units are a different tint and dont release as
the originals by prising the clips behind the mirror glass .
andmcit
Posts: 4299
Joined: 03 Mar 2005, 17:59
Location: Swansea - South Wales
My Cars:
x 30

Post by andmcit »

Yep, sorry for the confusion; that's what I actually meant, the connector
for the outside temp sensor aren't separate - at least on the nearside I've
just done today!! :P

It seems on this car the nearside doesn't have one wired in but working on
other cars the driver's side does - certainly there's one additional multiplug
on the opposite side to the two on the nearside. I've heard a few comments
about the pattern mirrors being as good as OEM.

Andrew
User avatar
CitroJim
A very naughty boy
Posts: 49658
Joined: 30 Apr 2005, 23:33
Location: Paggers
My Cars: Bluebell the AX, Polly the C3 Picasso, Pix the Nissan Pixo, Propel the duathlon bike, TCR Pro the road bike and Fuji the TT bike...
x 6204
Contact:

Post by CitroJim »

andmcit wrote:Yep, sorry for the confusion; that's what I actually meant, the connector
for the outside temp sensor aren't separate - at least on the nearside I've
just done today!! :P
Never looked at a MK1 but on the MK2, the temp. sensor is on a separate plug, a red one if I recall. On the Mk2 the temp. sensor is on the nearside (LH) whereas on the MK1 it's on the offside (RH)...
Jim

Runner, cyclist, time triallist, duathlete, Citroen AX fan and the CCC Citroenian 'From A to Z' Columnist...
addo
Sara Watson's Stalker
Posts: 7098
Joined: 19 Aug 2008, 12:38
Location: NEW South Wales, Australia. I'll show you "Far, far away" ;-)
My Cars: Peugeot 605
Citroën Berlingo
Alfa 147
x 93

Azaleas 1, Mirror 0

Post by addo »

Ah well; it broke completely today. :x

Looks like a type of ABS that doesn't heat weld very well; it's kind of porous and just rots under the nozzle.
User avatar
CitroJim
A very naughty boy
Posts: 49658
Joined: 30 Apr 2005, 23:33
Location: Paggers
My Cars: Bluebell the AX, Polly the C3 Picasso, Pix the Nissan Pixo, Propel the duathlon bike, TCR Pro the road bike and Fuji the TT bike...
x 6204
Contact:

Post by CitroJim »

That's the problem with ABS Adam, almost impossible to repair. Thinking on, it is impossible to repair :twisted:
Jim

Runner, cyclist, time triallist, duathlete, Citroen AX fan and the CCC Citroenian 'From A to Z' Columnist...
addo
Sara Watson's Stalker
Posts: 7098
Joined: 19 Aug 2008, 12:38
Location: NEW South Wales, Australia. I'll show you "Far, far away" ;-)
My Cars: Peugeot 605
Citroën Berlingo
Alfa 147
x 93

Post by addo »

The plastics showed signs of longer-term failure; cracking over several incidents rather than the one hit. Just as I expected. Mirror glass (heated) is fine, as is the motor and thermocouple. Now for some nitty gritty!

It is possible to remove the mirror assembly without pulling the door trim right off.

Prise off the top forward corner of your trim and wedge it open, with about an inch gap. Now ease away the triangular interior garnish/cover. Remove three readily accessed mirror screws, leaving the difficult one plus another for stability.

Next, outside the car, remove the mirror glass. This is done by identifying the two spring wire clips at 1200H and pushing each in turn, towards dead vertical and away. You'll feel each one release when this is done - withdraw the glass. Now unscrew the three T1 headed black screws holding the mirror motor in, and lift the motor assembly forward. Identify the three-way wiring connector clipped in, and release its translucent nylon plug. Set the motor aside.

From under the mirror, ease out the thermistor cover plate. You're warming up. :wink: Now unscrew the three yellow-gold T2 screws in the mirror shell, around where the motor was. Note that to the upper inside corner there is a little infill patch which may now be withdrawn towards the shell. Next, lift the mirror shell off the bracket. :shock: You now have a mirror bracket screwed to the door, and the rest is off.

Remove the "hard" mirror securing screw inside the door garnish using a right-angle screwdriver or T2 bit held with pliers. Finally, remove the last "easy" one. The mirror will remain sort of stuck as its sealing foam hangs on. Ease it out, noting there is a fragile hollow plug in the absolute top corner that needs pushing outwards (I found a long 5mm bolt did this nicely).

Holding the mirror parts away from the door now, ease the motor wiring plug through the recess in its swivel bracket. Carefully wiggle the thermistor through its access point. You're now free of the door and wiring, holding a mirror bracket in your hand.

RITROR

Cheers, Adam.
Post Reply