Zel's Fleet Blog - BX, Jag XJ-S, Sinclair C5, Mercedes 208D & 230TE, AC Model 70.

Tell us your ongoing tales and experiences with your French car here. Post pictures of your car here as well.
User avatar
Zelandeth
Donor 2024
Posts: 5285
Joined: 16 Nov 2014, 23:36
x 1591

Re: Zel's Fleet Blog - BX, Jag XJ-S, Sinclair C5, Mercedes 208D & 230TE, AC Model 70.

Unread post by Zelandeth »

This I believe this is a Lumenition kit, so not one of the cheap ones at least. I need to have another dig through the boxes to see if the original innards of the distributor came with the car.

The radio is definitely one of the things I have in mind - the clock is another awkward one as that also grounds through the case and is polarity sensitive.

We've had my mother in law visiting for the last week or so which is why I've been quiet as that's eaten up quite a bit of time.

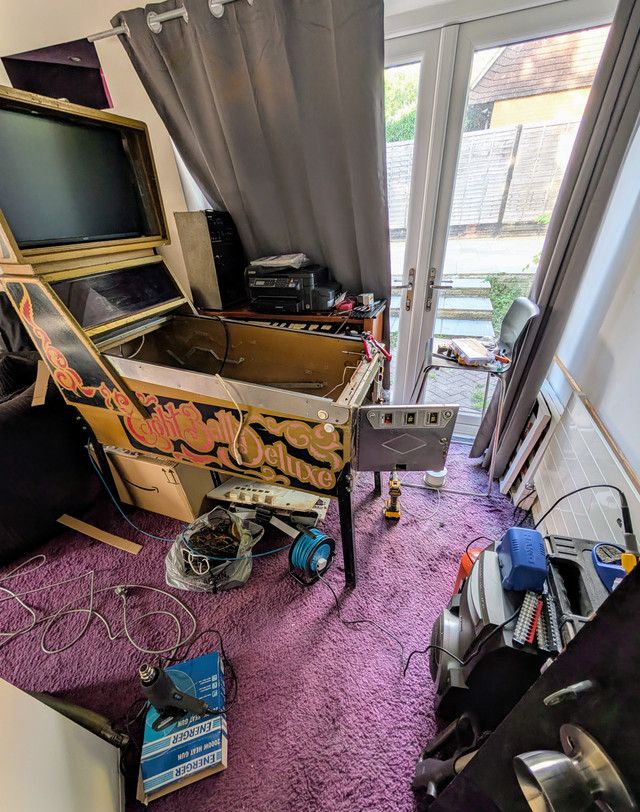
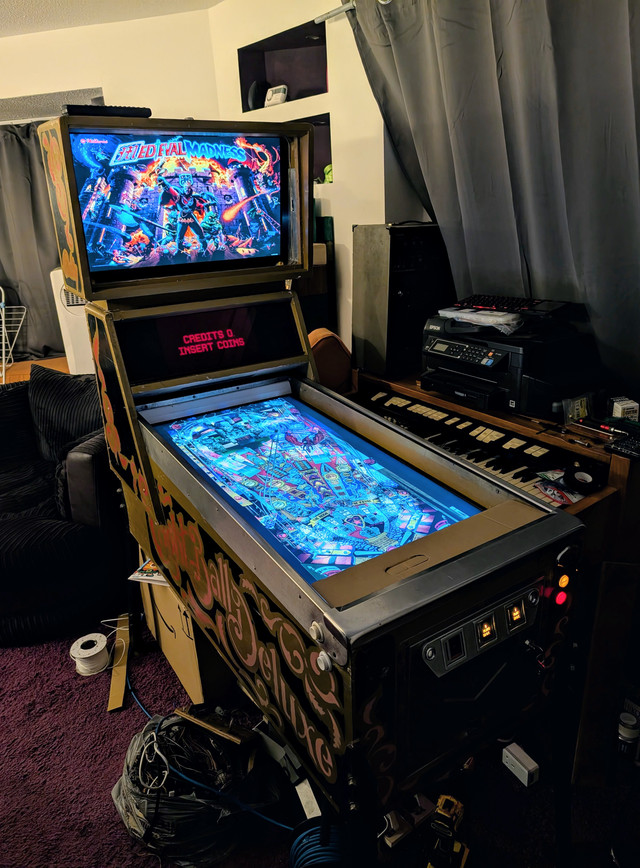
Spent half an hour or so this evening working on the pinball table.

The coin door lights you may have noted while working were dimmer than expected. Yes, that would be because I had them hooked up to 5V rather than 12V because I was rushing. They look rather happier wired up properly.
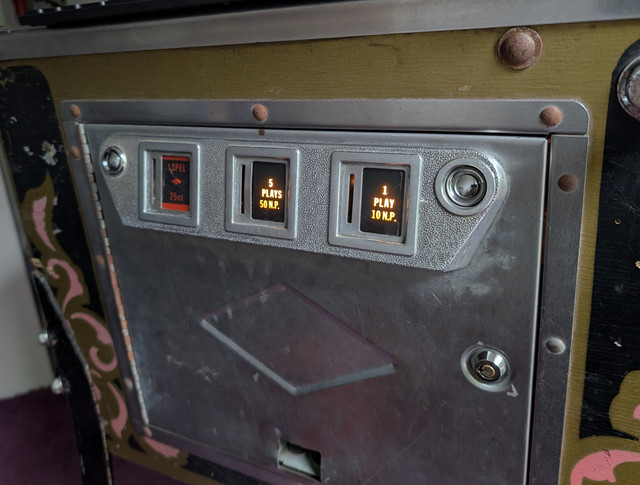
Image

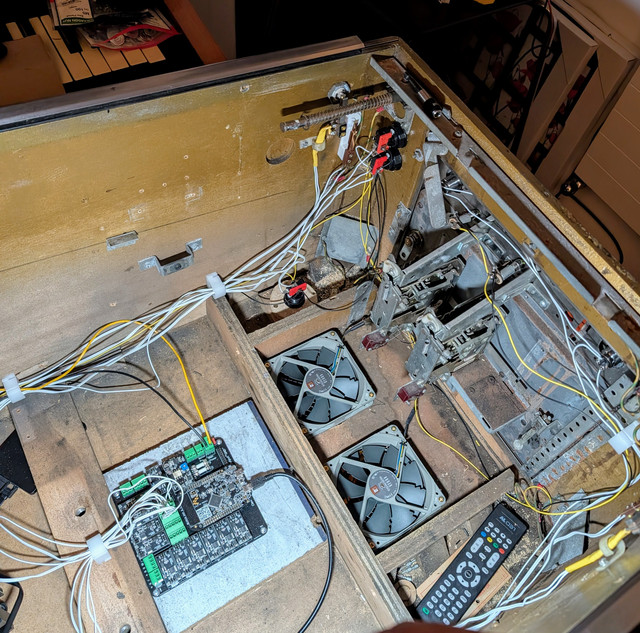
A "quick and easy" job I figured was installing the intake fans. I thought this would be a ten minute job as it was just a case of grabbing the 120mm hole saw, cutting two holes, screwing the fans in place and hooking them up to our 12V line (using the feed to the coin door lamps as it's convenient).

Ignore the mess of wiring at the moment - this is deliberately all being done loosely at the moment as a whole job is neatly routing and looming the wiring at a later date. I'm expecting to have to alter things a bunch though so there's little point worrying about that at this stage.
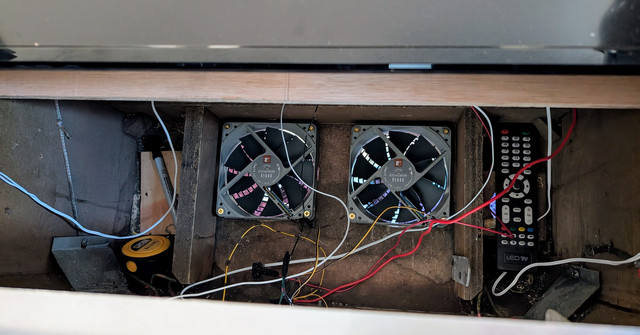
Image

"It'll be easy to cut the holes, the cabinet base is pretty thin ply."

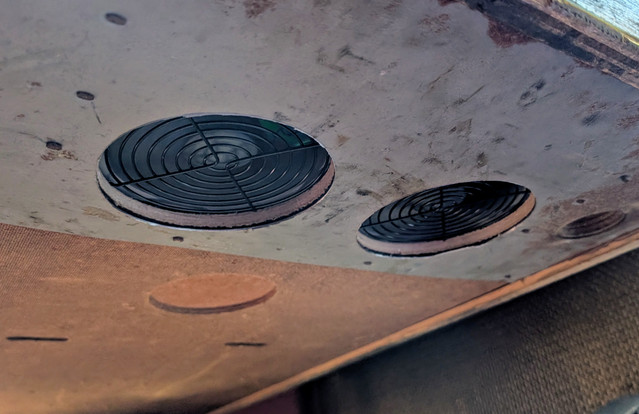
Yes it is. Except for one small area - right below where the cash box sits - where there's a fairly thick metal plate. Two guesses where I decided to put the fans.
Image

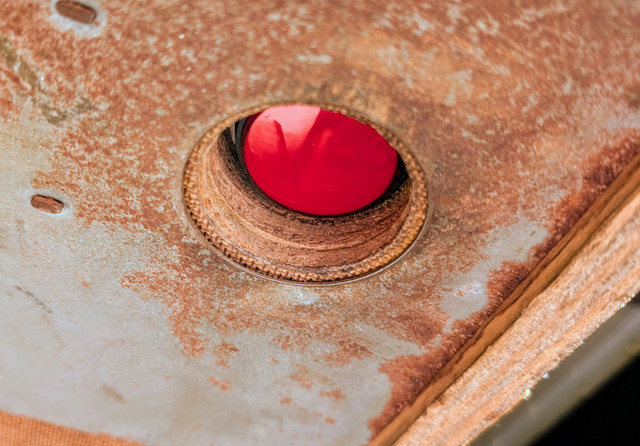
My hole saw did NOT enjoy cutting that. However I'd already cut through the ply when I discovered the plate so I was committed to it by then so just pushed through it. I'll obviously need to protect the edges of that as they're quite sharp. Will probably just move the intake grills to the outside.

The location was chosen specifically to try to force some airflow through the area where the display sits as well as through the cabinet itself. I've established that the cabinet actually breathes surprisingly well just due to convection, but we're now also pulling in a good amount of fresh air at the lowest point. We'll need to do some soak testing and monitoring to ensure that everything stays at a sensible temperature once we've got the glass in place on both the main and backglass displays.

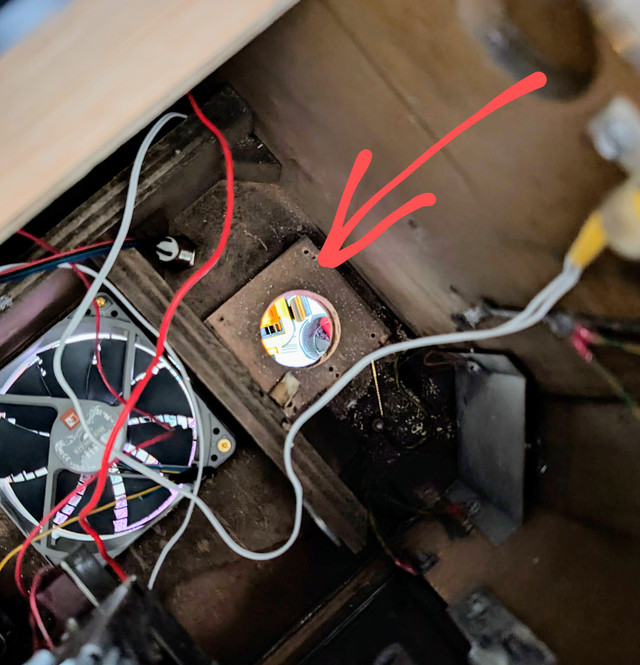
The smaller hole you can see right towards the right of the frame is where the factory power switch was originally fitted - that's where the power button which wakes up the whole unit will be fitted once that arrives. I've got a big 40mm button on the way for that.

We do need to add a few more buttons to the machine. We need...

[] Left/right flippers. Originals re-used.
[] Start game. Original location used.
[] Add credit. Coin reject location used. That's where we currently are. We still need...

[] Exit game/menu back.
[] Left/right magnasave.
[] Launch ball.

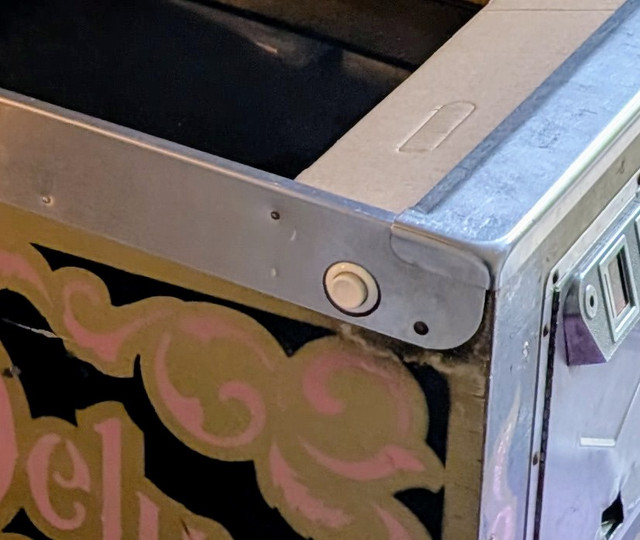
The Magnasave ones are easy enough - those will just be added using the same style of buttons as the flippers, exactly as they were on most machines which had this functionality. They were usually fitted horizontally behind the flipper buttons, but that's not really practical without modifying the side rails. We'd also run into a conflict with space for the display.
Image

So I'll be fitting them immediately below the flipper buttons.

It's not needed on all that many machines (Black Knight is the only one I can immediately think of off the top of my head), but we don't really want to half do this - and they're also used for configuration page scrolling and skipping whole letters/category in the table select software. I've already got the necessary buttons on the way for this, I just need to be careful to get them fitted straight.

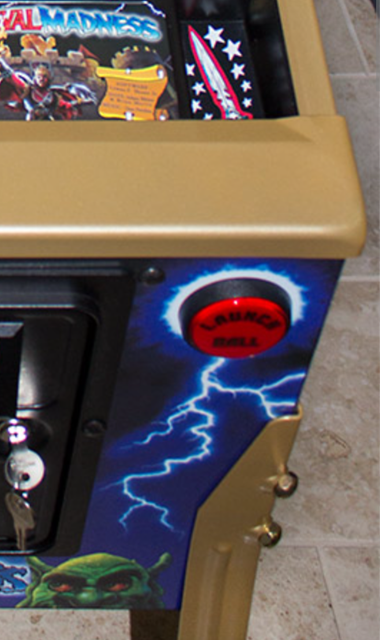
Quite a few of the later games (Medieval Madness, Attack from Mars, Jurassic Park, Terminator 2 I can immediately think of off the top of my head) don't have a conventional plunger, instead using button and launching the ball using a solenoid. Crop of a photo of a random Medieval Madness table to demonstrate.
Image

A pretty "standard" way to handle this on virtual machines is to install a launch ball button right below the plunger. That doesn't look too bad on a modern looking cabinet, but I think with is trying to maintain the more period look of this one will look a bit odd. The software should actually be clever enough to allow the plunger to do this by interpreting the plunger being pushed beyond it's home position by pressing against the spring as the same as a ball launch button being pressed. If that behaves consistently I'm inclined to stick with that.

Final one we need is a way to exit a table when we're done playing it or to open the menu in the table selection software. I'm inclined to use a button the same as the ones used for the start/add credit buttons. Though need to decide where to put it. I'm leaning towards symmetrically opposite where the plunger is as symmetry just makes sense to me. Open to suggestions on that though.

Current fleet:
07 Volvo V70 SE D5, 85 Sinclair C5, 84 Trabant 601S, 73 AC Model 70, 62 Rover 110.
User avatar
CitroJim
A very naughty boy
Posts: 54809
Joined: 30 Apr 2005, 23:33
x 8204

Re: Zel's Fleet Blog - BX, Jag XJ-S, Sinclair C5, Mercedes 208D & 230TE, AC Model 70.

Unread post by CitroJim »

Loving this pinball wizardry Zel :D Can't wait to see it for real and try playing it!
Jim

A bit of a Citroen AX fan...
User avatar
Zelandeth
Donor 2024
Posts: 5285
Joined: 16 Nov 2014, 23:36
x 1591

Re: Zel's Fleet Blog - BX, Jag XJ-S, Sinclair C5, Mercedes 208D & 230TE, AC Model 70.

Unread post by Zelandeth »

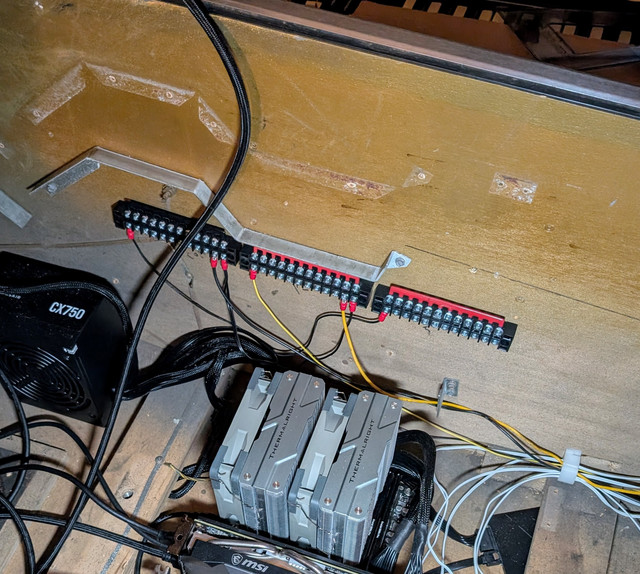
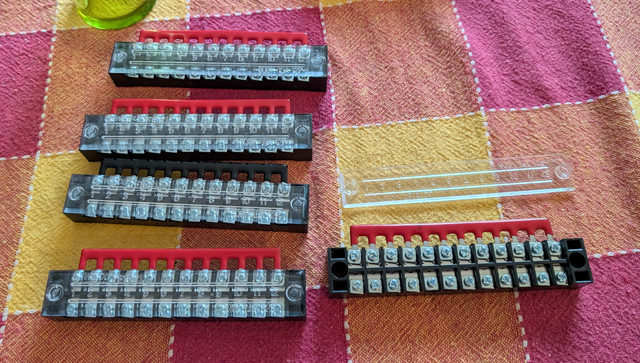
Small but important component turned up today, which will make it waaaaay easier for me when it comes to keeping the spaghetti under control in the cabinet.

Image

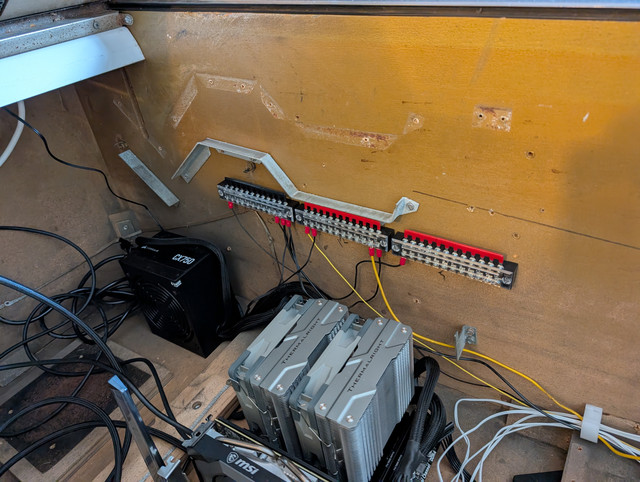
These will be forming our bus bars for each of the respective power rails. Helpfully they're numbered as well so I'll be able to populate a list of what's being hooked up to where as we go and allow me to draw up a full working diagram when we're done, which will make any future diagnostics or the like far easier.

Also going to be helping my sanity by being consistent with the wiring. For a start power and signal will be kept separate - even if they're routed together they will be loomed separately. Colours will be consistent as well.

DC 5V = Red.
DC 12V = Yellow.
DC 24V = Blue.
DC Common = Black.
Ground bonding= Green.
Signals = White.

I'd originally planned 24V to be orange (to ensure we're not using anything which could on any planet be confused with mains), but I don't have that in stock, but I've plenty of blue...so blue it will be. Realistically mains confusion isn't going to be an issue as all the mains is going to be in one far corner of the cabinet as the only things which will use mains will be the backglass and playfield monitors and the power supplies themselves. The DMD monitor is 12V so I'll just be tying that into the main DC bus as that in one swoop gets rid of a power brick I need to find space for. A bit of appropriate labelling can help with safety as well.

Did I remember to order wire terminals to go with those terminal blocks? Um...that would be a no. Oops.
Current fleet:
07 Volvo V70 SE D5, 85 Sinclair C5, 84 Trabant 601S, 73 AC Model 70, 62 Rover 110.
User avatar
Zelandeth
Donor 2024
Posts: 5285
Joined: 16 Nov 2014, 23:36
x 1591

Re: Zel's Fleet Blog - BX, Jag XJ-S, Sinclair C5, Mercedes 208D & 230TE, AC Model 70.

Unread post by Zelandeth »

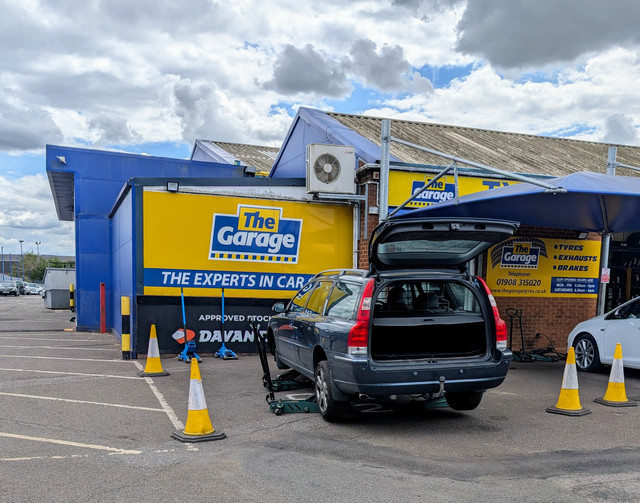
Volvo actually got a bit of attention today.

Image

Nothing amiss, just time to rotate the tyres. I'm too lazy to do it myself when it takes these guys minutes. I also had one of the tyres swapped onto another wheel that was passed my way by the previous owner as one had a pretty good buckle in it. Turned out that once it was balanced you couldn't feel it at all but it made sense to get it swapped over while I was here.

A box of pinball bits turned up this morning.

Image

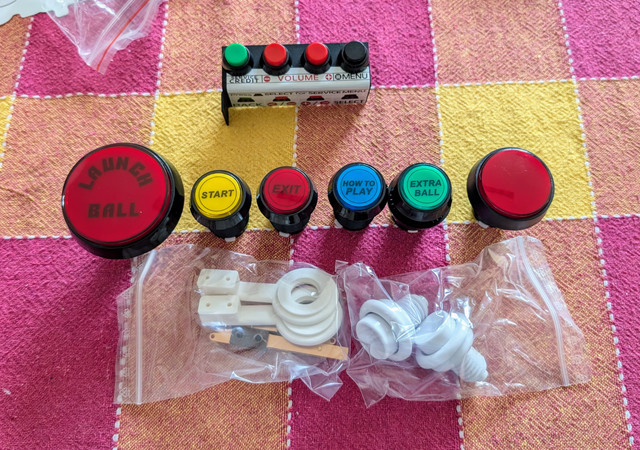
Bunch of buttons - several of which I don't actually need, but it was cheaper to buy a set than the ones I wanted. Several general purpose buttons (the legends can easily be changed), a WPC style ball launch button, two flipper buttons and switches, and a service panel.

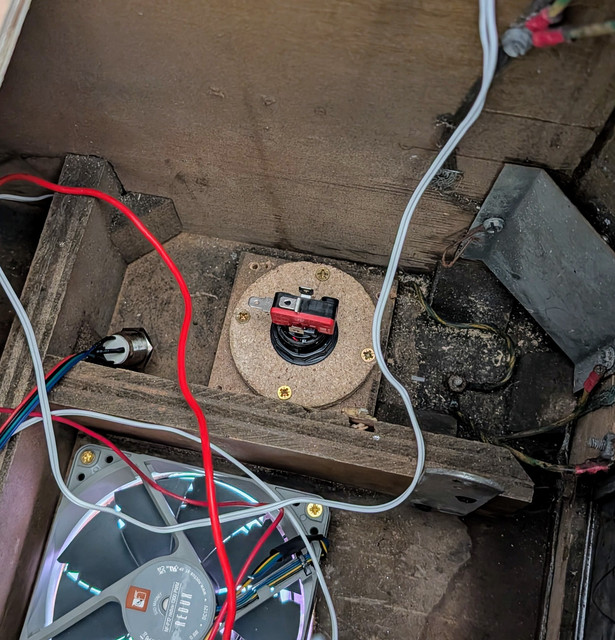
The slightly larger red button was intended to be my main power control. It wanted to go in here where the original power switch was.

Image

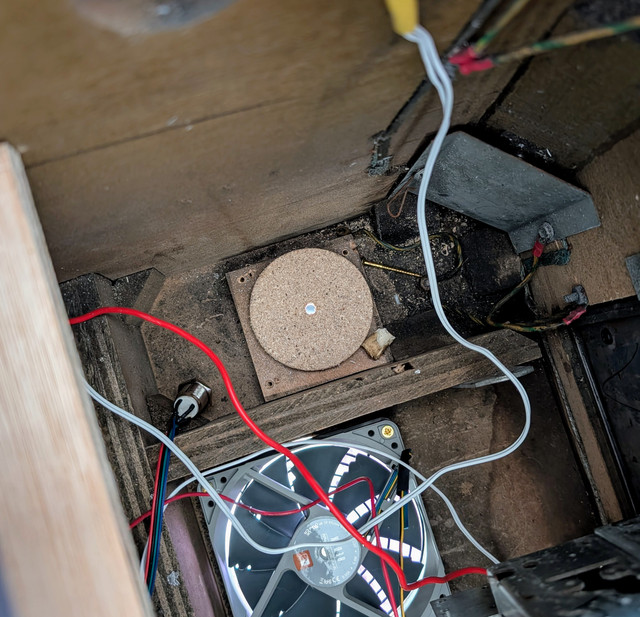
The hole there being slightly larger than the switch meant of course that we needed something to attach it to. I'd planned ahead for this and kept an offcut from another recent project and had a perfectly sized chunk of wood on hand for this.

Image

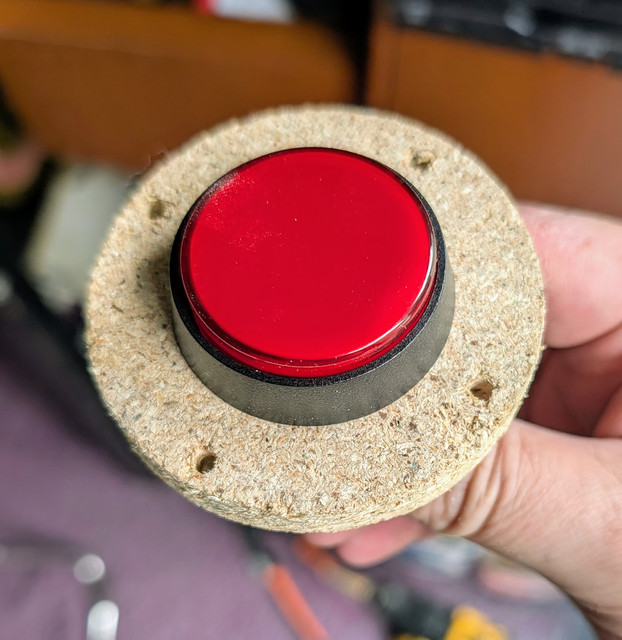
One switch mounting panel.

Image

Installed.

Image

Which is accessible through the cutout in the underside of the cabinet. Nice and easy to get to.

Image

That's just hooked up to the power switch line to the PC motherboard.

I'd had a think further about the ball launch arrangement for tables set up for a button based launch. It is possible to set it up to have the plunger provide this functionality by pushing it in beyond the home position. Though this always going to be a bit clunky. Not an issue for a lot of tables, but some do require precise timing for a skill shot on the ball launch so a button really is going to work better. So I'm going to go with that. You also want a fairly lightly weighted clicky button rather than the ones I've used for credit/start which have too heavy a draw on them.

I was wondering where exactly to put it when I noticed something.

Image

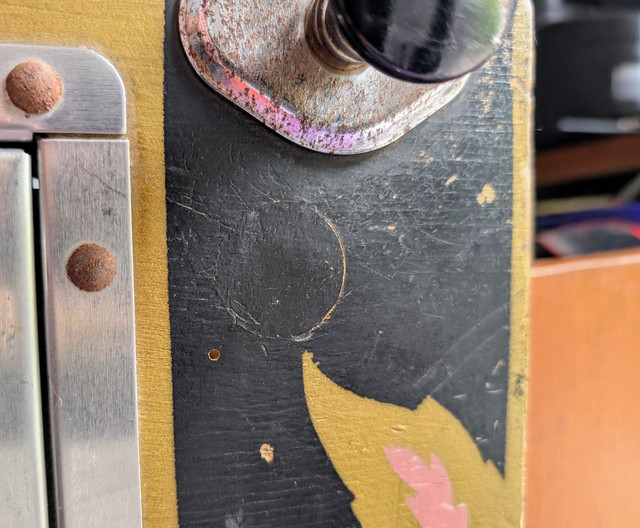
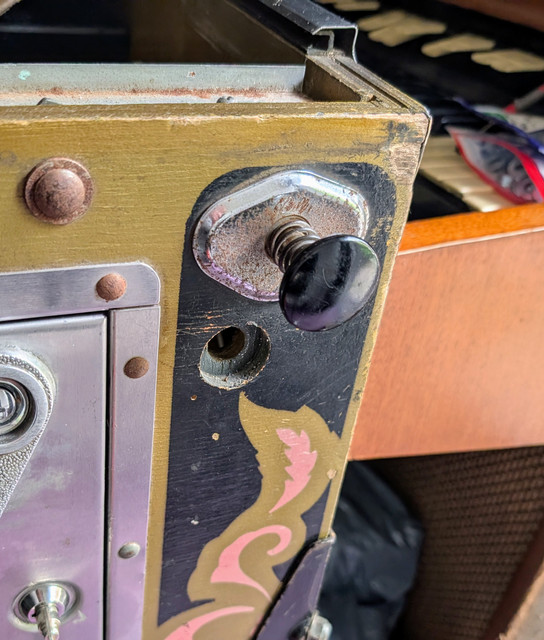
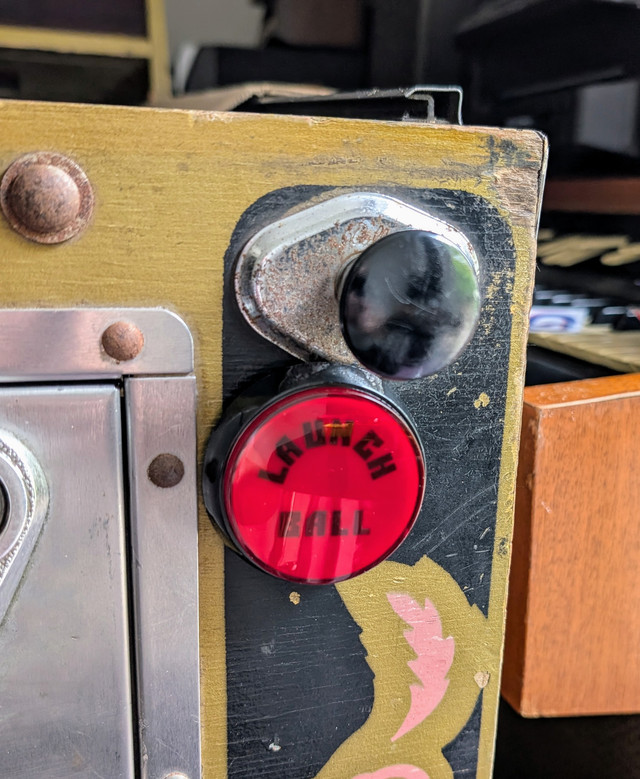
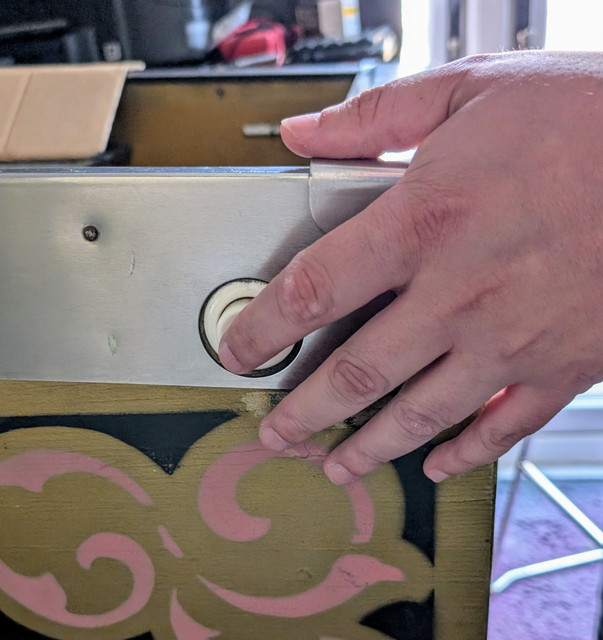
Aside from what appeared to be a single woodworm hole - I noticed that when I got it and it does appear to be the only one - see that circle just below the plunger? That's a plug. I assume used by the factory to allow for different plunger setups. Seems a good starting point.

Image

It wouldn't be possible to use the WPC style ball launch button here as it would foul on the plunger housing.

Image

Honestly I didn't fancy using that button anyway - it's just too big it feels like to me and looks out of place on this age of cabinet.

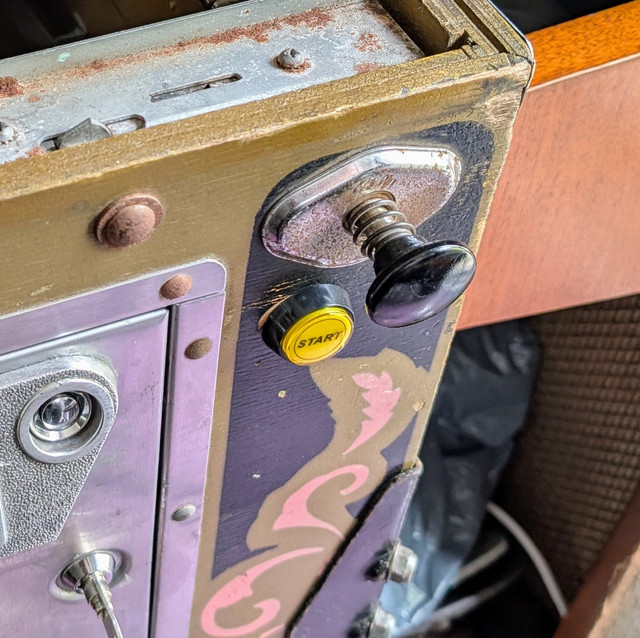
One of the smaller (20mm?) ones though feels like it's more in keeping scale wise.

Image

I'll change the legend to ball launch in due course.

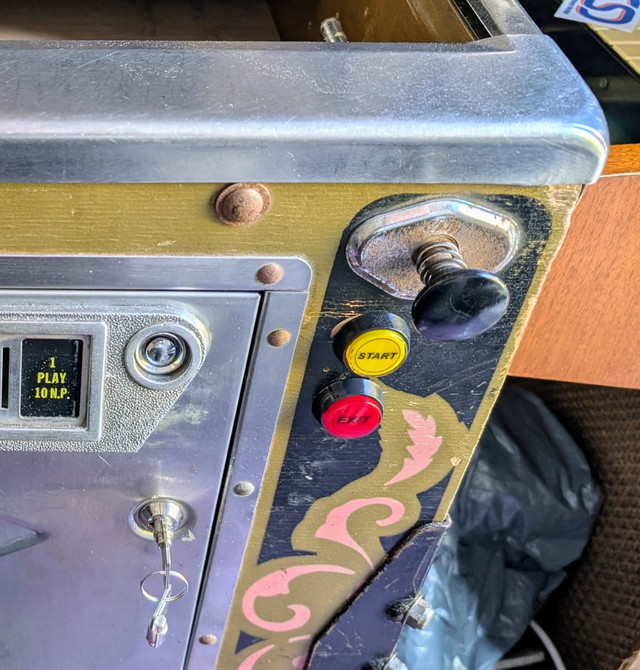
I decided to add the exit button lined up with that one. I was hovering between having the table more symmetrical from side to side, but decided to stick with keeping everything on one side, which I think will be tidier.

Image

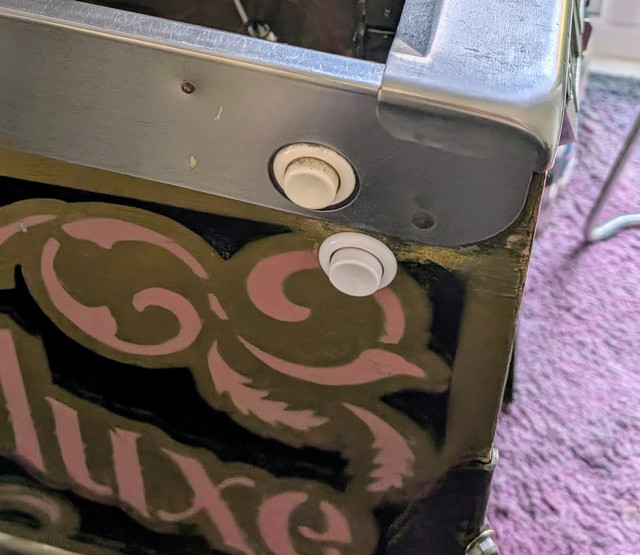
That was a pretty easy one to decide on, but the additional flipper buttons needed some more thought. These are generally referred to as Magnasave buttons as that's the most common feature they were generally used for, and it's just easier to type than auxiliary flipper control.

Ergonomics I decided were a good guide for this.

This is roughly where your hands tend to sit when playing the game.

Image

After a bit of pondering I went for this.

Image

Which I think because I stuck with a position in a straight line between the standard flipper button location and the top of the table leg, looks tidy enough. Yes, the new button being stark white does stand out a bit compared to the one above it with 44 years of yellowing on...but there's only so much I can do! I don't think it would really be noticeable at a glance, especially once I've dismantled and cleaned the originals.

I then made a godawful mess and got all the toys out the toolbox.

Image

I decided that we were probably far enough in now that it made sense to start dealing with some of the spaghetti we had generated. While there are some things which are still subject to change, most of what's in here now is largely unlikely to be going anywhere. So I basically ripped every single low voltage wire out of the cabinet save for the wires to the flippers.

First thing to go in was the first few of our DC bus bars.

Image

Having those was the main incentive to do this now, and why I hadn't really bothered with it previously while we still had a bunch of Wago connectors tying the DC bus together.

Obviously this is all just loosely in place at the moment routed through the guides (yes those are 15mm pipe clamps), strategic zip ties and such will eventually be employed. Oh and yes I will be adding protection to the section that flexes by the coin door hinges - there are a bunch more wires to be added there yet though (coin switches - yes I'm making those work too, slam tilt switch, all the buttons for the service panel) so it's being left as is for now.

Image

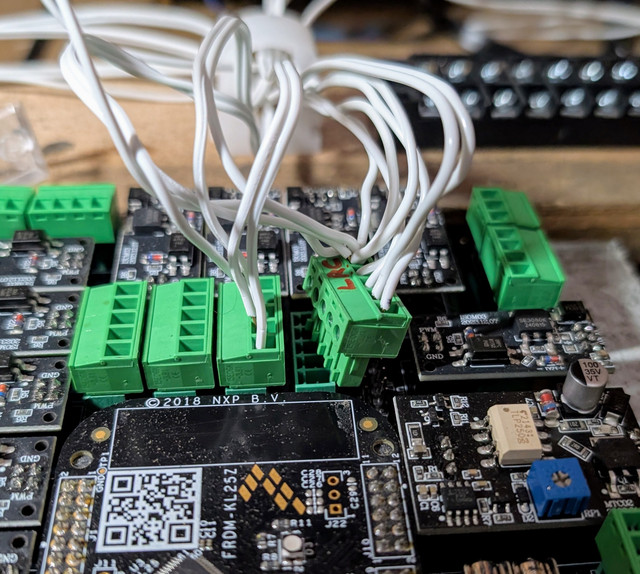
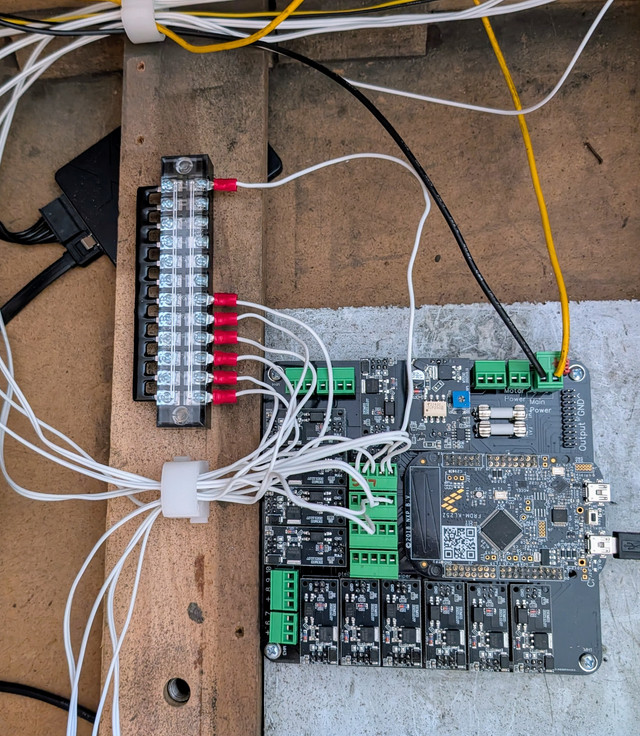
One change I'm making tomorrow is using one of the busbars to make up a common star point for the signal side of things as the common terminal on the controller is getting...congested.

Mains side rat's nest hasn't been touched yet.

Image

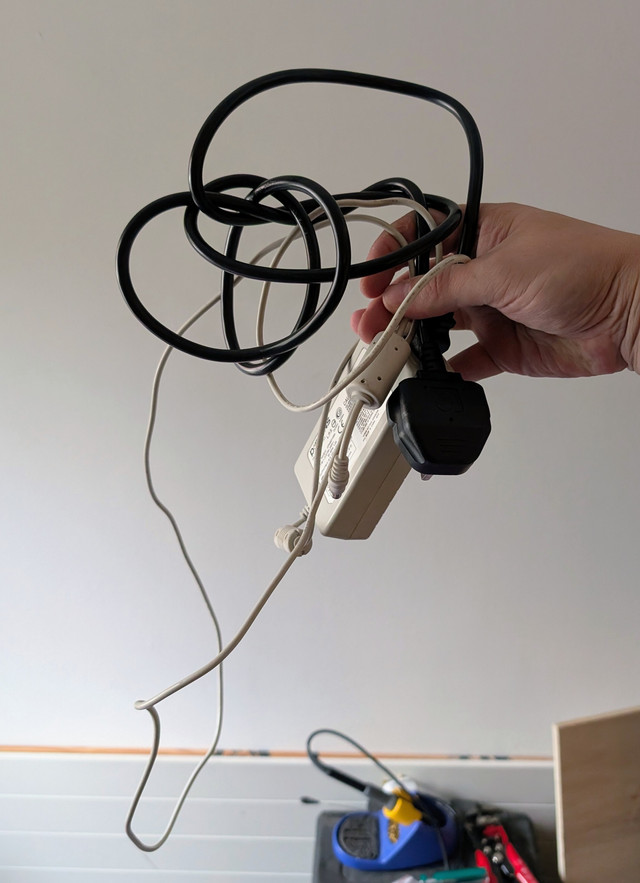
That's probably next up. Just shortening a lot of the cables will help a lot. That beige bo, and it's wiring can disappear too as I'm just going to hook the centre monitor up to the 12V bus as it just runs on 12V - the backglass and playfield monitors on the other hand have internal PSUs so need a mains supply. I may actually swap that extension lead out for a mini consumer unit as I like the idea of keeping the mains side of things as separated and out of reach as possible and that allows me to easily add both RCD protection and appropriate fusing for each circuit without the bulk of half a dozen plugs stuffed in the back of the cabinet.

I was only slightly apprehensive about plugging it back in given the amount of things I'd disturbed - but it just worked.

Image

Even better all the new controls I had just added also worked.

Feels like that's some decent progress today.
Current fleet:
07 Volvo V70 SE D5, 85 Sinclair C5, 84 Trabant 601S, 73 AC Model 70, 62 Rover 110.
User avatar
CitroJim
A very naughty boy
Posts: 54809
Joined: 30 Apr 2005, 23:33
x 8204

Re: Zel's Fleet Blog - BX, Jag XJ-S, Sinclair C5, Mercedes 208D & 230TE, AC Model 70.

Unread post by CitroJim »

That's looking very good Zel - getting ever closer :D
Jim

A bit of a Citroen AX fan...
User avatar
Zelandeth
Donor 2024
Posts: 5285
Joined: 16 Nov 2014, 23:36
x 1591

Re: Zel's Fleet Blog - BX, Jag XJ-S, Sinclair C5, Mercedes 208D & 230TE, AC Model 70.

Unread post by Zelandeth »

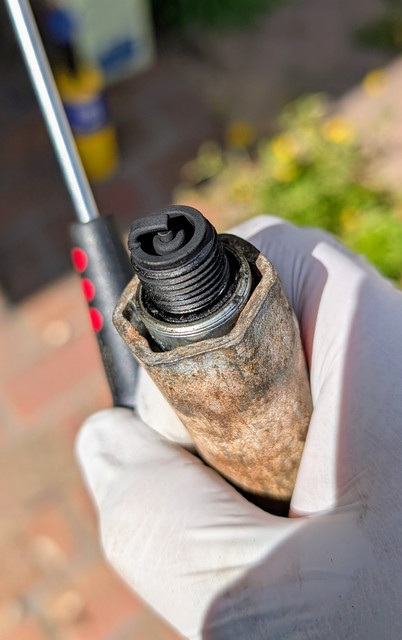
A couple of weeks ago the Trabant decided to be really grumpy, misfiring badly under load. I was pretty sure given the car had been shuffled around on the drive several times and had been left idling for quite a while. I know she runs a bit on the rich side at idle, and suspected we just had a fouled plug. Given this is a two stroke, fouled plugs can just be a thing - first time I've run into it so far.

Image

Yep, that would do it. Hard to see in the photo but it was pretty oily. Quick session with the blowtorch got rid of it. Finally got a chance to take her out for a run today on my errands, and the miss does indeed seem to be gone.

Image

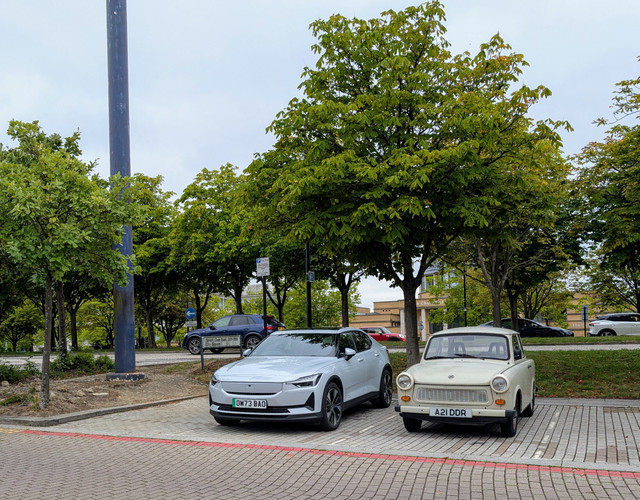
I'll keep an eye on it. I know she could do with being a little leaner at idle, but seems to spot on under load, and given how dangerous a lean condition can be for a two stroke I'm leaning towards just leaving it be unless this becomes a regular problem.

Did a very brief bit of further pinball tinkering today.

As mentioned yesterday, congestion around the signal common terminal was starting to become an issue as we had I think six wires all crammed into the one terminal.

Image

Yeah. That's not going to work. It was okay for brief testing, but beyond that no.

Image

Much better. That busbar will be used entirely for the input signal ground.

This spaghetti originally providing power to the DMD monitor was evicted.

Image

That has now just been hooked up to the 12V bus.

Image

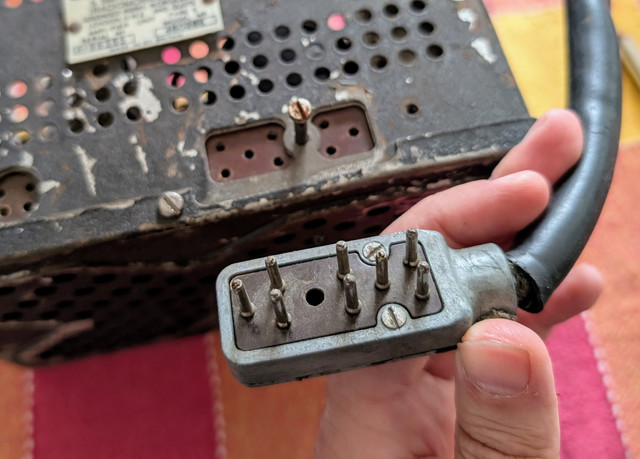
Had a quick look at one of the to do list items for the Rover - investigating the cut cable between the two bits of the radio. Have to roll my eyes that someone chopped the cable when if they had removed one screw the connector just unplugs at this end.

Image

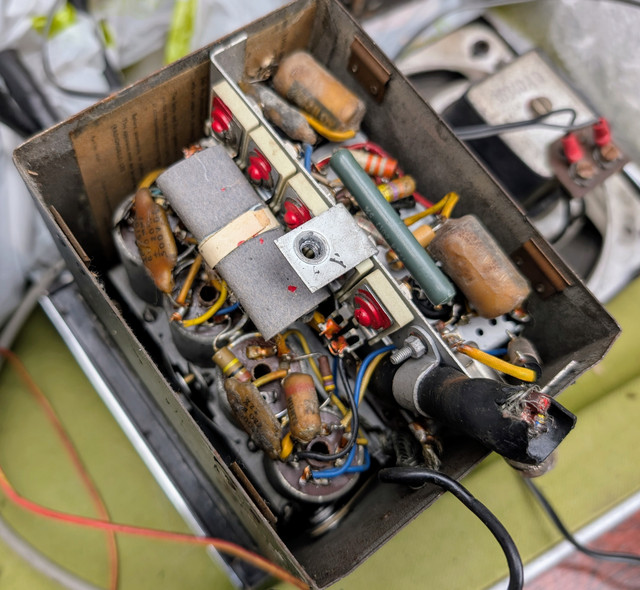
I was hoping it might be socketed at the other end as well as this would have made the repair easier. Sadly not.

Image

Guess I'll be repairing that when I have the chassis out of that enclosure as it'll be a right faff trying to repair it that close to the enclosure - just shortening the cable by a few inches and soldering it back in that way I think will be easier. It should be more than long enough I think. That's going to be a job for another day though. Likewise evicting all those waxed paper capacitors.
Current fleet:
07 Volvo V70 SE D5, 85 Sinclair C5, 84 Trabant 601S, 73 AC Model 70, 62 Rover 110.
User avatar
mickthemaverick
Forum Admin Team
Posts: 20697
Joined: 11 May 2019, 17:56
x 7971

Re: Zel's Fleet Blog - BX, Jag XJ-S, Sinclair C5, Mercedes 208D & 230TE, AC Model 70.

Unread post by mickthemaverick »

ITV4 + 1 At 7.20am this morning an episode of Minder featurng a Trabant!! :-D
I used to be indecisive, now I'm not so sure!
I used to ride on two wheels, but now I need all four!
User avatar
CitroJim
A very naughty boy
Posts: 54809
Joined: 30 Apr 2005, 23:33
x 8204

Re: Zel's Fleet Blog - BX, Jag XJ-S, Sinclair C5, Mercedes 208D & 230TE, AC Model 70.

Unread post by CitroJim »

Yes, do keep the mixture where it is on the Trabant Zel, much better to have an occasional fouled plug... All part of the fun of running a two-stroke - just take the opportunity always to take it out for a decent fun blast every time you start it... Just as I have to do with my modern diesel...

Great to see you have started on the Rover wireless. I'm sure it'll be up and running in no time but do replace those cylindrical waxies (but not the flat mica waxies - as they rarely fail) on-sight... They're likely OK enough to get it initially tested but best to replace them for future happiness. You can restuff them if you want to preserve the original look...
Jim

A bit of a Citroen AX fan...
User avatar
Zelandeth
Donor 2024
Posts: 5285
Joined: 16 Nov 2014, 23:36
x 1591

Re: Zel's Fleet Blog - BX, Jag XJ-S, Sinclair C5, Mercedes 208D & 230TE, AC Model 70.

Unread post by Zelandeth »

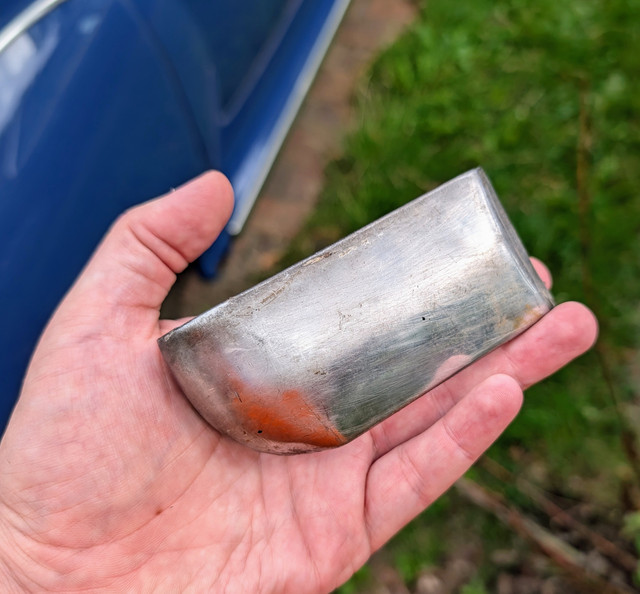
Found something I wasn't looking for when digging around in the boot of the Renault today, a bag of P4 bits which evidently I missed when loading the last one up. Not much useful in there...except for this.

Image

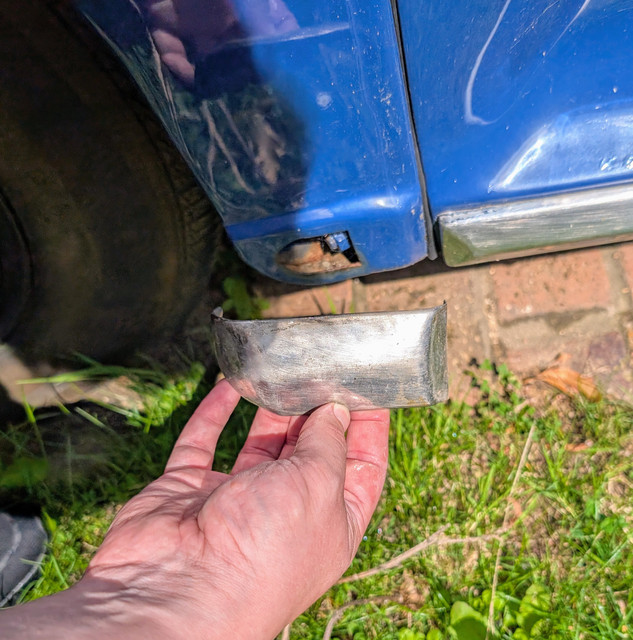
Which is helpfully the exact bit of trim I'm missing.

Image

Image

Just wedged in place there, but you get the idea.

-- -- --

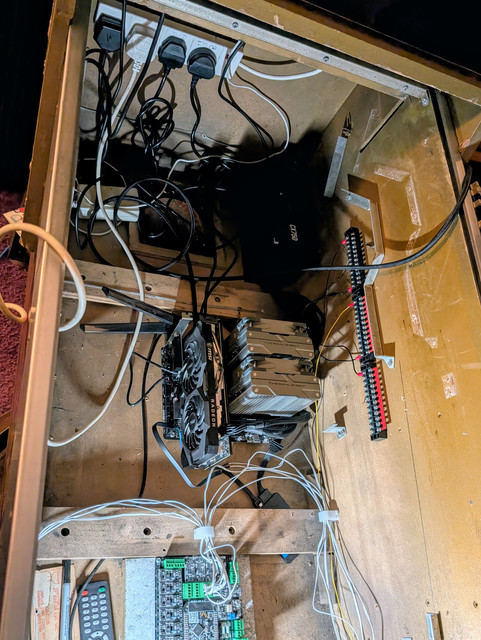
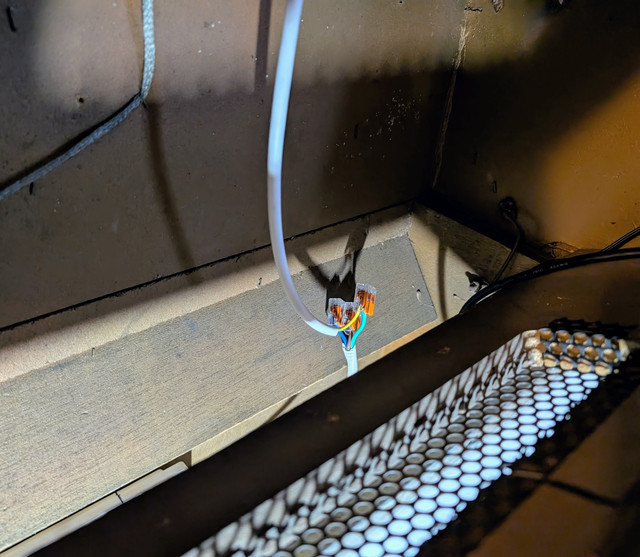
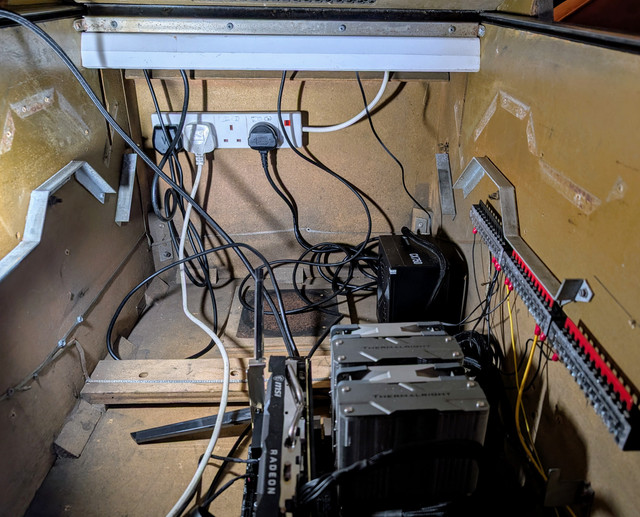
While the low voltage side of things in the pinball table has been somewhat tamed the mains side was still a bit of a disaster of spaghetti.

Image

Oh yeah, it was also all dangling of that trio of Wago connectors. It was only ever intended to get us up and running for testing though which it did just fine.

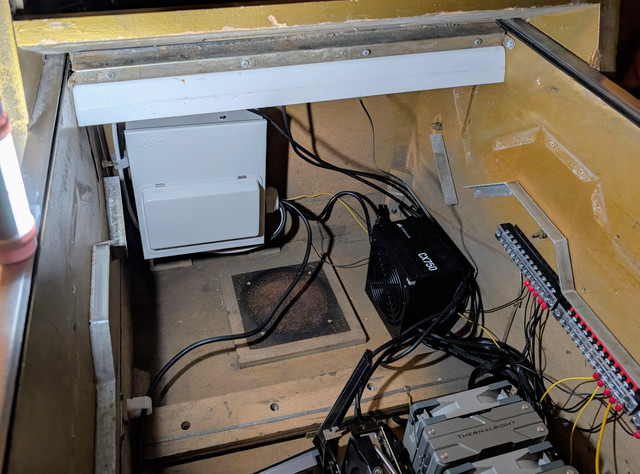
This needed a bit of tidying.

Image

This made for a reasonably satisfying before and after after a couple of hours of tinkering.

Image

Yes I know an actual consumer unit is overkill for mains distribution here, but equally it seemed a better solution than anything else I could come up with. It also gives me a nice way to be able to isolate given bits of the system easily, and also provided a convenient place to put the contactor as the ones I've got are DIN rail mounted.

It's a bit bulky and heavy...but they're really not things I'm worried about in this application - especially tucked away in that back corner.

I do need to check if it's mounted slightly off level like it looks in the one photo, as that will drive me mad!
Current fleet:
07 Volvo V70 SE D5, 85 Sinclair C5, 84 Trabant 601S, 73 AC Model 70, 62 Rover 110.
Gibbo2286
(Donor 2020)
Posts: 8170
Joined: 08 Jun 2011, 18:04
x 2943

Re: Zel's Fleet Blog - BX, Jag XJ-S, Sinclair C5, Mercedes 208D & 230TE, AC Model 70.

Unread post by Gibbo2286 »

Looking at those photos I wonder..........is spaghetti you favourite food?
Anyone who has never made a mistake has never tried anything new. (Albert Einstein)
User avatar
CitroJim
A very naughty boy
Posts: 54809
Joined: 30 Apr 2005, 23:33
x 8204

Re: Zel's Fleet Blog - BX, Jag XJ-S, Sinclair C5, Mercedes 208D & 230TE, AC Model 70.

Unread post by CitroJim »

Gibbo2286 wrote: 31 Jul 2025, 10:17 Looking at those photos I wonder..........is spaghetti you favourite food?
:lol: Yum 😋

I must admit that's a great use for a small consumer unit... Question is, does your wiring comply with 18th Regs.?
Jim

A bit of a Citroen AX fan...
User avatar
Zelandeth
Donor 2024
Posts: 5285
Joined: 16 Nov 2014, 23:36
x 1591

Re: Zel's Fleet Blog - BX, Jag XJ-S, Sinclair C5, Mercedes 208D & 230TE, AC Model 70.

Unread post by Zelandeth »

CitroJim wrote: 31 Jul 2025, 12:04
Gibbo2286 wrote: 31 Jul 2025, 10:17 Looking at those photos I wonder..........is spaghetti you favourite food?
:lol: Yum 😋

I must admit that's a great use for a small consumer unit... Question is, does your wiring comply with 18th Regs.?
I doubt there's any wiring in this house that conforms to 18th edition regs, much less the pinball table!

In honesty, anything in terms of wiring in our house which isn't original to it is an utter disaster given the previous owners had all work done by the lowest bidder. It shows.

Very quick additional tinkering on the table this evening.

Image

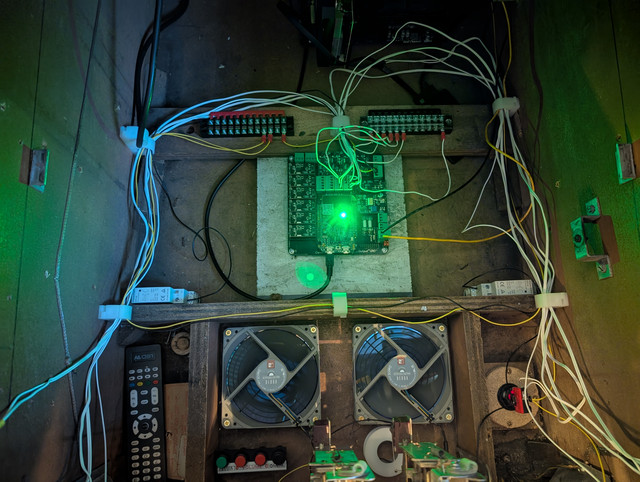
Note the two grey devices at around 4 and 8 o'clock. They're contractors - cheap contactors. These are connected up to the interface board and are being triggered correctly by the Direct Output Framework software, acting as stand ins for what will eventually be replaced with something more akin to actual pinball machine flipper coils and mechanisms. So it does indeed now physically go "clunk" when the flippers on screen move. It's not essential, but will very much make it feel like you're playing an actual table rather than a simulation which is the whole idea.

Using these cheap contactors to initially get the software set up and get the basic concept working because they're a couple of quid each rather than £40 or so apiece. They will probably do fine actually for the lower power coils like the slingshots, but the flippers and pop bumpers really need something a bit meatier. Which makes sense given that those coils are more akin to the start solenoid on a car - designed for short duty cycle use only and pulling at least a couple of hundred watts.

Most reasonably modern (read: this side of the 70s) flipper coils are actually wound in two halves - one with very heavy windings and one far finer. The end-of-stroke switch is used to switch between a series and parallel arrangement, so you can get away with a far beefier coil (therefore a stronger flipper) but without risking it burning up the coil if you hold the flipper button down for more than a couple of seconds. While most the innards of a machine will run on 12/24V (and of course various logic levels for the digital side of things) the flippers are usually ~50V. We're probably just going to stick with 12 or 24V here though for the sake of simplicity - and because we're not needing to actually fling a heavy metal ball around a table so can get away with some compromises.
Current fleet:
07 Volvo V70 SE D5, 85 Sinclair C5, 84 Trabant 601S, 73 AC Model 70, 62 Rover 110.
User avatar
CitroJim
A very naughty boy
Posts: 54809
Joined: 30 Apr 2005, 23:33
x 8204

Re: Zel's Fleet Blog - BX, Jag XJ-S, Sinclair C5, Mercedes 208D & 230TE, AC Model 70.

Unread post by CitroJim »

Loving how you're using contactors to get the proper analogue mechanical sounds Zel :D Utterly magical :cool:
Jim

A bit of a Citroen AX fan...
User avatar
Zelandeth
Donor 2024
Posts: 5285
Joined: 16 Nov 2014, 23:36
x 1591

Re: Zel's Fleet Blog - BX, Jag XJ-S, Sinclair C5, Mercedes 208D & 230TE, AC Model 70.

Unread post by Zelandeth »

CitroJim wrote: 01 Aug 2025, 06:23 Loving how you're using contactors to get the proper analogue mechanical sounds Zel :D Utterly magical :cool:
That and an actual set of chimes for the mechanical tables will go a long way to making the whole thing more convincing.

Starter solenoids would have been a better match for the flippers, but I don't have any of those floating around and they'd cost me considerably more than these little ones did. If I end up with more of them than I need I'm sure they'll come in handy for something some day. Having proven this works I can look at getting something that's a better match for the high power solenoids ordered in.
Current fleet:
07 Volvo V70 SE D5, 85 Sinclair C5, 84 Trabant 601S, 73 AC Model 70, 62 Rover 110.
User avatar
Zelandeth
Donor 2024
Posts: 5285
Joined: 16 Nov 2014, 23:36
x 1591

Re: Zel's Fleet Blog - BX, Jag XJ-S, Sinclair C5, Mercedes 208D & 230TE, AC Model 70.

Unread post by Zelandeth »

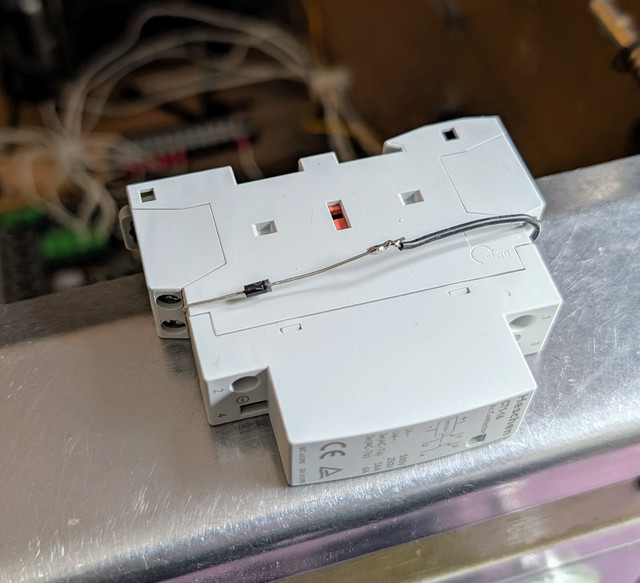
Something I forgot to mention previously about the contactors - and indeed any wound components like motors or even smaller relays - was that if they don't have them incorporated, you really need to add commutation diodes to deal with the back EMF generated when the power is cut to the coil.

Image

Shown there before heat shrink was added obviously.

Even a little 12V coil like this can easily generate a spike of a couple of hundred volts into an open circuit as the magnetic field collapses, and given we have sensitive electronics (like a PC motherboard) on the same power supply here that could be bad (and expensive) news.

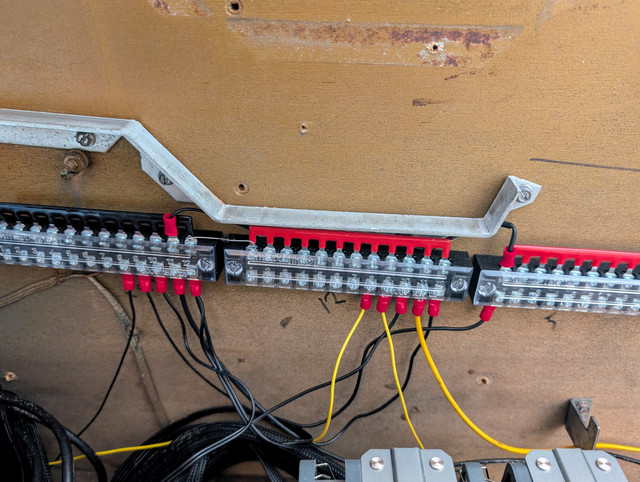
I do also have diodes hooked up over on the bus bars as well as belt and braces, but there's no harm in having protection locally.

Image

The actual amount of energy involved here isn't huge so just bog standard 1N4007 diodes are perfectly adequate.

Good thing they don't need to be anything special given we'll have ten solenoids for playfield devices, plus a replay knocker, three on a set of chimes, two on bells and probably a small geared motor.

A pretty tedious part of this process has now begun: Going through each of the virtual tables and setting them up. Not in terms of the emulation, no. Actually going into the real operator settings which would have been set up in an arcade. It's fairly intuitive on Williams/Bally/Midway machines from the early 90s onwards, and the more recent Stern tables also have a pretty easy to follow service menu - but some of the earlier ones are a right faff. Especially Gottlieb/Premier where it's all cryptic option and variables represented purely by numbers - and where operator manuals aren't usually readily available as they still protect their IP. You can get the manuals, but at $20 apiece for something I purely need the operator setup instructions and pricing table would get expensive quickly with probably 40 or so tables in question...on the plus side, most options that are relevant here carry over between tables built on the same platform so once you've figured out that option 4001-03 needs to be set to 05 on that table to enable free play, it's a decent bet it will be the same for anything based around the same MPU. At least most of the time.

Yes, I am keeping a cheat sheet so if I need to do this again it's less of a pain!

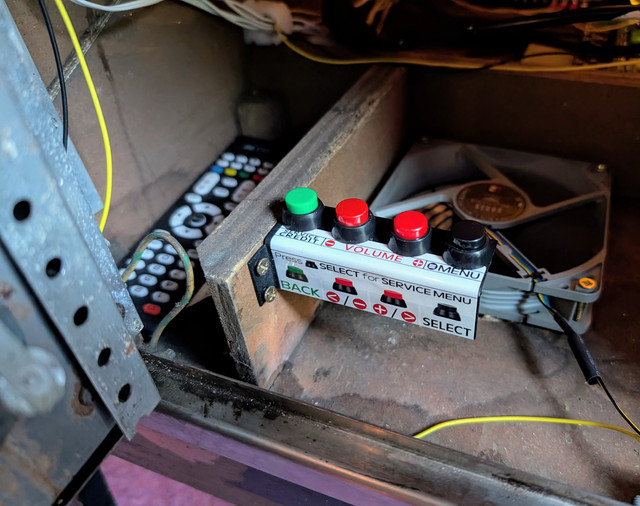
Speaking of service options, a location has been chosen for the button panel for that.

Image

Get that wired in soon and that will hopefully mean we can pretty much ditch the keyboard entirely.
Current fleet:
07 Volvo V70 SE D5, 85 Sinclair C5, 84 Trabant 601S, 73 AC Model 70, 62 Rover 110.