Zel's Fleet Blog - BX, Jag XJ-S, Sinclair C5, Mercedes 208D & 230TE, AC Model 70.

Tell us your ongoing tales and experiences with your French car here. Post pictures of your car here as well.
User avatar
Zelandeth
Donor 2024
Posts: 5285
Joined: 16 Nov 2014, 23:36
x 1591

Re: Zel's Fleet Blog - Xantia Activa, Jag XJ-S, Sinclair C5, Mercedes 208D, AC Model 70.

Unread post by Zelandeth »

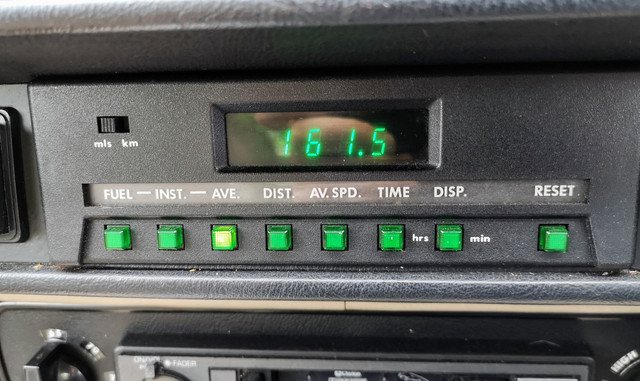
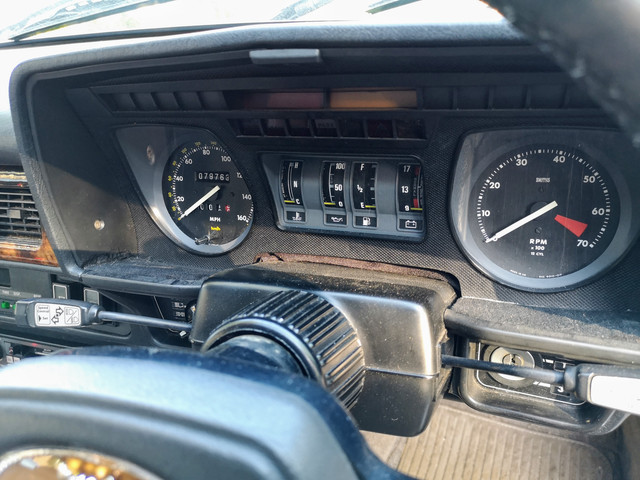
Got a really good MPG readout in the Jag today!

Image

Yeeeaaah...the poor computer is a bit confused. Some idiot (yes, that would be me) managed to leave the interior lights on yesterday and flattened the battery. The resulting voltage dip when I went to try to start it this afternoon wiped half of the memory...it has zeroed the fuel used but not miles covered...hence the ridiculous average MPG listed. Battery has been left on the charger overnight. Hopefully it will have survived the experience as I could do without having two cars with stuffed batteries right now.

Hooking the battery charger up was the extent of car related things today as we wanted to make good use of the relatively cool weather to continue attacking the garden. I think we have now successfully nuked all the Hawthorn at least.


This evening I did have a little project planned though of the computing variety. Those of you who follow that side of my ramblings will probably recall that a couple of weeks ago I upgraded the CPUs in my main workstation PC to a pair of Xeon 5365s, the most powerful chip supported by the machine. While this went smoothly enough I wasn't too happy with the thermal performance I was seeing afterwards.

Given that the X5365 chucks out 150W of heat when all four cores are flat out (and I have two of them...this thing is an effective space heater!) I was expecting it to run warmer than before, but the temperature readouts at full load were worrying. I was seeing around 40C at idle (was usually mid 30s with the previous CPUs), but it was climbing well into the 70s under full load. Noticeably though the CPU fans weren't really doing much, which tells a story as in this system the fan speed is regulated based on the readback from a thermistor on the CPU hestsinks, rather than the CPU temperature itself. This told me that the bottleneck was more the ability of the heatsink to pull heat away from the CPU package than the ability of it to actually shed the heat. I wasn't sure if these reported temperatures were accurate, but a couple of system lockups during heavy CPU load did seem to suggest things weren't happy. Not surprising if the temperature readouts were accurate given the maximum allowed opersting temperature for the X5365 is 63C...

Initially I tried replacing the thermal compound which came with the new CPUs with some of a better quality (Arctic Silver MX4), which did knock a couple of degrees off but didn't really make a huge difference.

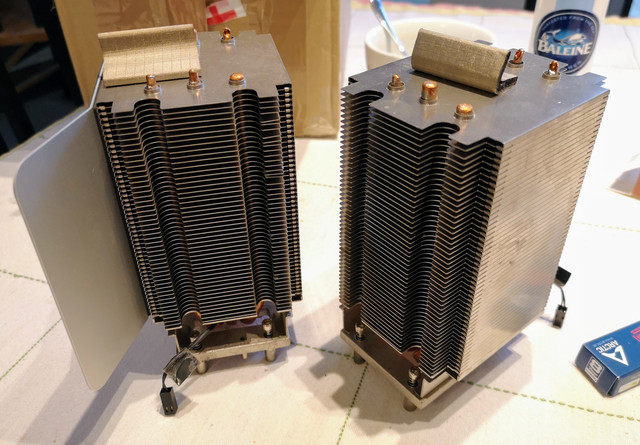
It was brought to my attention by a friend over on another forum that the CPU coolers used in the Mac Pro 3.1 are some dimensionally identical to those use in the version 1.1/2.1 machine, use the same fittings etc, but contain three heat pipes rather than one. Ten minutes rummaging on eBay sourced a set of Mac Pro 3.1 heatsinks for £10.

This morning a surprisingly large box arrived which contained these.

Image

Yes, I did straighten those fins before I fitted them.

They aren't a totally drop in replacement. You need to remove the air guide from the one (the one to the left above), and fit a couple of foam pads to help prevent the airflow from bypassing the heatsinks. I was able to just transfer all but one over from the old ones in this case.

The only other thing I had to do was bend the pin header for the lower (B) CPU heatsink thermistor plug on the motherboard over by 90 degrees as the leads on the new heatsinks are about an inch shorter than the originals. I found that by having this plugged in parallel to the board it was possible to have it hooked up without any tension on the leads or needing to make an extension cable.

I was expecting this to improve cooling performance, but I wasn't expecting quite such a big difference!

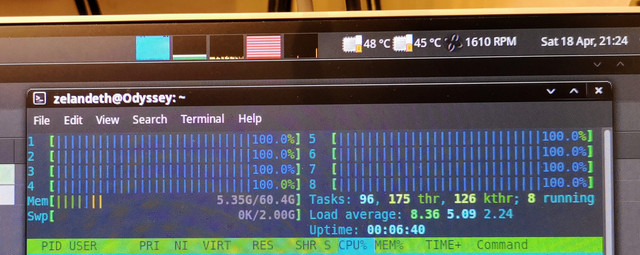
Idle temperatures are now in the high 20s to low 30s. Under full load the difference is far more extreme, now levelling out at far more sensible numbers.

Image

The temperatures are shown at the top of the screen. They're monitoring one core temperature on each physical CPU. High 40s to low 50s, far more sane...and well clear of the maximum allowed figures according to the data sheets.

Another difference which is really obvious is that you now hear the fans ramping up almost immediately when you drop a heavy load on the CPUs now...that's good as it shows the heat is being transferred efficiently to the heatsink.

This is a really good demonstration of how much more there is to heatsink design than just a block of metal and some fins...the heatsinks here in the "before and after" situation were to the untrained eye identical. Same number of fins, same sized copper mounting block, same physical size...the differences are all in the internal architecture...and the difference in performance is staggering!

I left it running flat out for about an hour this evening and the temperature never budged from the figures shown above - numbers I'm perfectly happy with.

Overall a good result, especially for a tenner and half an hour of time.

So yeah...if you want to upgrade a Mac Pro 1.1/2.1 to run Xeon X5365s, it's definitely worth spending a few quid extra upgrading the CPU hestsinks to the later versions while you're at it. Means literally about ten minutes additional work if you do it at the same time as the CPU upgrade itself.
Last edited by Zelandeth on 22 Apr 2020, 15:03, edited 1 time in total.
Current fleet:
07 Volvo V70 SE D5, 85 Sinclair C5, 84 Trabant 601S, 73 AC Model 70, 62 Rover 110.
User avatar
Zelandeth
Donor 2024
Posts: 5285
Joined: 16 Nov 2014, 23:36
x 1591

Re: Zel's Fleet Blog - Xantia Activa, Jag XJ-S, Sinclair C5, Mercedes 208D, AC Model 70.

Unread post by Zelandeth »

So the gardening has continued, pretty much all day today so nothing else was really on the cards.

A recap for those not familiar with the overgrown mess that is our garden.

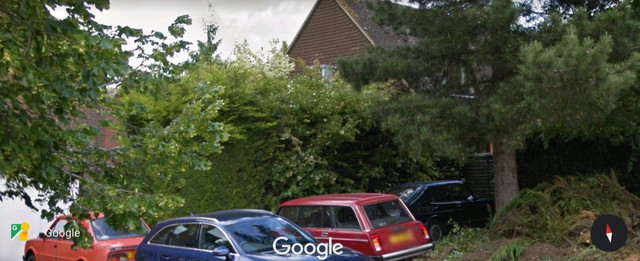
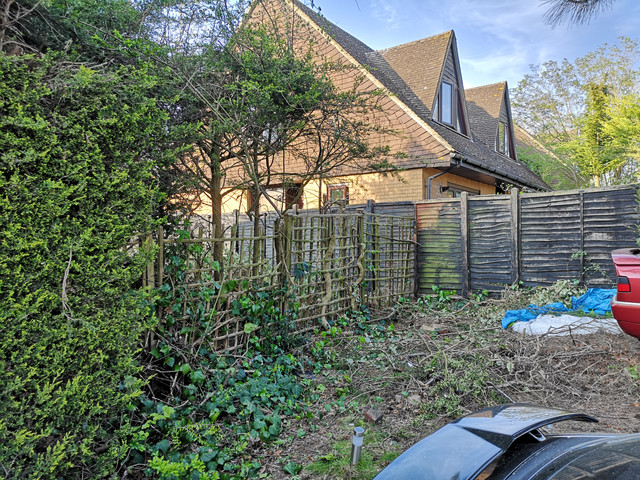
80% of our property is bordered by Leylandii hedges which had been left to grow wild for about five years before we moved in. The ones between the drive and our boundary on the northern edge has been the target of this last couple of weekends. I forgot to take a "before" photo, so I had to resort to Google Street View to give us some idea what we were starting with. It's a couple of years old, but looked pretty much the same.

Image

As of last weekend we had thinned it down to this...

Image

We honestly had no idea that lattice fence even existed 14 days ago!

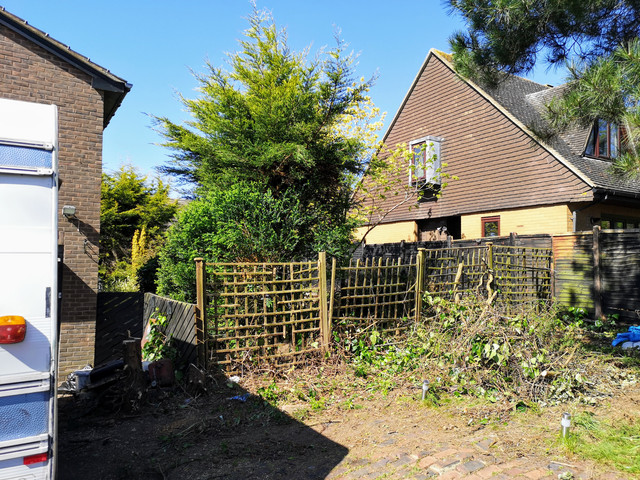
When we wrapped up today this was the view in that corner.

Image

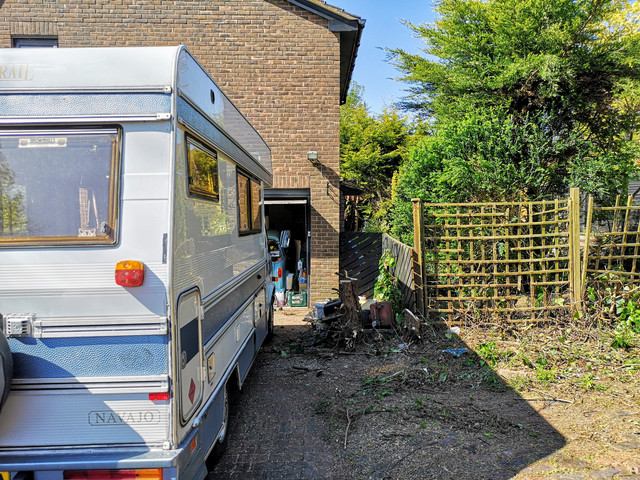
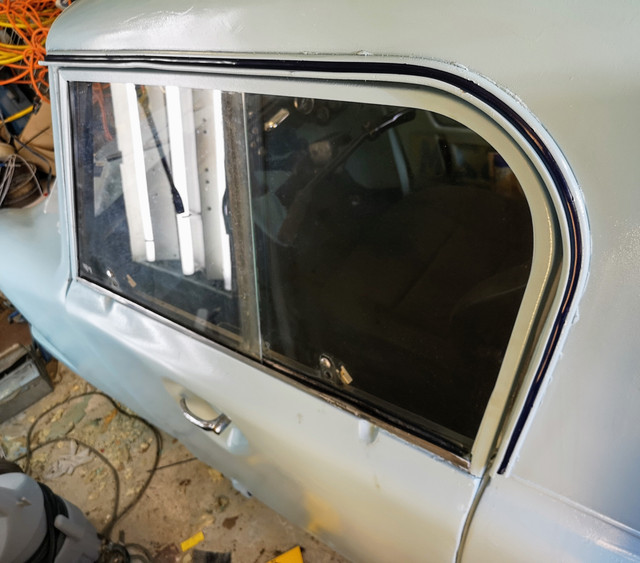
Pulling the van into the space here has always involved folding the mirror in and barging through the hedge to some extent. Opening the driver's door was never on the cards. Backing out the garage with the Invacar always involved picking greenery out of the offside window runners afterwards too.

Image

Bit different now!

Actually being able to open the driver's door is a novelty.

We will be extending the full height fence all the way round to the house once we've finished clearing the greenery. I'm planning to have a little gated store where that pile of junk is as that's where I tend to keep stuff that's waiting to go to the tip. Would be nice to have somewhere that's out of the way for stuff that really doesn't need to be in the garage too like wash buckets, and somewhere the garden waste bin can't blow over would be nice. So the fence will come out to be flush with the end of the house, will nicely disguise the rear gate too.

The overgrown Leylandii and whatever that bush is will also be going as they're out of control and beyond taming. There's a gaping hole in the back of it too where a tree has died back historically too.

We will be planting some things in here, but they'll most likely be fruit trees rather than supposedly decorative hedges.

Looks a bit of a disaster area just now, but once we're done it will be so much better and easier to actually maintain.

About 80% of the greenery from the driveway to the far fence was either hawthorn or had hawthorn intertwined with it. We are very bloody glad to see the back of that.

Before the obvious question is raised, yes I've climbed up there and had a good dig around to check for any bird nests before we started pulling things down. The only one found hasn't been occupied for at least the last two years.

My back is absolutely killing me!
Current fleet:
07 Volvo V70 SE D5, 85 Sinclair C5, 84 Trabant 601S, 73 AC Model 70, 62 Rover 110.
User avatar
Zelandeth
Donor 2024
Posts: 5285
Joined: 16 Nov 2014, 23:36
x 1591

Re: Zel's Fleet Blog - Xantia Activa, Jag XJ-S, Sinclair C5, Mercedes 208D, AC Model 70.

Unread post by Zelandeth »

Having been attacked by the reel of vacuum hose I picked up for the Jag today for the umpteenth time when I opened the garage door I figured it was time that I fitted some of it.

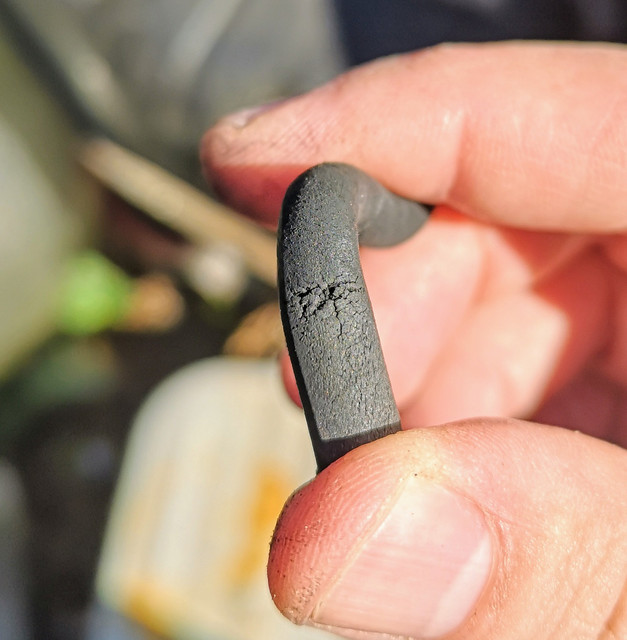
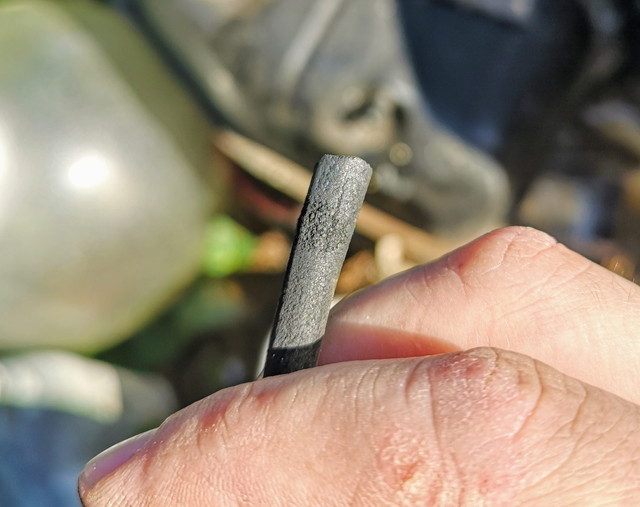
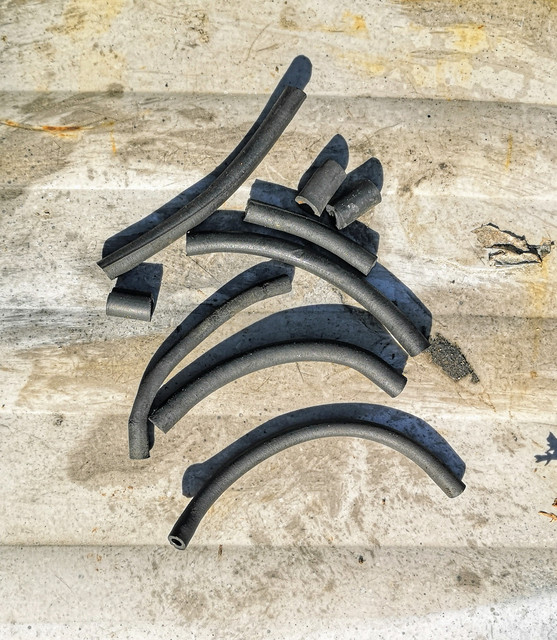
This is the state most of the ones which came off were in.

Image

Image

These are the ones that were changed.

Image

A couple were larger diameter ones which I didn't have in stock - there was enough slack in them though I was able to just cut off the perished/stretched ends and refit the hose. I'll get the right hose in stock and then replace them in due course.

I discovered that the little elbow connectors that attach to the throttle body and fuel pressure regulators are a very loose fit. I was planning to stick a couple of hose clips on there to tighten them up but sadly can't find any hose clips of an appropriate size. Will need to get some ordered in.

You can probably tell from that tiny pile of old hose that I only managed to change about 30% of the hoses. The rest are utterly buried and are pretty much utterly inaccessible. I can't even begin to tell where half of them go beyond "vanishes under the inlet manifold." I have to assume a lot of the lines were attached during engine assembly before the inlet manifolds were fitted. Another job to add to the list while they're off then. Unless I find a good vacuum hose diagram which suggests a good number of them can be routed in a less annoying manner.

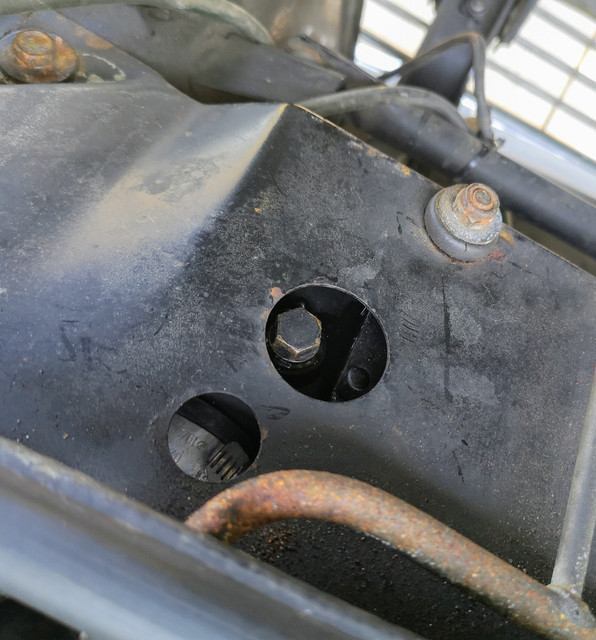
I've also noticed that I have a very slight weep from the radiator bleed screw.

Image

I'm guessing this should have a copper washer or an O ring under it (currently absent), can someone confirm this?

While working on it I noticed that the nearside front tyre was looking a little soft. Checking it revealed it to be fine and just looking low down to how the car was sitting on the drive. It did however bring my mind back to something else I'd been meaning to investigate for a couple of months now.

I can't remember exactly when it was, but a couple of months ago I think it was our RCD was taken out when I plugged the compressor in. Resetting it immediately resulted in the circuit breaker for the garage socket tripping. Resetting that immediately knocked out the RCD again...so something was obviously amiss.

I was hoping that this would be something amiss with the pressure switch or a bit of chafed wiring. Sadly it wasn't anything that simple and it turns out that one of the motor windings has shorted to the case. Annoying but these things happen. It did quite a bit of hard work back when the Invacar was painted, which was the job I needed it for the most really.

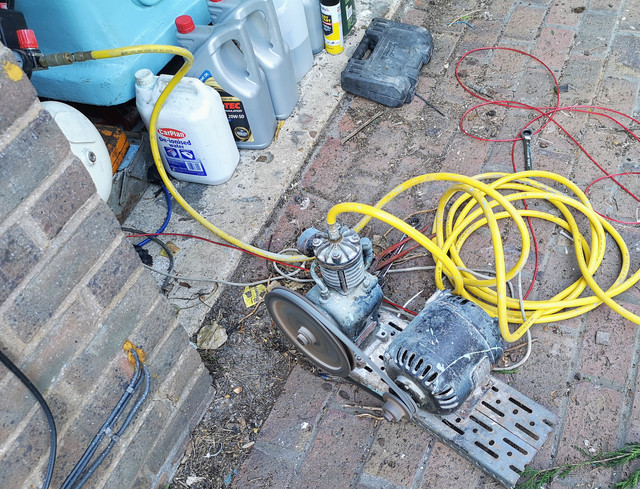
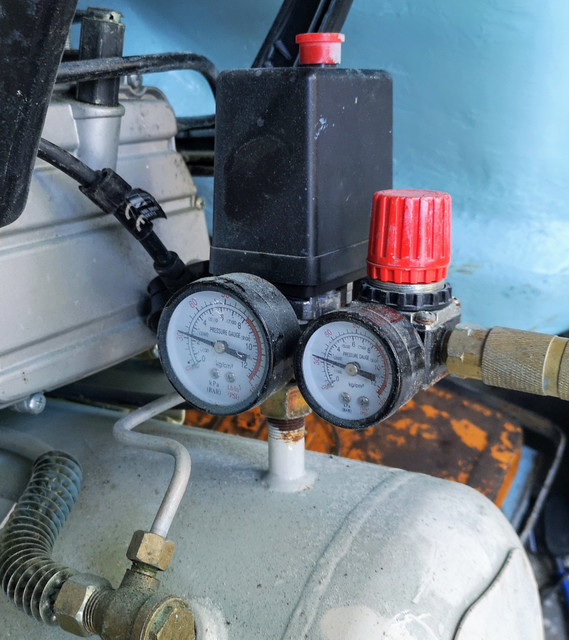
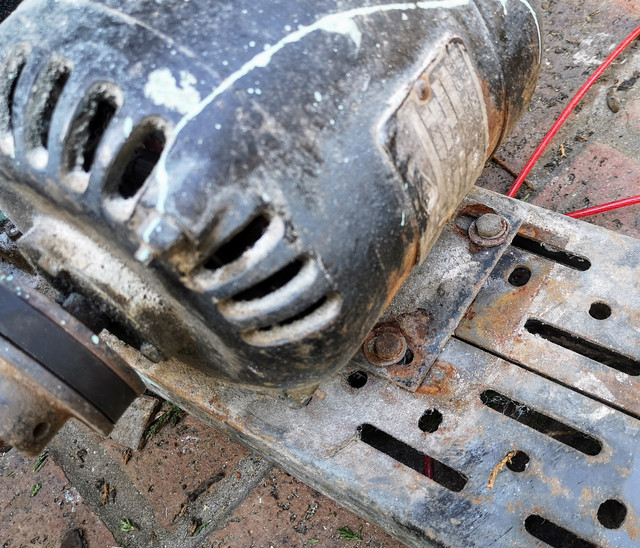
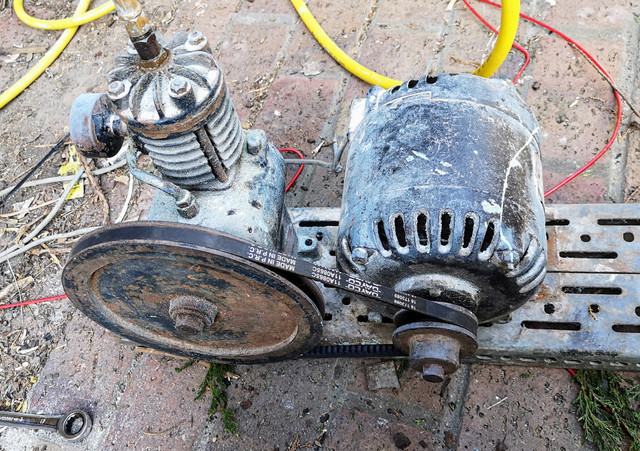
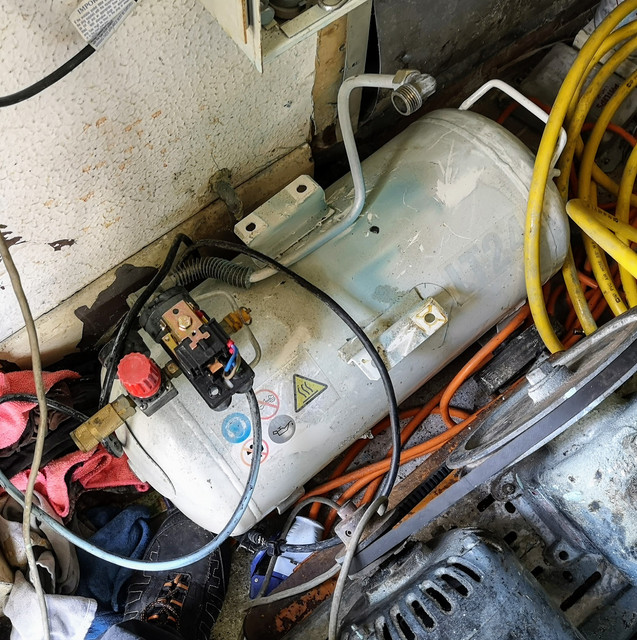
Can't really justify replacing it just now...while it's nice to have air in the garage it's hardly mission critical. A thought sprang to mind though...a while ago I stumbled across an ancient tiny little compressor hooked up to a probably even more ancient motor. It's only a tiny one, but I had established that it would at least move air. Seemed worth investigating whether I could make use of it in some way. It didn't have a receiver of any sort fitted so a bit of improvisation was going to be needed.

Cue some scrabbling around the garage for things I could scavenge fittings from to actually attach any form of outlet hardware to it, finding a plug (as of course I'd nicked that for something else) and cobbling things together.

Image

Then it became apparent that I'd left the tank drain open. This had also helpfully seized. After a little gentle persuasion it started moving...then sheared off. How lovely!

Eventually finding a bolt that was the correct size plugged that, and we could see if the teeny tiny compressor could fill the receiver in a vaguely sensible time. If it's going to take an hour to get it up to 50psi that's not really going to be useful.

The belt tension needs setting up properly as I need to nudge it with my foot to start it just now, but once it's kicked over it sits there going "dugga-dugga-dugga..." quite happily. Surprisingly quietly too. The vast majority of the noise is actually from the intake, so a muffler would solve a lot of that.

Less than a minute in...

Image

Looks promising. After a few minutes we were up to about 70psi, so that's entirely usable for my purposes. I'll pull everything out of the garage at some point so I can actually get at it and then have a think about how to actually properly pipe things up.

Long term I'll need to look at getting a new compressor as this isn't going to have the legs to keep up with any real demand, but it should at least let me do things like checking my tyre pressures reasonably quickly.

Will probably look to install a little shelf above the receiver and use this as an excuse to get some polished copper and brass in the garage. I'll look to add a fan of some sort to blow over the compressor body too, even though it only got vaguely warm during today's test. The hose was quite warm though which was the main reason I called time when I did as it's obviously not really suitable for use in that position.

I was backfilling the tank through the outlet through a random extension hose because I simply wanted to see whether this would even work, the correct inlet and outlet will be used once I set stuff up. No reason I can't use the existing pressure switch and regulator etc as there's nothing wrong with it as far as I can tell.

...Glad I saved this one from the skip at the side of the road now!
Current fleet:
07 Volvo V70 SE D5, 85 Sinclair C5, 84 Trabant 601S, 73 AC Model 70, 62 Rover 110.
User avatar
xantia_v6
Forum Admin Team
Posts: 10846
Joined: 09 Nov 2005, 22:03
x 1406

Re: Zel's Fleet Blog - Xantia Activa, Jag XJ-S, Sinclair C5, Mercedes 208D, AC Model 70.

Unread post by xantia_v6 »

The radiator bleed would originally have had a copper washer, although some had a bleed valve instead of the bung. The bleed valve was introduced on the pre-HE because they were not very good at self bleeding, the HE beed system works better, but I thought they usually had the bleed valve fitted in addition.

The vacuum hoses under the manifold go to the warm-up valve (which can be discarded) and to the distributor vacuum regulator (blue) and dump valve (beige and circular), which are important. I can re-plumb it all from memory, but it is harder to put into a written description.
User avatar
white exec
Posts: 7445
Joined: 21 Dec 2015, 12:46
x 1751

Re: Zel's Fleet Blog - Xantia Activa, Jag XJ-S, Sinclair C5, Mercedes 208D, AC Model 70.

Unread post by white exec »

Reminds me of Eddie's famous avatar... :shock:
Eddie's avatar 1.jpg
Chris
User avatar
Zelandeth
Donor 2024
Posts: 5285
Joined: 16 Nov 2014, 23:36
x 1591

Re: Zel's Fleet Blog - Xantia Activa, Jag XJ-S, Sinclair C5, Mercedes 208D, AC Model 70.

Unread post by Zelandeth »

xantia_v6 wrote: 22 Apr 2020, 09:16 The radiator bleed would originally have had a copper washer, although some had a bleed valve instead of the bung.
That explains why it's weeping then, someone has lost the washer. I'll have a rummage around. Sure I've got one floating around somewhere. Have quite a few copper washers and such floating around from the Lada injection project.

Thanks for letting me know at least what's buried under the manifolds in terms of vacuum lines, even a gauge idea of what's meant to be connected to what is useful given the sheer amount of stuff in this engine bay. Especially as it's not always visually apparent what some of the components do!
white exec wrote: 22 Apr 2020, 11:56 Reminds me of Eddie's famous avatar... :shock:

Image
The resemblance is striking!
IMG_20200416_172441.jpg
Current fleet:
07 Volvo V70 SE D5, 85 Sinclair C5, 84 Trabant 601S, 73 AC Model 70, 62 Rover 110.
User avatar
Zelandeth
Donor 2024
Posts: 5285
Joined: 16 Nov 2014, 23:36
x 1591

Re: Zel's Fleet Blog - Xantia Activa, Jag XJ-S, Sinclair C5, Mercedes 208D, AC Model 70.

Unread post by Zelandeth »

Couple of updates rolled into one here as I ran out of time to get a post put together last night.

----

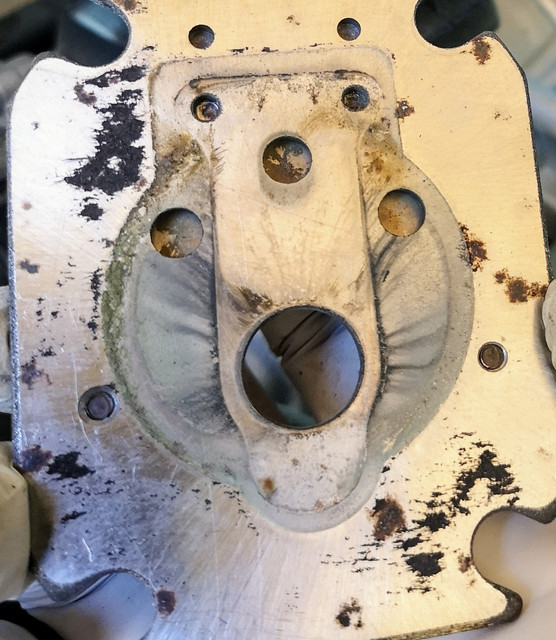
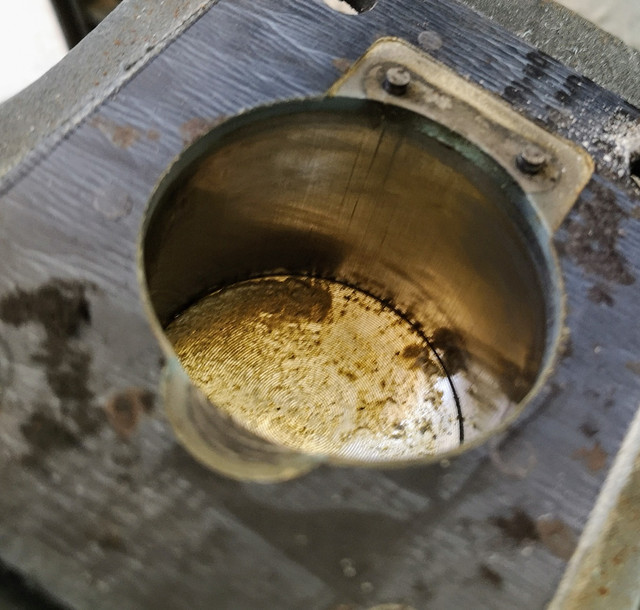
A few people have suggested that it might be possible to replace the motor on my currently dead compressor. I'd originally discounted this myself as being a direct drive unit I expected things to be pretty model-specific. It's only one of those around £100 including a bunch of basic tools jobs anyway so not worth throwing a huge amount of money at. However it's worth looking into depending on what state the compressor side of things is in. I particularly wanted to examine the bore on account of having discovered that the cheap piece of recycled biscuit tin that the air intake was made from was sufficiently poorly made that there was a good 1/8" gap between the air cleaner element and the back of the housing. So none of the air was actually being required to go through the air cleaner. I discovered this *after* doing a bunch of soda blasting and painting a car in the garage! As such I was...curious...to see how much of this gunk it had ingested.

Had to admit to being a bit curious anyway...I've had a few refrigeration compressors apart before so I was interested to see what differences there were in the construction.

Off with its head!

The valve plate definitely shows that it's been breathing more than just clean air...This is the side which faces down into the cylinder, there's a reed valve which sits over the central hole allowing air into the cylinder through there, but forcing it out through the three smaller holes above it. Two of these had a good 1/16" of solidified gunge on them, and the inlet reed valve had about the same thickness of paint on the outward facing surface.

Image

Image

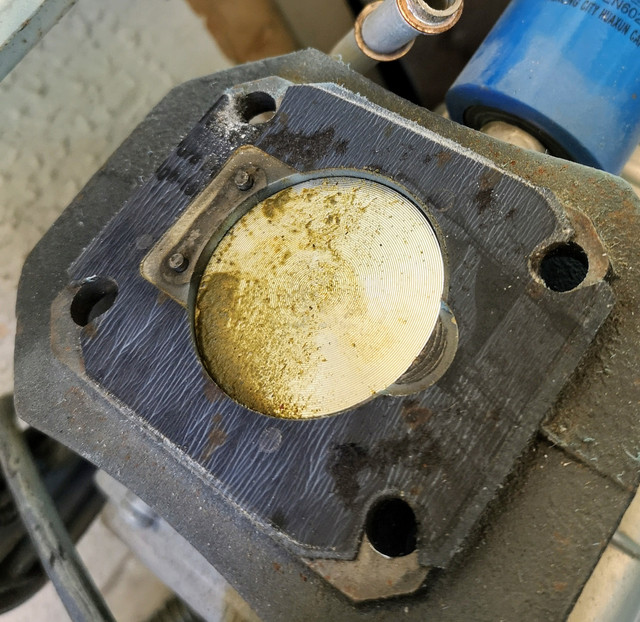
Lovely...That's a large blob of what appears to be a congealed mixture of soda blasting media and compressor oil. I wasn't sure if I wanted to push the cylinder down to examine the bore at this point!

Image

Actually a lot better than I honestly expected. I can *just about* feel the most obvious score you can see in the above photo, but that was the worst of it. With a good clean I reckon it could live to fight another day with a replacement motor - if it's cheap enough.

I knew the older one I was monkeying around with yesterday wasn't performing its best down to how much the belt was slipping, and wanted to see how it compared actually working better.

There was no way to get the tension set properly on the belt with the slots in the base it's currently mounted on being where they are, however I just happened to have a slightly shorter belt in stock, which meant I was able to line things up better. Also meant I could actually bolt both things down with four bolts rather than the original two.

Image

This then meant I could fit a new belt and properly tension it. Doesn't this look better?

Image

Suffice to say it's an awful lot happier with a new properly tensioned belt on it. Not only does it seem to be filling the tank at nearly the same rate as the original compressor seemed to, it will now happily start even with 100psi of head pressure on it (which it wouldn't normally see when starting as there's an unloader built into the tank feed - and of course the pressure switch is set so that it will normally cut in at around 60psi).

Even if it is a little slower than the original compressor, honestly it's so much quieter that I think that's a price I'd be willing to pay. You could certainly happily be working in the garage with this one chugging away, whereas the original one definitely required ear protection if you were in the same room. It frequently resulted in me jumping half out of my skin when it started up - even when expecting it.

I'll have a think about my options and come back to this project I think.

I definitely need to get something set up soonish though. The only two garages near here with air lines in a usable condition are now charging £1 to use them. Sorry...Nope. £0.20 I was fine with, £0.50 I'd grumble but pay, a quid however is having a laugh. The tyres on the van though run at 58/65psi front/rear. My little 12V compressor really isn't designed with pressures like that in mind, so I really need the garage air supply working to keep them topped off (they don't generally lose air, but I like to check things like that weekly).

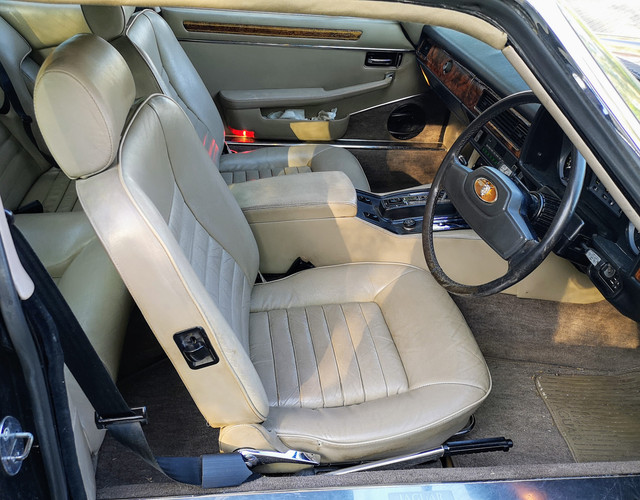
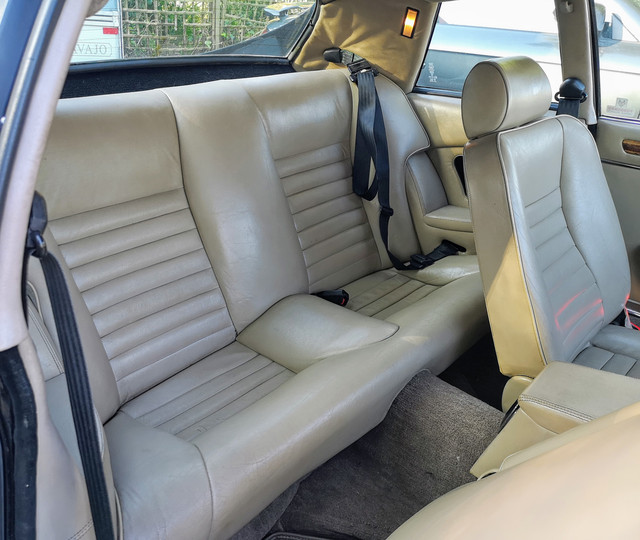
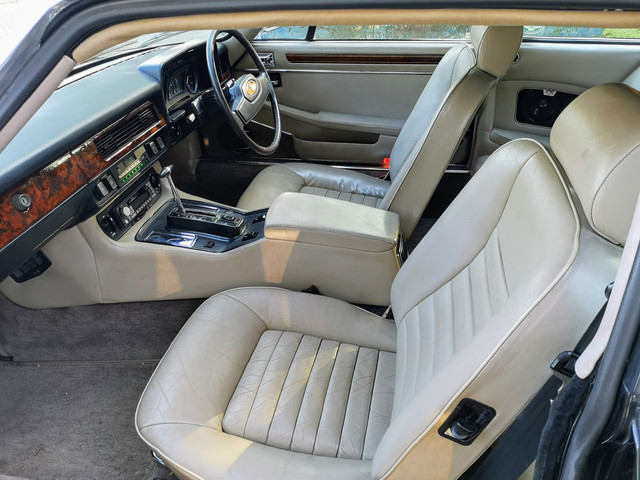
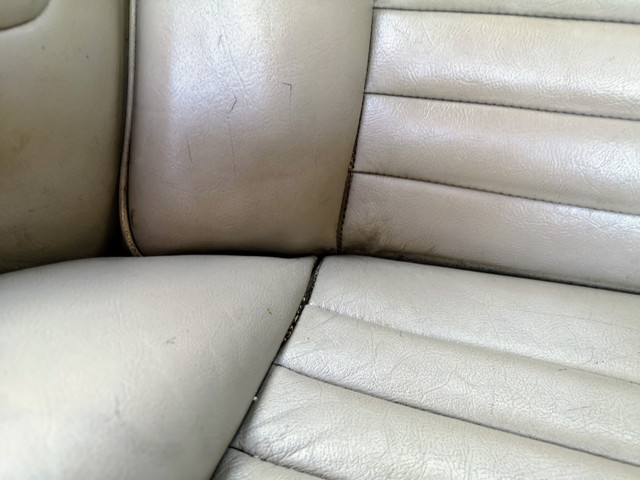
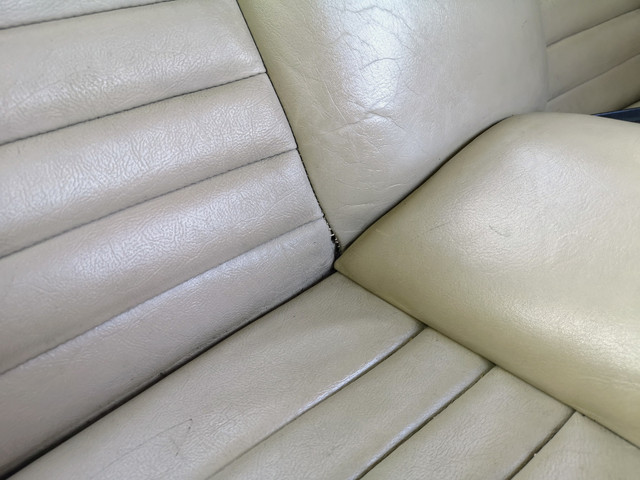
Only other thing I really got done today was to give the leather in the Jag another going over with the leather feed. I think this must be the sixth or seventh treatment, and it's actually just about starting to not immediately get absorbed. The rear seats in particular felt very dry when I got the car - not that anyone is ever really likely to be in the back given how hard to is to get in and out of!

Looks better for it, though I do at some point need to give them a really good scrub down with the cleaner as they're still quite grubby in a few places. I didn't realise how much so until looking at these photos.

Image

Image

Image

There are a couple of small areas that could do with some attention...so a question to those of you who have dealt with interior trim repairs before (it's a new field for me). Are these things that a specialist would be able to repair, and if so is it likely to be at a reasonable cost? I've never really had a car where it was worth asking questions like this before!

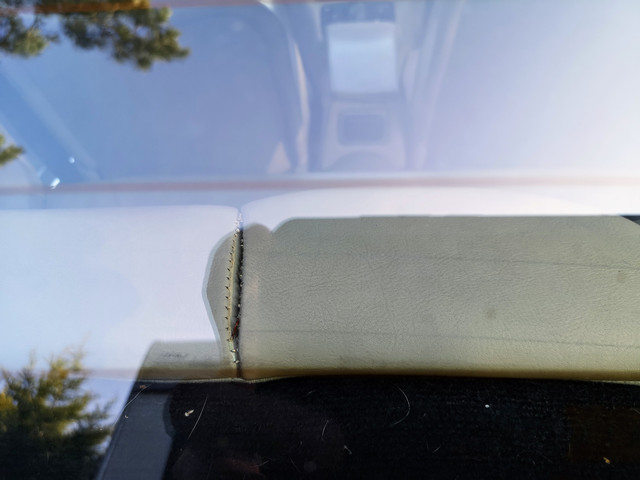
Rear seat has three spots where the stitching is failing. From previous experience with XJ6s, I think there is an element of "they all do that sir" because the thread used in the stitching isn't all that great.

Image

Image

Image

That last one is probably the most important to me as it's really clearly visible from outside the car.

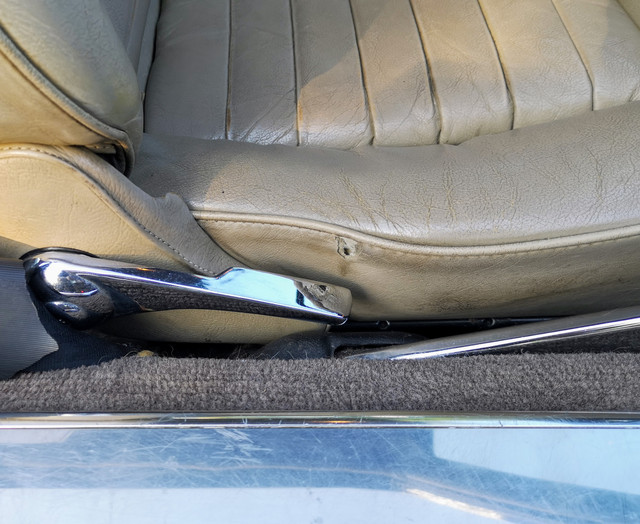
The driver's seat also has a spot where the backrest adjuster lever has rubbed a hole in the side of the seat base. Again I suspect this is something that virtually every XJ-S owner has to deal with at some point just due to the seat base design.

Image

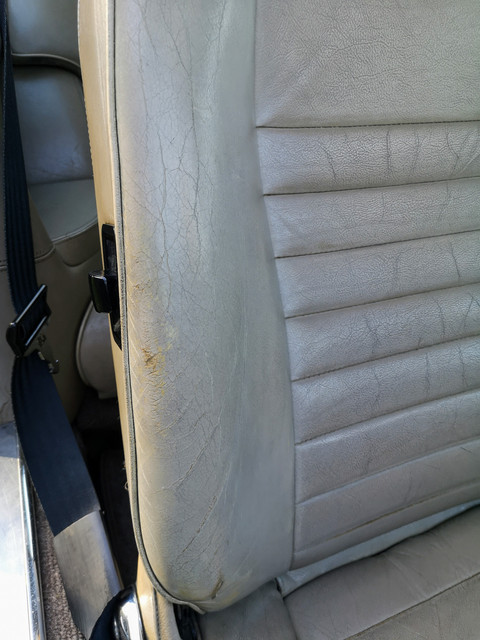
Also there's a bit of wear to the backrest bolster on the same seat - though I'm more willing to just mark this up as the inevitable battle scars of 35 years and 78K miles, it's not really noticeable unless you're looking for it.

Image

If it was going to be reasonably cheap to repair though I'd not say no.

These aren't things I'm going to lose sleep over, but it's probably the first car I've had where it's actually worth thinking about getting things like this looked at. In the long term they will add value, and will obviously make the car a nicer place to be (like having refinished the wood trim).

----

Having had a look around for compressor motors I've not really found anything at a price that makes sense. Around £50 is the cheapest I found from a seller I even vaguely trust, and when Toolstation have an entire compressor of more or less identical ratings for £99.98 - that just doesn't stack up. So I'm continuing with my thought experiment about using the working hardware I have.

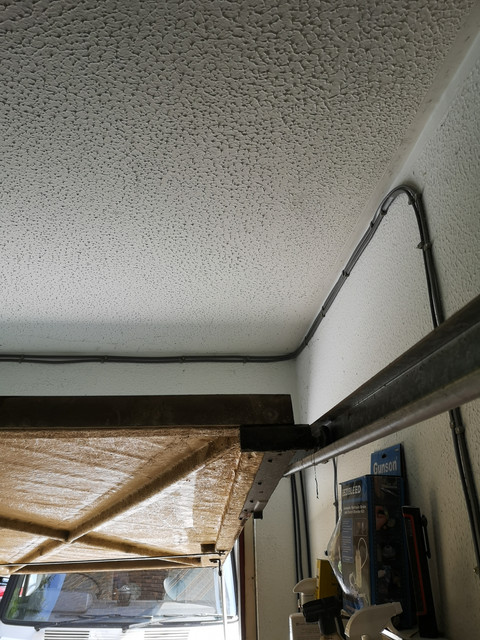
The idea that there was no real requirement for the receiver and compressor to necessarily be in the same place does raise some interesting ideas in terms of saving floor space in the garage, as it does take up quite a lot of room. There really isn't any reason though that it couldn't be elevated into the "dead" space around or above the garage door frame.

Image

The tank drain valve has always been an utter pig to get at, so this would make it more likely to actually be drained weekly as it wouldn't involve me having to wheel the thing out of the garage, tip it on its side, getting the pliers out to unscrew it and then repeating the process in reverse to get it back inside.

I had always planned at some point to move the compressor itself somewhere else in the garage anyway and to pipe the air to somewhere near to the door...so it's just an expansion on that idea really.

----

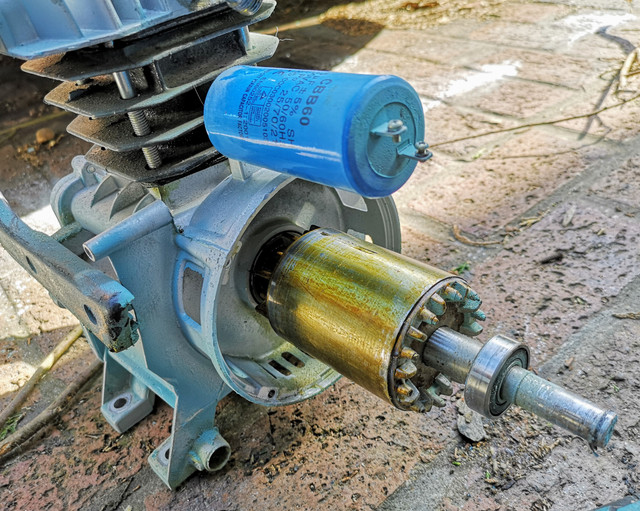
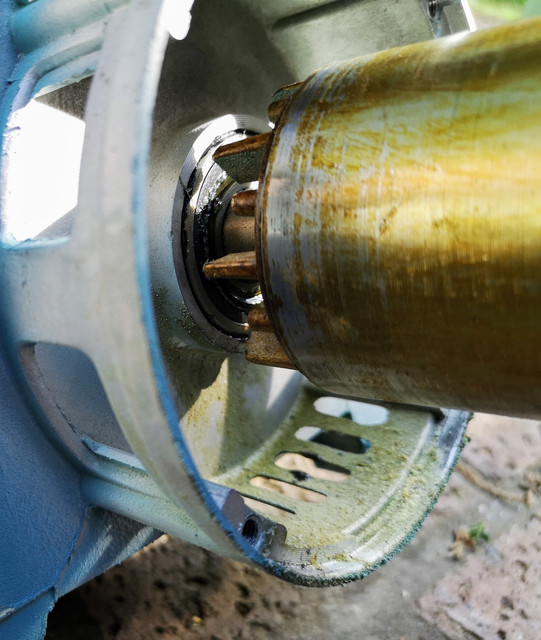
Did a bit more digging into the compressor today as curiosity got the better of me. I'd expected some sort of coupler between the motor and compressor...however it quickly became apparent that it's all one chunk.

Image

Also became quickly apparent that the crankshaft seal has been leaking, the whole rotor is covered in sticky horrible oily gunge. I thought the golden colour was varnish or something - right up to the point where I touched it.

Image

Getting the fan off the end of the shaft was an absolute pig of a job as it was clearly designed with a correctly sized, keyed fan in mind...however the manufacturer had literally just hammered one on there that was small enough that it was jammed in place. Getting it off as a result required no small amount of brute force.

The receiver isn't all that heavy in itself, so I think the idea of mounting it remote to the compressor is a decent one. Pressure switch, reg and water separator (not currently fitted) can be kept at eye level, and a drain down valve can also be remotely piped in. Reckon a pipe off the bottom of the tank and a ball valve will be more reliable long term than the fiddly arrangement it originally had anyway.

Image

I reckon that the original compressor mounting brackets there may well even be well suited to secure it with (obviously I'd need to modify the outlet pipework, but we can deal with that).

It does take up a good old chunk of floor space so I like the idea of it being shoved somewhere properly out of the way.

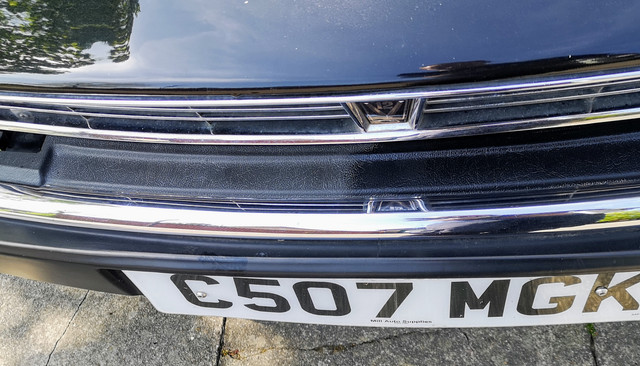
At this point I was intending to tidy up from that before moving onto another job - however successfully sidetracked myself en route and still haven't remembered what I actually went into the garage to do in the first place. I stumbled across an ancient bottle of Auto Glym Bumper and Trim treatment which I think I've had since I worked at the garage (which I moved on from in 2005). This reminded me that I noted way back when I first picked it up that the plastics and bumpers on the Jag were looking really dull and lifeless. I didn't realise how bad they were until I started treating them.

Image

I honestly thought that the strip under the radiator grill there was really grey until now!

Image

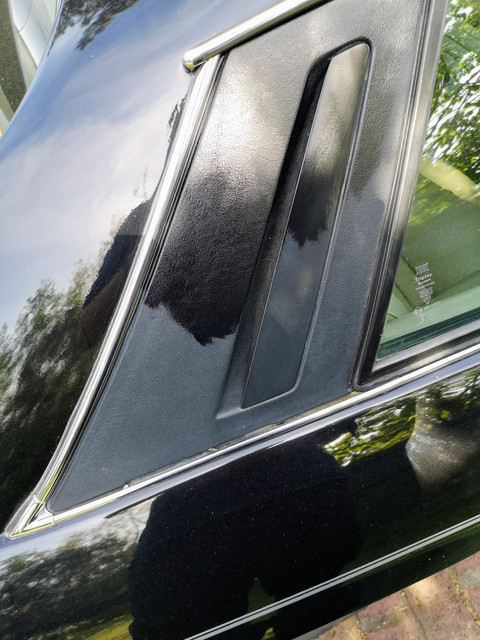
These vents speak for themselves I think, this is where I started out and realised how badly the plastics needed some TLC.

This thing was a pig to do. In hindsight I should have pulled it off the car, would have been quicker I think.

Image

Can see a few bits I need to go back to anyway. Also I'd always thought that grill was plastic...nope, it seems to actually be die cast aluminium based on the feel of it.

I always forget how much just treating all the plastics and bumpers can make a car look so much tidier.

Image

Image

The one bit of plastic I didn't touch is this one.

Image

Reason being is that I want to go in with a tiny brush and touch in the lettering on the panel between the reversing lights. I'm not sure if this being silver or black is a HE/Pre-HE difference, but I prefer the look with the text standing out a bit. I've seen this panel all black like this, silver with black lettering on a couple of really early cars, and black with the lettering in satin silver. That's the look I'm going for.

The other bit of silver detailing I've seen on a couple of photos of early cars is on the surrounds around the instruments.

Image

I'm guessing this was dropped as time went on as it saved a bit of time on the assembly line, and therefore a few pennies!

Like this (image grabbed from a classified listing somewhere - trade-classics judging from the image watermark - a while ago, and used purely for reference).

Image

I know it's technically not correct for a HE, but I think that the silver detailing really looks nice and breaks up what is otherwise quite a big slab of black and helps define the border between the black and dark grey parts. I need to pull the panel again because the warning light for the rear fog lights has packed in (again, dodgy lamp holder), so might add a bit of early car detailing there. It fits with the overall black with silver piping theme outside too.
Current fleet:
07 Volvo V70 SE D5, 85 Sinclair C5, 84 Trabant 601S, 73 AC Model 70, 62 Rover 110.
User avatar
Zelandeth
Donor 2024
Posts: 5285
Joined: 16 Nov 2014, 23:36
x 1591

Re: Zel's Fleet Blog - Xantia Activa, Jag XJ-S, Sinclair C5, Mercedes 208D, AC Model 70.

Unread post by Zelandeth »

Yesterday didn't go so well.

I didn't have a huge amount of time so thought I'd tackle something small. My choice was installing the switch I picked up ages ago for the heater blower I've fitted to the Invacar. Simple enough job.

It all came unravelled however when I decided to overhaul the switch before fitting it. The action was rather "crunchy" and checking it with a meter showed the contacts to be quite intermittent. Nothing a bit of cleaning and some fresh grease can't sort.

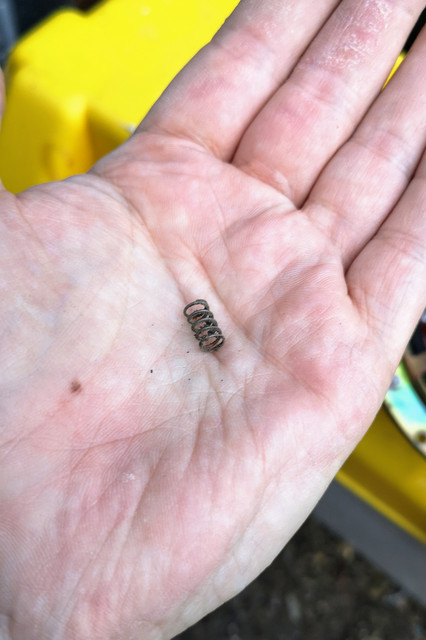
However somewhere between me taking the switch apart and me sitting down to reassemble it, the spring disappeared. I had precisely zero idea where or when...I don't *think* I left it sitting loose on top of the switch body when I walked out of the garage...but I can't be sure.

I must have spent an hour and a half crawling around trying to find it before running out of patience. I did have a thorough dig through the boxes of random bits and pieces to see if I could find a suitable replacement...no dice.

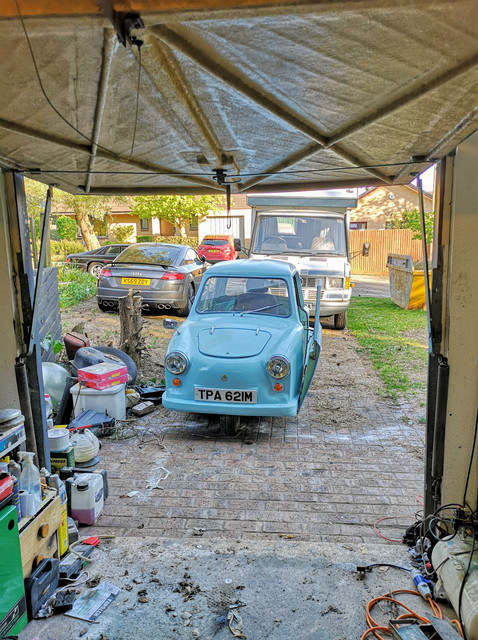
So back out this afternoon to see if I could find that blasted spring. After about an hour of digging through the garage I finally relented and shuffled all the stuff out of the way, moved the Jag onto the street and backed the van up so I could get TPA out of the garage. Here she is blinking in the sunlight for the first time since September.

Image

Could I find it even having got myself some room to move? Not a chance.

Had a last bash at things by sweeping the garage out then going through the resulting pile of dust and debris with a magnet. Result?

Image

Found ya, you little sod!

Ten minutes later I actually got the switch cleaned up, back together and was able to get it installed.

Image

I don't think it looks out of place, going digging for switchgear matching the originals was a good call.

Image

Could have been straighter, but I'll take it. There's a bit of wiggle room there so I can look to fine tune it later. Obviously needs wiring attached at some point. Plus at some point I'll be swapping the dash out for the spare I have which doesn't have a stinking great hole in the top anyway. I need to pull it to tidy some of the existing wiring up anyway (the main ignition feed passing through a rusty screw terminal block doesn't instill confidence!), so may as well take the opportunity to fit the better dash while it's out.

Speaking of wiring I want to see if I can make a few improvements anyway...a relay or two to take the load off the ignition switch for one as it gets warmer than I'd like. Plus I want to add a 12V outlet tucked out of view under the dash and hook up the additional instrumentation pod...so a few wiring jobs to do.

Wouldn't be a bad idea to tackle that job now while the car's otherwise off the road now I think of it...

Will probably move the indicator stalk back to the left too...I prefer it on the right, but trying to operate it and the throttle at the same time is awkward. That will wait until I've picked up the right stalk though as the legends being upside down (this is a Land Rover SIII one I believe, the correct Invacar one I believe is shared with the Herald) would drive me nuts. The correct stalk doesn't have the cranked stalk or any legends so it can be fitted on either side just as easily.
Current fleet:
07 Volvo V70 SE D5, 85 Sinclair C5, 84 Trabant 601S, 73 AC Model 70, 62 Rover 110.
User avatar
Zelandeth
Donor 2024
Posts: 5285
Joined: 16 Nov 2014, 23:36
x 1591

Re: Zel's Fleet Blog - Xantia Activa, Jag XJ-S, Sinclair C5, Mercedes 208D, AC Model 70.

Unread post by Zelandeth »

Gardening ate up most of this afternoon but managed to grab an hour in the garage just before dinner.

First task was to get a new set of taps ordered to try to get the hub sorted, hopefully the new set won't be made of cheese like the original set.

Bit of general box ticking was then done.

[] Sealed off the air outlet on the engine cowling for the heater which is now unused. I figure reserving as much air for engine cooling can't be a bad thing.

Just went for a bit of duct tape which is clamped down by a hose clip. Crude but it should do the job. I'll look at a more elegant solution down the road at some point.

Image

I will pull the tubing that runs between the two halves of the cowling off as well next time the transmission cover is out.

[] I've pulled the current shunt off the negative battery terminal as I've decided that the digital ammeter that goes with it isn't staying with the car. It was handy when I was initially checking out whether the charging system was behaving though.

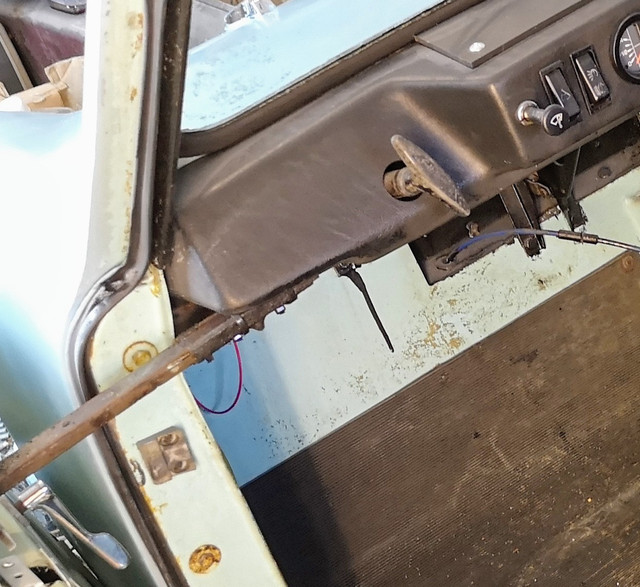
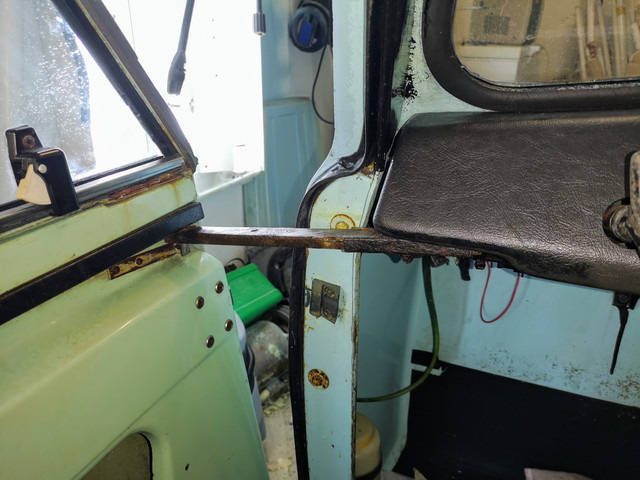
[] Nearside door tie fixing. This issue goes all the way back to when I first got KPL, in that the threads were so mangled in the door tie that I couldn't get the retaining nut on. As a result the tie rod was held onto the dash support bar with a bunch of cable ties.

Image

Not pretty. It also made the door sticky to close sometimes.

Today I finally got around to pulling it apart, cleaning the threads up (I didn't have a tap and die set when I originally put this together), cleaning and re-greasing the assembly itself, and then bolted it in place properly.

Image

Much better.

While I was working on the door in general I took the opportunity to also dig all the old grease out of the whole lower door runner and regrease it. What was in there had basically taken on the consistency of toffee. Chipping it all out took a good twenty minutes or so, but was worth it as the door now slides almost acceptably. Greasing the latches has resulted in being able to actually close the door with the handle rather than having to open the window and grab the top of the door. Still needs a good slam, but it's a definite improvement. I think "passable" is about the best you can hope for with Invacar doors!
Current fleet:
07 Volvo V70 SE D5, 85 Sinclair C5, 84 Trabant 601S, 73 AC Model 70, 62 Rover 110.
User avatar
Zelandeth
Donor 2024
Posts: 5285
Joined: 16 Nov 2014, 23:36
x 1591

Re: Zel's Fleet Blog - Xantia Activa, Jag XJ-S, Sinclair C5, Mercedes 208D, AC Model 70.

Unread post by Zelandeth »

A few things rolled into one again as I've done a poor job of keeping things up to date lately.

I needed to head out a couple of days ago to pick up some prescriptions (it would be really nice if they would just let me order things a couple of days earlier so I didn't need to make four separate trips for four separate medications!), of course I took a small, sensible car didn't I?

Well...kind of.
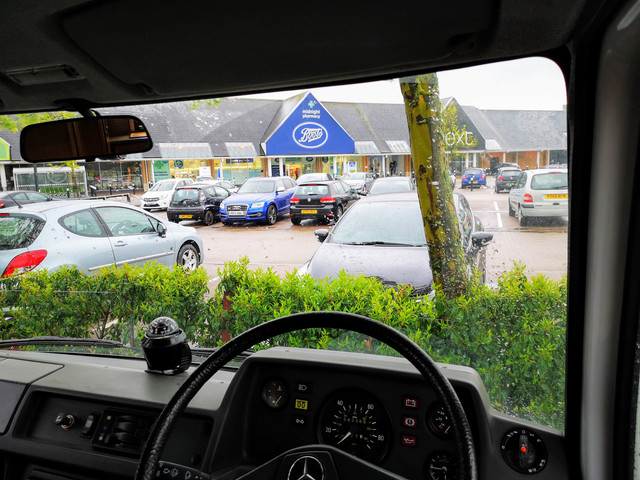
Image

To be honest I don't really want to take the Jag out in the wet until I've sorted the rust on the nearside wing on the Jag and refitted the wheel arch liner, so it was the logical choice.

Now a brief Segway into tech as happens now and then in this thread.

About a year ago I was generously gifted an Acorn RiscPC 600 by a fellow fan of these machines. A RiscPC had been on my wish list since I first encountered one in the late 90s. I have several Archimedes machines as I've always been a huge fan of both Acorn and Amiga computers, having grown up with them.

Don't ask me to pick a favourite... they're very different machines, though from a purely technical perspective Acorn probably gets my vote. They were so, so far ahead of their time architecturally. While I enjoy using Workbench on the Amiga, 3.0 is what I really made my first *real* steps into computing with, I can't deny it's quite clunky in a lot of ways. RiscOS on the other hand still feels slick now...while it might lack modern visual sparkle in some ways, it still works well. It was very much its own thing in the time and to this day nothing has behaved in quite the same way. I think it's the massively efficient use of screen space in RiscOS which makes me want to bash my head against a brick wall when using Windows 10.

While I've several Archimedes machines (A3000, A3020, A4000, A5000) and relatively recently found an A7000, I've never managed to track down a RiscPC at a price I thought was sensible. So when the opportunity to get this one came up I didn't hesitate for a millisecond. Hopefully one day a BBC Micro or Master will also materialise.

Scruffy though it may be, I was very glad to have added this to my collection of interesting (to me anyway!) computing hardware.
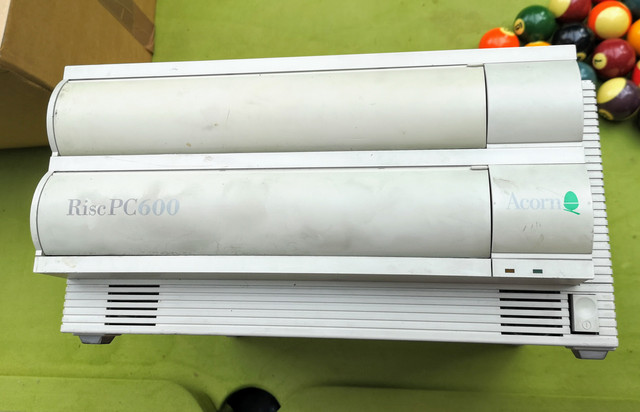
Image

Unsurprisingly this machine needs a bit of TLC.

While I didn't have time to give it too much attention when it initially arrived, I did give it a quick once over. This immediately revealed that the RTC/CMOS battery had been leaking, a common issue on Acorn gear, which can do quite a lot of damage if left unchecked.

Thankfully despite having made a mess there was no actual damage visible.
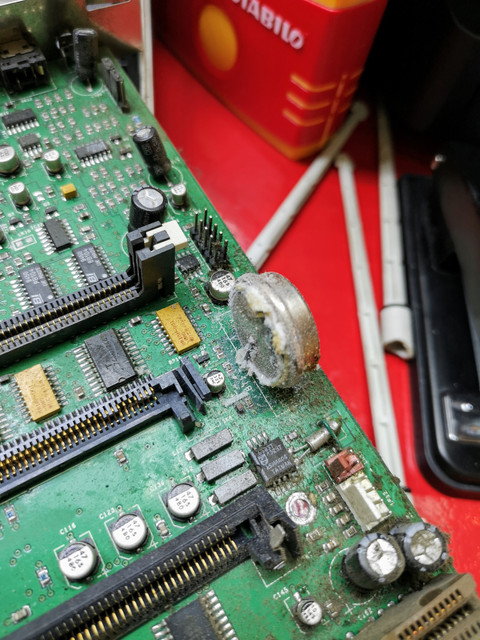
Image

So the battery was snipped off the board, the alkaline gunk neutralised and then the motherboard cleaned before it was put into storage to wait its turn in the queue.

After patiently waiting a full year, it's now getting some attention.
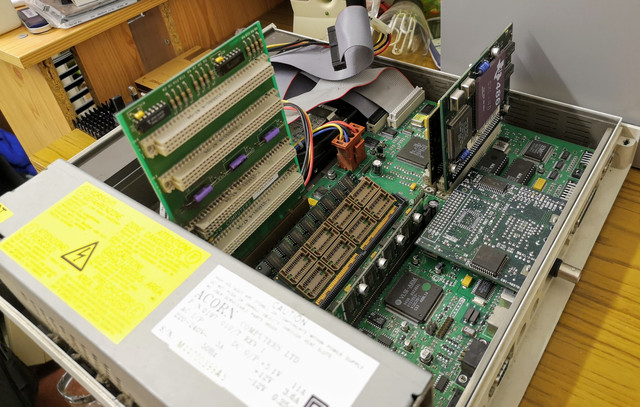
Image

We appear to have the 2Mb VIDC Memory upgrade, a StrongARM CPU upgrade board (not sure exactly which one yet), 32Mb of RAM and the 80486 expansion board (which makes me happy as the idea of being able to run DOS/Windows software in a window on a RiscOS desktop appeals to my sense of ridiculous).
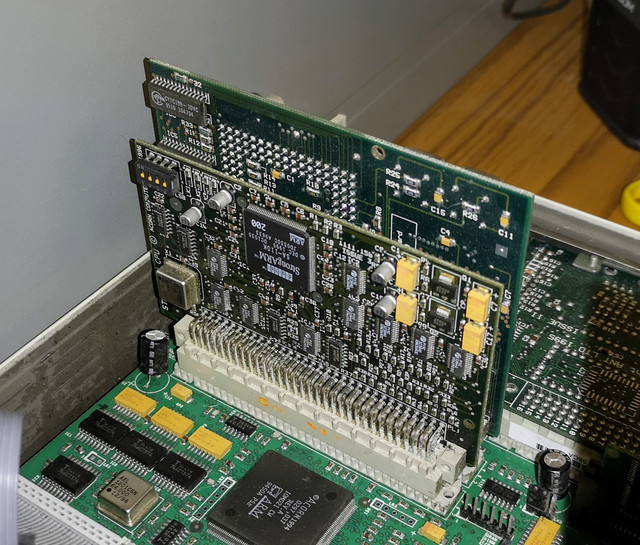
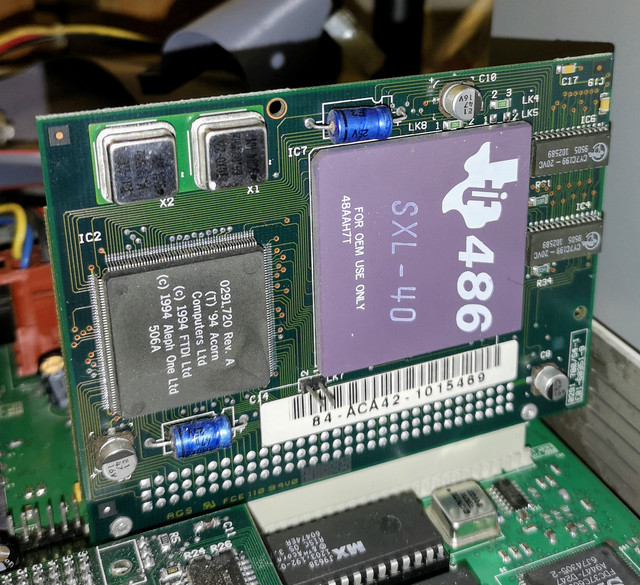
Image

Image

Also enjoyed seeing a TI branded 80486 rather than an Intel one, don't think I've come across that before.

Starting status: Dead. Well not entirely. On powering on there's a click from the speaker, the hard drive spins up (with that unmistakable "Nnnn-Wrrrriiimmmm...tick-tick-tick-clack" anyone into computers from this era can ID as a Connor hard disc), the power and hard disc LEDs light as expected (disc activity light goes out once the hard disc has spun up), the network adaptor status LED lights, and the keyboard LEDs blink showing me it's getting power, but that's it.

No soft synthesized "Boooop" sound effect, no seek of the floppy drive, no screen output, nothing. These machines are able to output quite a few POST error codes via flashing the activity light on the floppy drive, however nothing showing here.

If the CMOS data has become corrupted or left in a state which could prevent the system booting, it's possible to do a factory reset by holding down delete when powering it up. Didn't make any difference.

One of the best things about these machines is that you can get down to the motherboard (and even get that out) without needing any tools. The "slice" based case really is a clever idea.

At this point I stripped the machine down to it's bare bones and tried known good memory to no avail.

Moving on from there I made sure that all the correct voltages were all present, which they were. Nothing for it then but to pull the motherboard out for a closer examination to see if I could find any tracks broken by corrosion from the battery leakage, especially with the proximity of it to the RAM sockets. While I was there it made sense to pull every socketed chip, clean them up and reseat them.

It didn't take long for a likely candidate to turn up... though not for the reasons I was expecting. This is the chip which handles most of the system I/O, probably being vaguely analogous to the northbridge chipset on a modern conventional PC.
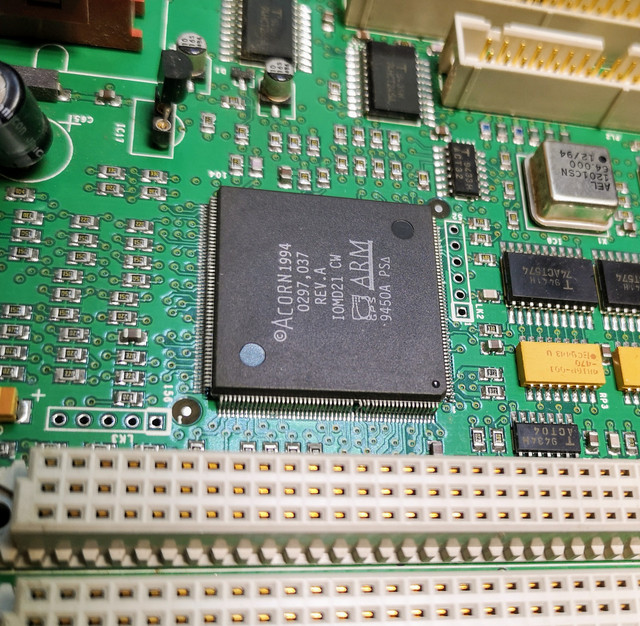
Image

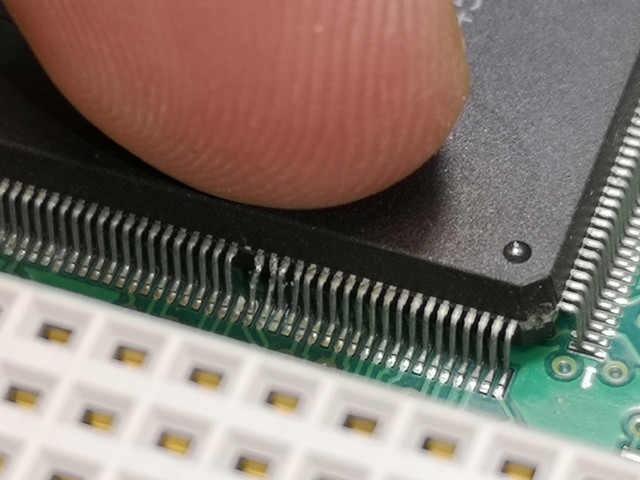
While I'm not entirely sure how this happened (best guess someone dropped one of the CPU cards on it), we have four bent and one broken pin. I could see that one was already broken, but I decided to see if I could get the remainder to bend back into shape enough to ensure they weren't actually touching each other.
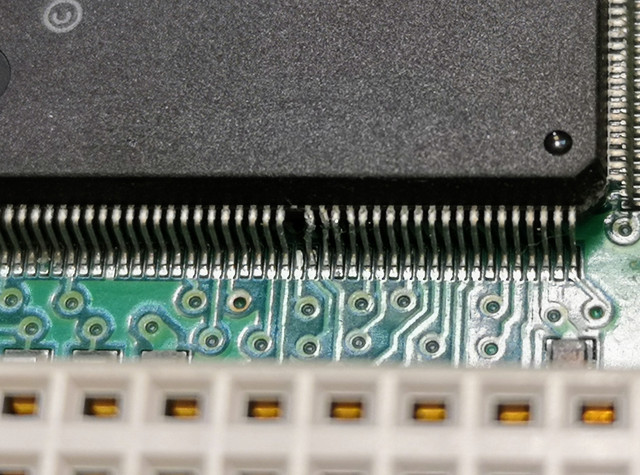
Image

To give a better idea of the sort of nanosurgery I'd need to do to repair the pin, here's a fingertip for scale.
Image

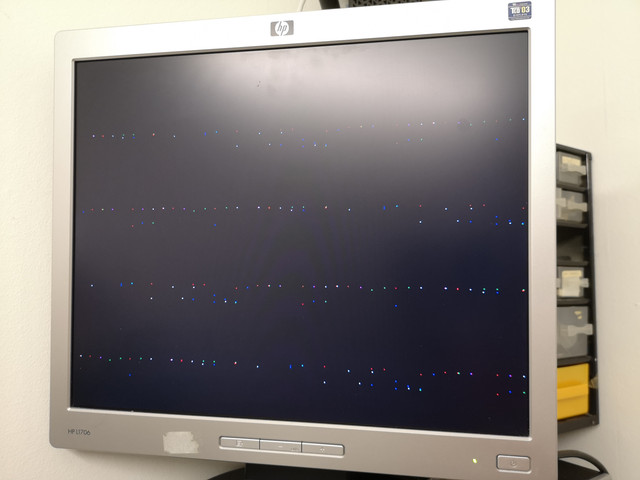
I didn't expect anything, but I figured I'd see if we had any change in behaviour with the short removed at least. I was staggered when the monitor woke up, and the floppy drive chunked its way into life for the startup seek. Still didn't boot though, was still non responsive. We did have some sign of life on the display though which was huge progress.

Image

I know that as the infamous battery is right next to the video memory expansion slot and that contact issues there are common. Sure enough wobbling the memory stick in the VIDC memory expansion slot made the pattern on screen change.
Image

A quick test to see if the problem is with that memory is simply to remove it. The machine has onboard video memory, you just don't have access to the highest resolution and colour depth modes without the expansion fitted.

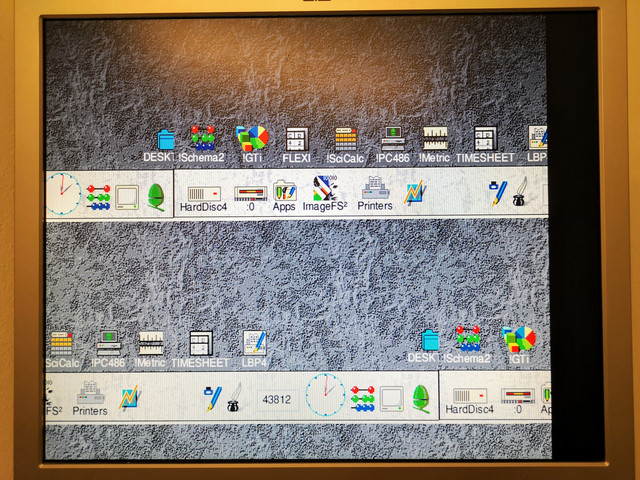
Powering up then resulted in a buzzing noise from the speaker...and the unmistakably obtrusive chatter of a Connor hard drive booting up an OS echoing around the room. I was staggered to see this then appear.
Image

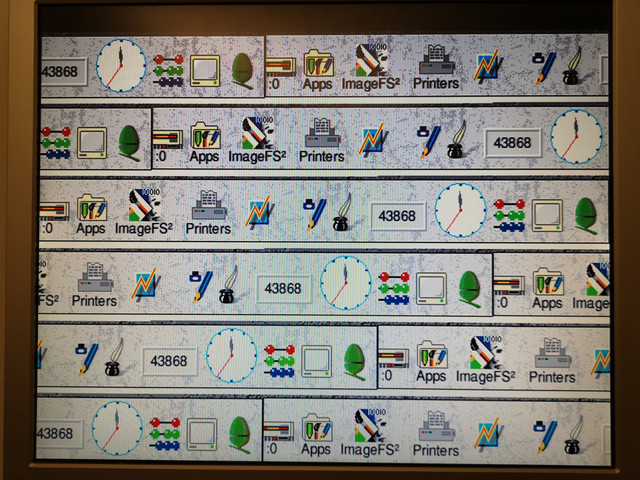
Now something is still very unhappy given the video issues that are visible...but given that there's physical damage to one of the main ICs on the motherboard, getting it to boot at all seems need miraculous to me. Seems to be 50/50 as to whether I get the above display or this...
Image

This artefact is actually a bit more complicated than it might at first look, as it's not just the screen display being folded over - it does actually seem to be getting drawn that way as the application bar scrolls left or right as you mouse over it, so it seems that we are in fact in some strange, probably invalid screen mode. It's also not just the monitor getting confused, the signal being fed in is a normal VGA signal.

Realistically I need to track down either a replacement IOMD21 chip or a parts donor motherboard before I can go forward with this. There's just no way on earth that I can repair what I've got with the equipment and experience I have. I'm just not set up for nanosurgery like this.

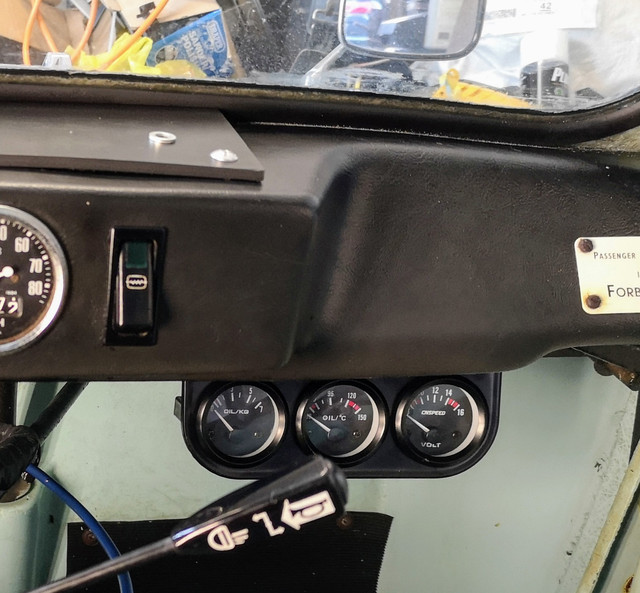
While I had the workbench clear I set about wiring up the additional instrument pod for the Invacar, just need to bolt it in place and add the senders for that. My intention is for it to sit roughly here.
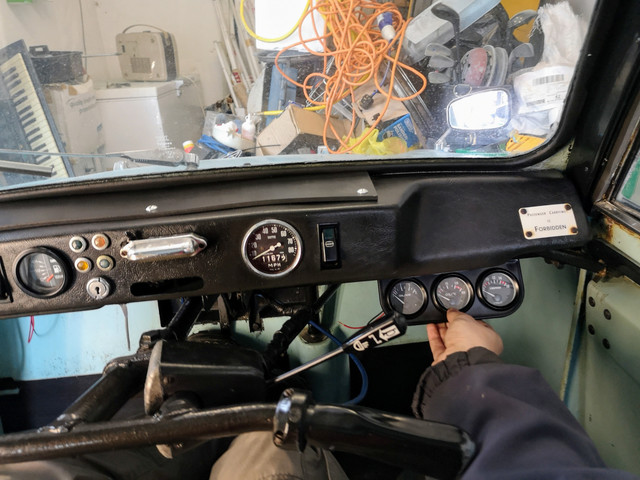
Image

The exact angle will be chosen to minimise reflections in the face of the gauges. They're just cheap random ones I've accumulated over the years in there at the moment, but I'll try to replace them with more period correct Smith's or similar ones as time goes on and I find appropriate gauges at autojumbles etc. I'm not willing to pay what seems to be the going rate for them on eBay these days. This will be getting attached to a metal bar that runs under the dash rather than to the plastic itself, so won't put any additional strain on the already brittle plastic or anything like that. It will also be removable in the future without leaving any visible evidence if I decide to get rid of it.

I've no real interest in the absolute values that these gauges will show me, I'm far more interested in observing what the baseline for "normal" is for my engine, then any sudden deviation from that norm will be cause for investigation. I may feel that in the more distant future that it's unnecessary, but I'd like to be able to keep tabs on things until I've got at least a couple of thousand miles covered trouble free. Given I do have plans for a long trip in mind which will probably involve a lot of sustained high speed driving, I feel that it's a good idea to have the pod there at least until that's happened. If I was purely trundling around locally I'd be less bothered.

-- -- --

I thought that I'd resolved the issue with water finding its way in through the driver's door on the Jag...
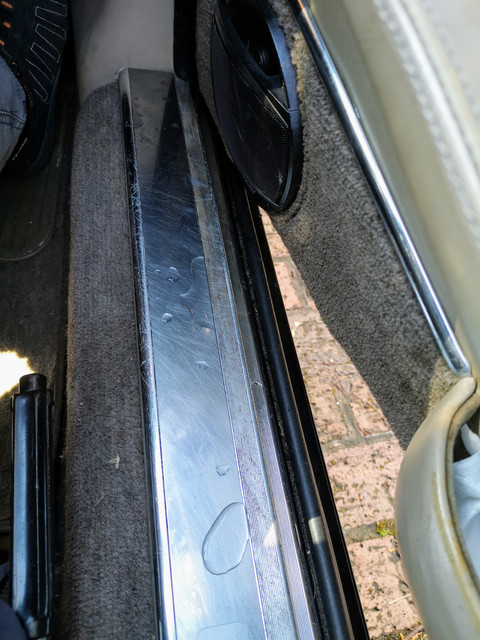
Image

...Apparently not. Looks like I'll be having to pull the door apart again then. We will have to see if I get bored enough to tackle that next week.

This afternoon I decided it would be fun to stand on my head under the dash of the Invacar for half an hour.
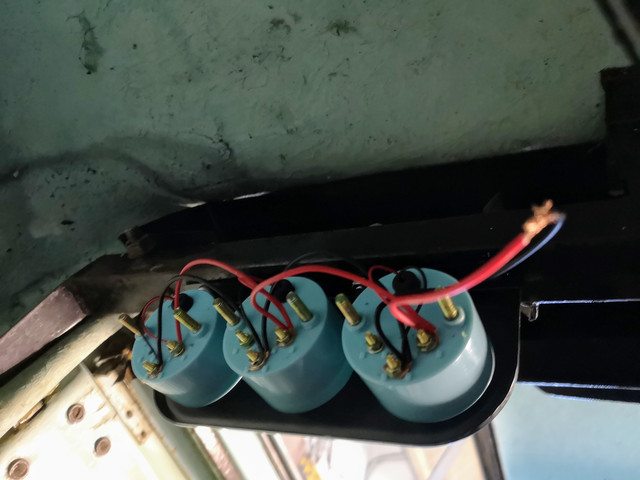
Image

Before anyone says anything, I'm waiting for the package with the ring terminals small enough for these terminals to arrive from eBay, I got fed up of waiting...when they arrive I'll terminate the wiring properly.

I've simplified the wiring into the car a bit by just thing the illumination and power supply to the gauge pod together, so it will just be lit whenever the ignition is on. So all I'll need is an ignition switched live, a ground (which will be attached to the bracket once I've got ring terminals), and the two sender lines. "Keep it simple, stupid!" Is an approach I like.

Hopefully the wiring will be done this weekend. Need a couple of adaptors for the senders (also in the post) but no reason I can't get the wiring done.

Doesn't look too out of place.
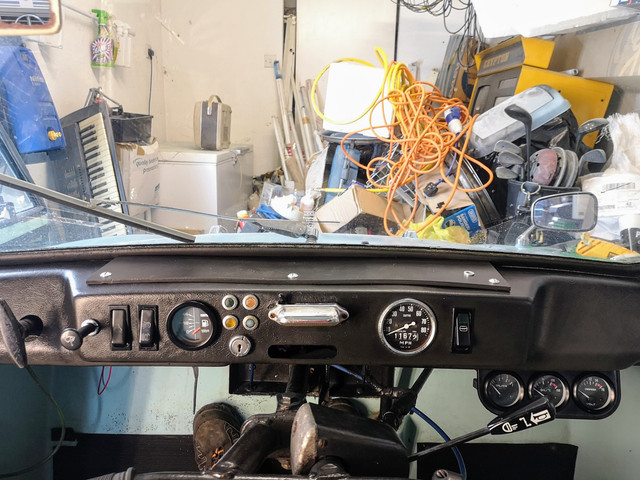
Image

Will obviously look better once I get some period gauges in there rather than the cheapie Chinese nonsense currently in there. These have been in the garage for goodness only knows how long though so seemed the sensible choice.
Image

Will serve the purpose for now though even if they're a little cheap and nasty.

Current fleet:
07 Volvo V70 SE D5, 85 Sinclair C5, 84 Trabant 601S, 73 AC Model 70, 62 Rover 110.
User avatar
Zelandeth
Donor 2024
Posts: 5285
Joined: 16 Nov 2014, 23:36
x 1591

Re: Zel's Fleet Blog - Xantia Activa, Jag XJ-S, Sinclair C5, Mercedes 208D, AC Model 70.

Unread post by Zelandeth »

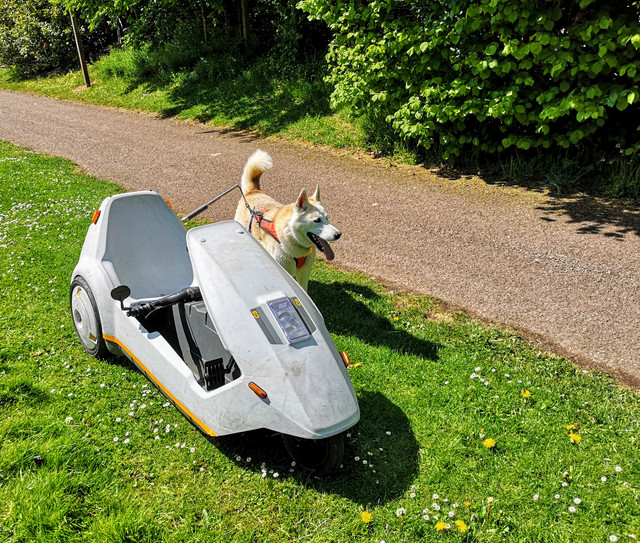
Thanks to his walks having been quite a bit shorter than usual lately Tesla has been bouncing off the walls a bit this last few days. Figured it made sense to get him a bit of extra exercise today then and took him out for a run.

Image

Nice spot to pause for a breather (mainly for canine temperature management as he has zero concept of how to pace himself).

Image

I really do need to pick up a new battery for the C5 though. It was struggling last year but I was able to nurse it through to the end of the year. It's getting a bit beyond tired now and is really annoying.

While I'd like to go down the road of a proper lithium polymer setup one day the costs involved are just prohibitive at this stage. By the time you've bought the batteries, a proper charger and upgraded the control hardware to properly take advantage of it you can very easily have spent north of £500.

A decent sounding halfway house seems to be lithium-iron-phosphate battery technology. This seems to have come down in price quite a bit over the last couple of years. While it's not quite as much of a game changer as lithium polymer you're still looking at a battery that's half the size and about a third of the weight of an equivalent lead-acid one. Plus they're far better suited to a deep cycle application like this compared to a normal automotive battery. I'm currently seriously considering this one.. The weight saving and lower self discharge rate are attractive enough on their own. I'll let you know how I get on with it if I do go down that route.
Got a couple of small things done on the Invacar this afternoon too.

First up was refitting the infill strips on the gutters. This is important from a weatherproofing perspective as it covers the retaining screws. Plus it makes the car look far less unkempt.

Image

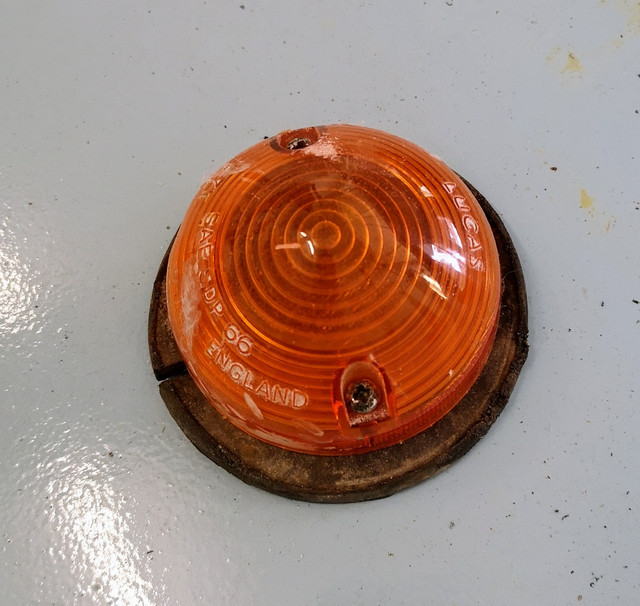
I had initially planned on changing the front indicator seals, however can't find them. I was absolutely sure I knew which box they were in...apparently I was wrong. No huge loss as the whole indicator units are like £2 each, so I've just ordered a pair of new ones. The lamp holder in the nearside one is somewhat temperamental and the lenses aren't the best anyhow, so a fresh set probably isn't the worst idea ever.

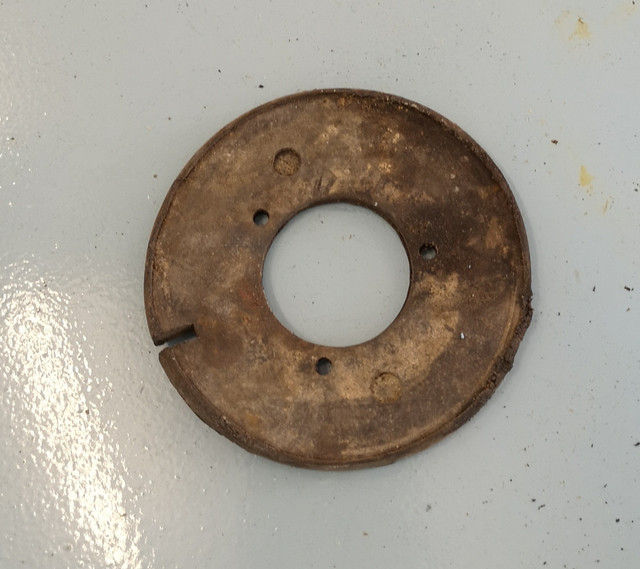
The one light seal I did find appears to be for an Invacar Mk12 tail light I think...definitely nothing Model 70 related anyway.

Image

With one of my indicator lenses for scale you can clearly see it's larger in diameter.

Image

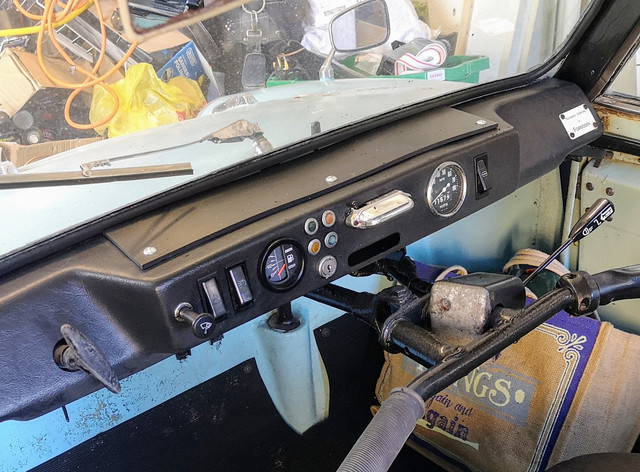
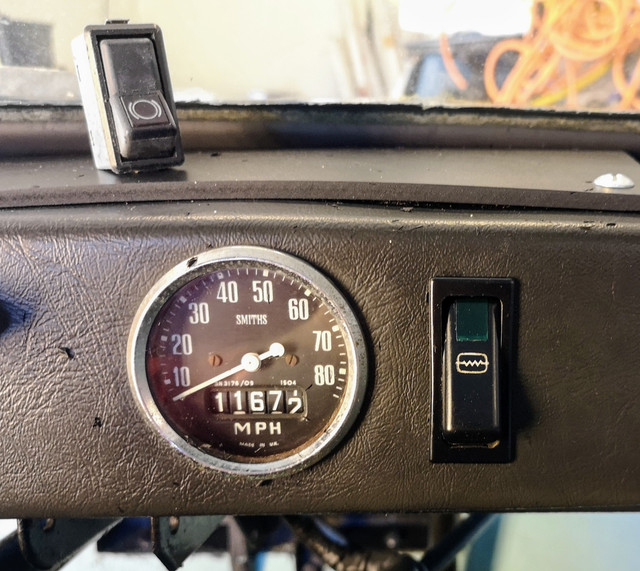
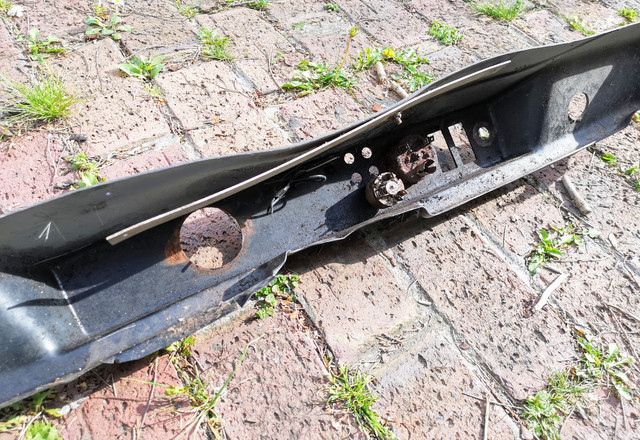
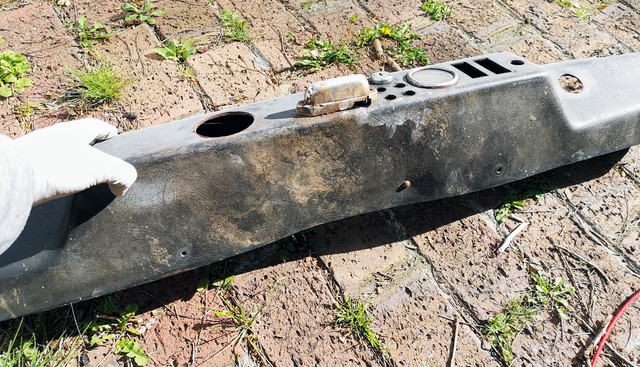
While rummaging around in the back of the garage I took the opportunity to drag my spare dash out into the land of the living. It's scruffy and needs a really good tidy up, but there are no cracks or holes in the surfaces you can see. Just a couple of small cracks in the lower edge around where it attaches to the bar under the dash.

Image

The issue with them warping across the top is purely because the only support there is a tiny little flat bit of metal screwed to the top in three places that doesn't even extend to the ends of the dash.

Image

Which as you can see from the shape of it, seems to bend more easily than the dash plastic itself. I'm sure I can engineer a better solution than this. It's spent a lot of time outside though so everything attached to it is rusted beyond hope. Getting the fuel gauge out will be fun I think...

I'll see how well it tidies up. If it ends up looking decent I will probably look to swap it for the one in the car. I prefer it not having a gaping hole where the dash mounted gear selector would be if it had one anyway.

I've got some serious scrubbing to do...

Image

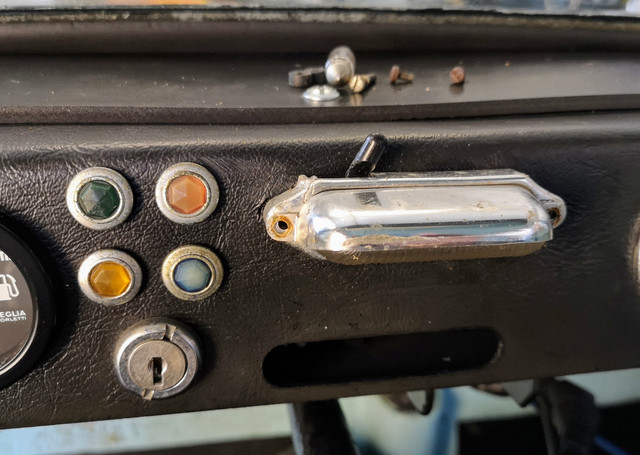
Speaking of the dash, something which had been bugging me no end in the car was the hole just above the interior light. Don't seem to have a recent photo showing it so had to delve into the archives, this was taken when I was experimenting with possible locations for additional warning lights. You can see there's a hole just above the left hand end of the interior light.

Image

Resolving this involved dismantling the light, removing it from the dash and moving it upwards about 10mm.

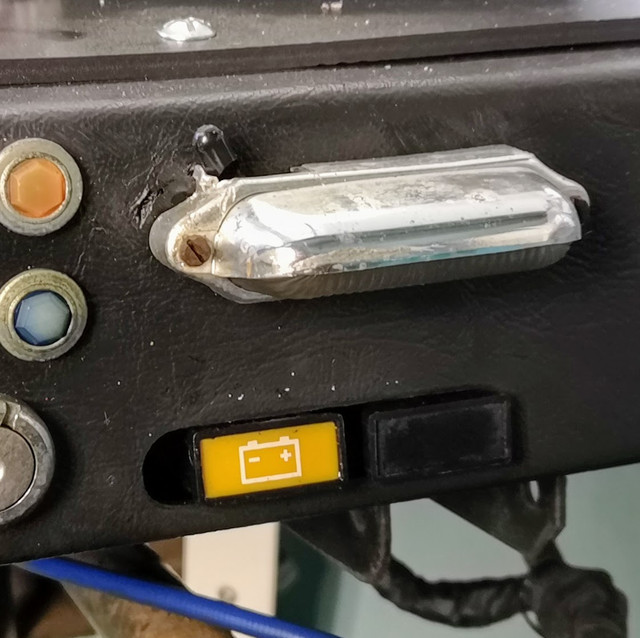
There's still a you've out of the plastic by the left hand screw but it's a lot better than it was.

Image

Little things in the extreme but at the end of the day they all add up.
Current fleet:
07 Volvo V70 SE D5, 85 Sinclair C5, 84 Trabant 601S, 73 AC Model 70, 62 Rover 110.
User avatar
Zelandeth
Donor 2024
Posts: 5285
Joined: 16 Nov 2014, 23:36
x 1591

Re: Zel's Fleet Blog - Xantia Activa, Jag XJ-S, Sinclair C5, Mercedes 208D, AC Model 70.

Unread post by Zelandeth »

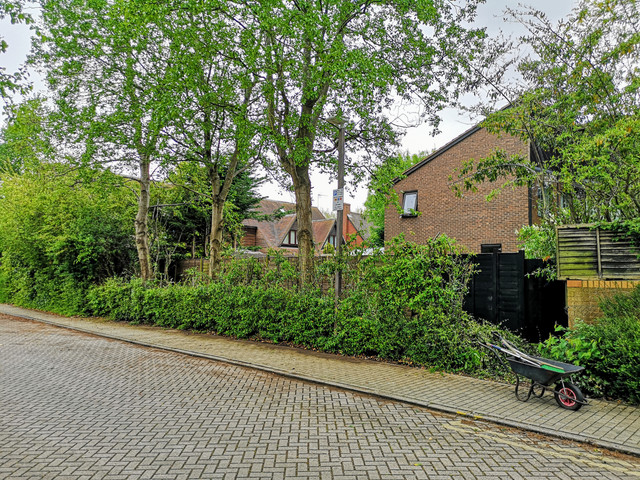
Yet another day where gardening ate up most of the day. Did at least feel like we achieved something though. The hedge along here was originally high enough along this whole stretch that the streetlight was almost entirely hidden.

Image

The whole lot will be coming out at some point and the fence pushed back to just behind the trees, but this is a step in the right direction.

Did mean that I didn't have much time left for the cars though. The Invacar has always had one small oil leak from the sump drain plug. Nothing major but it always left a drip or two in the garage.

Given she was due an oil change I figured this was a good time to investigate that.

Yeah...the state of this might have something to do with it.

Image

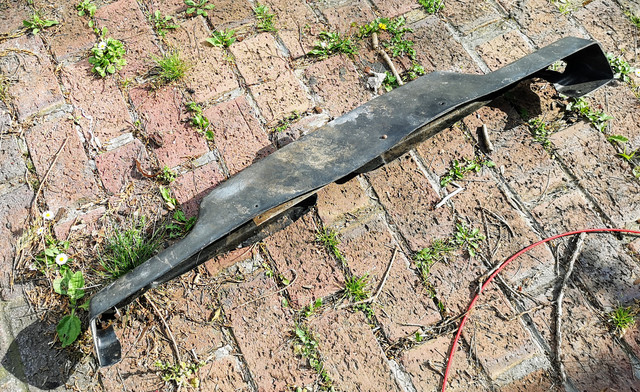
Generally I think that sump washers aren't generally meant to be conical!

I couldn't find another one the right size, so battered it back into a vaguely flat shape and added a smear of instant gasket. I'll get a replacement ordered in and change it the next time the oil gets dropped (which won't be far down the road given I'm wanting to do the best to wash the inevitable gunk out).

I need to have a think about where I'm going to put the oil pressure and temperature sensors.

The pressure sensor can't just go where the pressure switch usually lives as there's no room for it. The distributor is too close to it. I'll need to make up a line to relocate a T connector to somewhere where there's more room.

The temperature sensor is going to be a bit trickier. I'm guessing that the easiest solution would be to get an adaptor to thread into the sump plug and to put it in there. The other option I can immediately think of would be to get hold of a second oil pickup strainer assembly and drill and tap a hole for it in that. That looks suspiciously similar to the plate that VW used as the engine drain on the Beetle/Transporter engines... I'll need to check the dimensions, because if they are the same size that could make my life easier...
Current fleet:
07 Volvo V70 SE D5, 85 Sinclair C5, 84 Trabant 601S, 73 AC Model 70, 62 Rover 110.
User avatar
Zelandeth
Donor 2024
Posts: 5285
Joined: 16 Nov 2014, 23:36
x 1591

Re: Zel's Fleet Blog - Xantia Activa, Jag XJ-S, Sinclair C5, Mercedes 208D, AC Model 70.

Unread post by Zelandeth »

For the first year since 2016, all hell has not been breaking loose and preventing me from being able to shop around to sort my car insurance on the Xantia, as such I've been getting utterly taken for a ride by Adrian Flux.

The renewal this year actually dropped for the first time in living memory, to just over £800, from just over a grand.

Sorted with another provider for £220 for better cover. I'm looking forward to calling and telling them to get lost.
Current fleet:
07 Volvo V70 SE D5, 85 Sinclair C5, 84 Trabant 601S, 73 AC Model 70, 62 Rover 110.
User avatar
white exec
Posts: 7445
Joined: 21 Dec 2015, 12:46
x 1751

Re: Zel's Fleet Blog - Xantia Activa, Jag XJ-S, Sinclair C5, Mercedes 208D, AC Model 70.

Unread post by white exec »

Lots of fun reading this blog, Zel, and some great photos.
A couple of recent ones...
One of Jim's ping f*ckits?
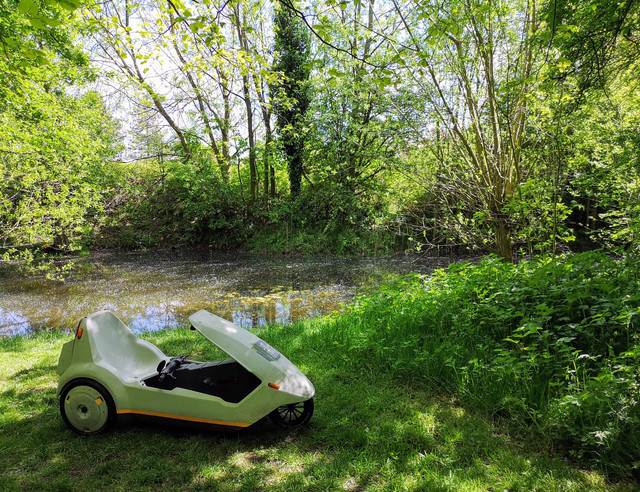
I wandered lonely as a C5, by still waters...
And your shot of the dash light on the Invacar reminded me I still have a set of four of these - courtesy lights from a Rover P5...
P5 courtesy lamp.JPG
Chris
User avatar
bobins
(Donor 2025)
Posts: 6842
Joined: 05 Jul 2012, 18:07
x 3562

Re: Zel's Fleet Blog - Xantia Activa, Jag XJ-S, Sinclair C5, Mercedes 208D, AC Model 70.

Unread post by bobins »

Apart from the body, chassis, and steering yoke - what was actually custom built just for Invacars, as opposed raids on various parts bins ?