
A wire pulled out of the battery box and needed reattached
DIY with function over finesse!!
-
Dormouse

- Donor 2024
- Posts: 2145
- Joined: 15 Apr 2021, 14:32
- x 696
Re: DIY with function over finesse!!
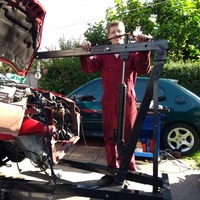
And for the doubters who don't think you can solder cushion's, I just snapped this before LOML tucked it all back together.
A wire pulled out of the battery box and needed reattached
A wire pulled out of the battery box and needed reattached
-
NewcastleFalcon

- Posts: 26399
- Joined: 25 Feb 2009, 10:40
- x 7162
Re: DIY with function over finesse!!
I have two virtually identical Sony compact cameras. The first one after a good few years of decent operation failed and started turning out useless images some kind of failure of the sensor or lens function. Not exactly repairable. Just replaced it with a newer version of the same camera Sony Cyber Shot DSC-W810 20.1 mega pixels 6x optical zoom.
In an effort to investigate the old one I took it to bits, and put it back together with no resolution of the problem.
I now have a problem with charging my replacement, now past it's guarantee period. It neither charges up with my original usb charger or the new one which came with the camera. Nothing wrong with either charger the new one has never been used.
The problem lies with the "micro usb" connector on the camera. It neither allows charging or transfer of files from the camera to the laptop. Having taken the old camera to bits I will not be undoing a single screw on the new camera. There is no worthwhile repairing of that female connector on the pcb that receives the micro usb male connector from the charger/ or to the laptop for upload of files from the camera.
So on order is a charger which you take the battery out of the camera and place it in the cradle to recharge to get over the inability to charge the battery when in situ on the camera. The file transfer can be done with the removable SD Card where previously I used the cable.
The camera uses a NP-BN Battery....with 3 terminals +ve C and -ve . Needs a bespoke charger with the matching connections hence the one on order.
Don't like being without a camera so managed today to charge up the battery using the old camera. Would have been straightforward because the charging connection of the old camera does work, but a minor modification involving half a rubber tap washer and a hairband was necessary to keep the battery pressed against the terminals on the in situ charger. (I have "lost" the clip that maintains the battery in position on the old camera).
Did the job, battery fully charged camera back in action, pending arrival of the "off camera" charger.
Several aspects of this very nearly made it into room 101 including the un-standard nature of camera batteries, their "intelligence" and the need for a bespoke charger. Of course not being a camera expert these may be merely misconceptions on my part.
Regards Neil
Only One AA Box left
687 Trinity, Jersey
687 Trinity, Jersey
-
CitroJim

- A very naughty boy
- Posts: 54645
- Joined: 30 Apr 2005, 23:33
- x 8130
Re: DIY with function over finesse!!
I still have a few 'proper' cameras Neil, including a Olympus that uses a very similar battery to yours and a very posh Canon...
Truth is, I've not used any of them for years as my mobile phone cameras do all I need and arguably, especially in my 'burner' Samsung, is better than any of my proper ones!
I still keep my proper ones charged and regularly exercised just to keep them good, just in case...
Truth is, I've not used any of them for years as my mobile phone cameras do all I need and arguably, especially in my 'burner' Samsung, is better than any of my proper ones!
I still keep my proper ones charged and regularly exercised just to keep them good, just in case...
Jim
A bit of a Citroen AX fan...
A bit of a Citroen AX fan...
-
NewcastleFalcon
- Posts: 26399
- Joined: 25 Feb 2009, 10:40
- x 7162
Re: DIY with function over finesse!!
Amazon prime reputation intact new charger delivered again when they said they would and pretty quick for the time of year ordered Sunday delivered Tuesday. Two new batteries and the off-camera charger for £17 ish.
Regards Neil
Only One AA Box left
687 Trinity, Jersey
687 Trinity, Jersey
-
mickthemaverick

- Moderating Team
- Posts: 20296
- Joined: 11 May 2019, 17:56
- x 7840
Re: DIY with function over finesse!!
That charger only appears to have two connecting tabs Neil. which obviously is sufficient to charge a battery but begs the question why does the battery have three? My guess is a common negative with a low current positive to feed the normal things like screen shutter etc and maybe a higher current positive which feeds the zoom motor and the flash perhaps? Thus three terminals for discharge and only two used for charging? 
I used to be indecisive, now I'm not so sure!
I used to ride on two wheels, but now I need all four!
I used to ride on two wheels, but now I need all four!
-
NewcastleFalcon
- Posts: 26399
- Joined: 25 Feb 2009, 10:40
- x 7162
Re: DIY with function over finesse!!
I dont really know Mick. The normal charger with the camera which plugs into the camera via the micro-usb end, or the battery itself may have some features which identify the battery type, and have a little additional circuit to monitor the temperature of the battery to prevent overcharging.mickthemaverick wrote: 20 Dec 2022, 18:28 That charger only appears to have two connecting tabs Neil. which obviously is sufficient to charge a battery but begs the question why does the battery have three? My guess is a common negative with a low current positive to feed the normal things like screen shutter etc and maybe a higher current positive which feeds the zoom motor and the flash perhaps? Thus three terminals for discharge and only two used for charging?
The original supplied battery infor from Sony
The NP-BN is specially designed for camera models for which it is supplied. There is no difference from the optional NP-BN1 in terms of the battery performance and battery life.
NOTES:The NP-BN battery pack cannot be used with a camera for which it is not originally supplied with.
Found this on a search. Seems fair enough but they may be talking rubbish! The Terminal is marked as "C" on the original NP-BN battery.
The third pin is usually for an internal temperature sensor, to ensure safety during charging. Cheap knock-off batteries sometimes have a dummy sensor that returns a "temp OK" value regardless of actual temperature.
Some higher-end batteries have internal intelligence for charge control and status monitoring, in which case the third pin is for communications.
Regards NeilThat third contact is connected to an internal thermistor, enabling the charger to measure the battery temperature.

Only One AA Box left
687 Trinity, Jersey
687 Trinity, Jersey
-
mickthemaverick
- Moderating Team
- Posts: 20296
- Joined: 11 May 2019, 17:56
- x 7840
Re: DIY with function over finesse!!
Thanks for that Neil, I had a dig myself but got fed up with the Sony site keep asking about cookies etc. Then logically maybe the 'C' terminal on yours is a 'control' terminal and works as that diagram shows! Every day's a school day!! 
I used to be indecisive, now I'm not so sure!
I used to ride on two wheels, but now I need all four!
I used to ride on two wheels, but now I need all four!
-
NewcastleFalcon
- Posts: 26399
- Joined: 25 Feb 2009, 10:40
- x 7162
Re: DIY with function over finesse!!
Thanks Mick appreciate you having a look, dont really need to put the batteries on their first charge yet to see if the new charger works. The two new batteries supplied are NP-BN1 which according to Sony are the same as the original NP-BN except they can be used on other cameras whereas the originals if I read it right can only be used on the camera they were originally supplied with. The charger is a NP-BN1 charger so fingers crossed when it comes to the first charge up it just worksmickthemaverick wrote: 20 Dec 2022, 19:13 Thanks for that Neil, I had a dig myself but got fed up with the Sony site keep asking about cookies etc. Then logically maybe the 'C' terminal on yours is a 'control' terminal and works as that diagram shows! Every day's a school day!!
Seeing as my package contained 2 Lithium Ion Batteries it needed one of these!

Regards Neil
Only One AA Box left
687 Trinity, Jersey
687 Trinity, Jersey
-
mickthemaverick
- Moderating Team
- Posts: 20296
- Joined: 11 May 2019, 17:56
- x 7840
Re: DIY with function over finesse!!
Since the cold spells this winter, it has become apparent that the insulation in our downstairs loo is not up to the job. We have a choice of leaving the loo door open which allows the downstairs heating to warm the room, but also increases demand on the system as it leaks heat like a sieve, or option two keep the door closed and retain our cosy downstairs, reduce the gas consumption but suffer potential hyperthermia when going to the loo!! Obviously the solution is to radically improve the insulation in the loo!!
Our loo is in fact our old front door lobby converted to a downstairs loo as we needed one and that was the easiest option I could see. I took out the side window in the dining room which only looked out onto the garage wall, knocked out the wall below it and installed our new 'front' door on the side where it opens into the covered walkway between the house and garage which now also serves as a porch. (I'd rather it served as a Ferrari but you can't always have perfection! )
That left me clear to convert the old entry lobby into the much needed loo which I set about with gusto. Unfortunately I soon ran into a problem as it was pointed out to me that, on our estate, planning permission was required to significantly alter the front elevation and removing the front door was considered a significant alteration! So, as I didn't want to jump through those hoops (see the thread title!), I decided to leave the old front door as it was and simply seal it up, seal the letterbox and then hang a blind on the inside to make it look like a wall to users!!
While that worked well from an aesthetic point of view the recent cold weather has shown the door to have significant draughts around the frame causing the problem I mentioned above. So today I decided to take the bull by the horns and install a new internal frame housing 15mm of polystyrene insulation and the supporting the blind as before to please you know who!
I'm afraid I forgot to take a picture of it as it was before I started, but here is the new insulation and frame I have fitted this morning followed by the finished project with the blind back in situ. SWMBO came home as I was typing this and her reaction was 'Oh you haven't done it then?'
Our loo is in fact our old front door lobby converted to a downstairs loo as we needed one and that was the easiest option I could see. I took out the side window in the dining room which only looked out onto the garage wall, knocked out the wall below it and installed our new 'front' door on the side where it opens into the covered walkway between the house and garage which now also serves as a porch. (I'd rather it served as a Ferrari but you can't always have perfection!
- Own work
While that worked well from an aesthetic point of view the recent cold weather has shown the door to have significant draughts around the frame causing the problem I mentioned above. So today I decided to take the bull by the horns and install a new internal frame housing 15mm of polystyrene insulation and the supporting the blind as before to please you know who!
I'm afraid I forgot to take a picture of it as it was before I started, but here is the new insulation and frame I have fitted this morning followed by the finished project with the blind back in situ. SWMBO came home as I was typing this and her reaction was 'Oh you haven't done it then?'
- Own work
- Own work
I used to be indecisive, now I'm not so sure!
I used to ride on two wheels, but now I need all four!
I used to ride on two wheels, but now I need all four!
-
Gibbo2286
- (Donor 2020)
- Posts: 8170
- Joined: 08 Jun 2011, 18:04
- x 2943
Re: DIY with function over finesse!!
My workshop foreman back in Brum installed a downstairs loo, he had to break into the main sewer in the street about halfway down a steep hill.
He said "Blimey those turds come down like express trains."
He said "Blimey those turds come down like express trains."
Anyone who has never made a mistake has never tried anything new. (Albert Einstein)
-
CitroJim
- A very naughty boy
- Posts: 54645
- Joined: 30 Apr 2005, 23:33
- x 8130
Re: DIY with function over finesse!!
Great work Mick
I howled at that...
We have the opposite problem here. Not enough fall on ours and rodding is a regular task... Every six months or so I find myself up to my elbows in s*^t
It's made worse by all our houses sharing a common drain. We are in series so I get all the 'stuff' from upwind of me

Things have been a lot better since neighbours' kids have grown up and no longer using baby wipes...
Gibbo2286 wrote: 24 Jan 2023, 17:08 My workshop foreman back in Brum installed a downstairs loo, he had to break into the main sewer in the street about halfway down a steep hill.
He said "Blimey those turds come down like express trains."
We have the opposite problem here. Not enough fall on ours and rodding is a regular task... Every six months or so I find myself up to my elbows in s*^t
It's made worse by all our houses sharing a common drain. We are in series so I get all the 'stuff' from upwind of me
Things have been a lot better since neighbours' kids have grown up and no longer using baby wipes...
Jim
A bit of a Citroen AX fan...
A bit of a Citroen AX fan...
-
mickthemaverick
- Moderating Team
- Posts: 20296
- Joined: 11 May 2019, 17:56
- x 7840
Re: DIY with function over finesse!!
Well today I decided it was time to do something about this:
As you can see both the panels are in a very poor state and rotting away as we look at them. The ivy has also gained a strong hold and the whole thing needs replacing.
There followed an intense period of ripping, cutting, wrenching, hammering and digging before the entire panels were removed and headed for the recycling bins. Unfortunately at that moment the body clock insisted I visit the small room and then SWMBO offered a cuppa and a piece of Manor House cake. There followed much slurping and munching which resulted in a further visit to the small room before returning to the task.
Unfortunately I had forgotten the camera by then so no images are available of the midway stage.
There followed another period of sawing, drilling, hammering and screwing until, in accordance with the title of the thread, I was happy with the end product!!
- Own work
- Spoiler: show
I used to be indecisive, now I'm not so sure!
I used to ride on two wheels, but now I need all four!
I used to ride on two wheels, but now I need all four!
-
MattBLancs
- Donor 2024
- Posts: 5028
- Joined: 25 Apr 2022, 09:03
- x 2195
Re: DIY with function over finesse!!
(Tweaked your words a touch!)
P.S. I've got a fence (or perhaps at some point I should be calling it a hedge?) Like that too. Unfortunately my ivy has proven not up to the task, so recently winds are causing the fence elements of the assembly to loose the fight with gravity. Must do something about that as looks alright state!mickthemaverick wrote: 04 Feb 2023, 17:28 As you can see both the panels are in a very poor state and rotting away as we look at them. The ivy has also gained a key structural role in proceedings
-
myglaren

- Forum Admin Team
- Posts: 28462
- Joined: 02 Mar 2008, 13:30
- x 5592
Re: DIY with function over finesse!!
Disposing of non-functioning dishwasher and dragging the washing machine into the kitchen to replace it and allow more room for clutter in the utility room, much bodgery® took place and it is still ongoing.
Raking through toolboxes to find the right bodging equipment what do I find but this:-
You may think that this is a cushioned box spanner and it certainly looks like it could be, but in reality it is a precision tool to locate the clutch plate accurately, IIRC from my GS but possibly my neighbour's Ford Cortina Crusader.
Which while doing I dropped the gearbox on my hand and almost lost my little finger, still bears the scar and aches in cold weather.
No idea why the tape is still on it but been there for forty years or more.
-
mickthemaverick
- Moderating Team
- Posts: 20296
- Joined: 11 May 2019, 17:56
- x 7840
Re: DIY with function over finesse!!
Having turned off the house heating it is warmer in the garden at the moment than in our North West facing lounge so, inspired by Jim's thread, I decided it was time to remove the winter cover from the Dahlia bed and see if there were any shoots visible!! Ever realised you've left something too long? 
oops!!
- Own work
- Own work
- Own work
I used to be indecisive, now I'm not so sure!
I used to ride on two wheels, but now I need all four!
I used to ride on two wheels, but now I need all four!