Im going to start with a picture as others have expressed some interest in this little setup.
so here it is: It would cost a lot of money to have an adaptations company do this for you.
I am loosing feeling in my feet through Neuropathy I can move my feet and legs fine they are just numb.
I would like to help anyone else in similar circumstances. Neuropathy is linked to diabetes and ageing.
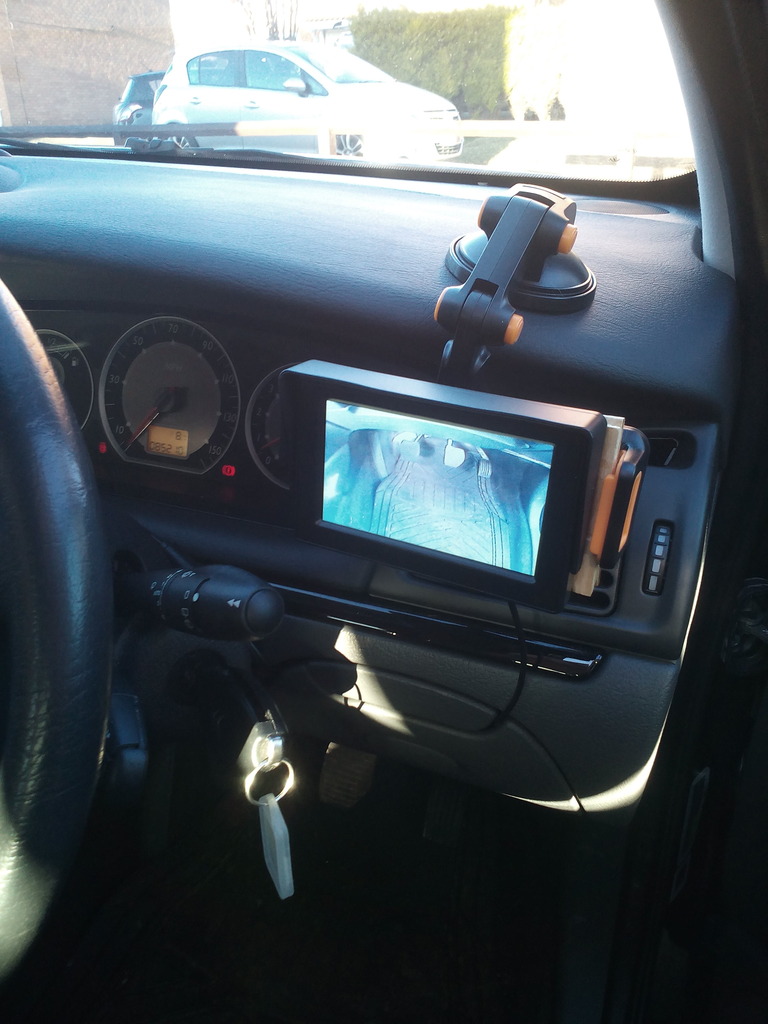
Ok this is the camera it must be forward facing giving a (NON-Reversed image) and have no reverse parking lines transmitted to the display screen.
it is mounted to the bottom cowling of the steering column with the supplied screws
a pointy braddle was fine to make the holes for the screws. some of the parts come from china but I just had to be patient waiting for them to arrive.
it keeps costs down.
http://www.ebay.co.uk/itm/1PCS-Useful-C ... 1825592707
Now the screen: This can be a bit tricky because many screens are developed for reverse parking with parking guide lines on the image in either pal the British format or NTSC the American format for tv pictures.
The little camera is both pal and NTSC formats so we need a screen with no parking lines on the image and pal & / or NTSC compatibility to match the little camera.
heres a link:
https://www.amazon.co.uk/BW-Monitor-Dig ... B0056WJP1M
At this point you will need 1 x yellow MALE Phono connector lead for the FEMALE video connection plugs x 2 to route the video from the camera to the screen the length of each I will leave for you to determine. secondly a suitable three or four socket 12 volt dc in car Cigarette socket expansion extension lead.
Phono lead Link
https://www.amazon.co.uk/CDL-Micro-Sing ... +lead+male.
Cigarette socket expansion link.
http://www.ebay.co.uk/itm/12V-24V-Volt- ... SwA3dYReV0
and Now the all important bracket to hold the screen which isn't a perfect fit right from the off I had to aeroldite using wilkos waterproof epoxy two standard wooden clothes pegs side by side and glue them together once I had removed the springs, I then epoxied to the depth of one peg to each end of the back of the display screen two glued together pegs. this provides grips for the phone holder (link below) to grip to screen and a stand off for the adjustment buttons on the back of the cctv screen and its stand mounts. it works very well. it does help to roughen the surface on the back of the screen for the glue to bond to.
Link to phone mount bracket.
https://www.amazon.co.uk/gp/product/B01 ... UTF8&psc=1
you will also need a sat nav dashboard mounting disk the biggest you can buy which will help with adjustment later and initial bonding to the dashboard these are available from Halfrauds for £2.99 each. at this point it is worth noting that sticking one of these mounting disks to the dashboard in midd winter is nigh on impossible unless you do what I did, firstly using a clean cloth/rag clean the mounting area with methylated spirits and dry, then attach the disk to your articulated phone mount, peel off the sticker cover and warm the dashboard and the sticker with a hairdryer on high heat then press the base attached to your phone mount down hard on the dashboard, holding down the sat nav mount release the phone holder from the mount and push down hard on the sat nav disk to get it to bond to the dashboard, allow to cool before remounting the articulated phone mount and mounting the display screen.
you will also require 2 x 12 volt dc cigarette socket plugs, I paid a little extra at wilkos car mart for the ones with the protruding wires which made life a little easier. you will need a multimeter when your screen and camera arrive to determine the polarity of these cigarette socket plug leads so you are ready to solder the leads to the red and black leads of the camera and screen.
I hope you have not spent any more than £50.00 for all of it. I asked a Motability specialists what it would cost and they said £1,000.000
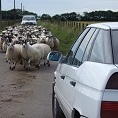
My system is in a C5 Mk2 and all the wiring is buried in the drivers side Dashboard pocket.
The camera lead is not attached to the dashboard it is simply routed to the left and slung over the steering column cowling then shut in the dashboard compartment door.
power is taken from the front ciggy lighter socket activated on ignition only, and routed in the gap alongside the ashtray and stereo up over the steering column and into the drivers dashboard compartment next to the passenger airbag switch. the gap in the dashboard pocket door is sufficient to accommodate the wires without putting any pressure on the dashboard pocket door.
Lighting for night time use is at present a problem I purchased an IR illuminator but its rubbish so I'm looking to adapt it with a mounted side light bulb under the C5 drivers seat to light up the foot well at night. I shall come back and edit the light bit in when I figure something out. I will also add more pics later.