Latest purchase blog

Tell us your ongoing tales and experiences with your French car here. Post pictures of your car here as well.
User avatar
CitroJim
A very naughty boy
Posts: 51023
Joined: 30 Apr 2005, 23:33
x 6676

Unread post by CitroJim »

MikeT wrote: I don't know what it may indicate but the valves had varying degrees of resistance to being removed from the guides.
That's normal Mike and it's caused by a bit of gum on the stems and varying degrees of resistance offered by the stem oil seals.

You must replace all the stem seals. The old one are a bit of a pig to remove and the new ones need to be seated back squarely and carefully. I use a length of perspex rod as a mandrel. To get them off I use a slim pair of strong pilers. Take care not to damage the cam follower bores getting the old seals out.

I'd recommend a very light lap to get rid of the spots on the faces. Only a very light one mind or you'll need to reset the valve clearances. Thise spots rarely cause significant leaks though Mike.
Jim

Runner, cyclist, duathlete, Citroen AX fan and the CCC Citroenian 'From A to Z' Columnist...
MikeT
Posts: 4809
Joined: 11 Jun 2007, 16:17
x 233

Unread post by MikeT »

Eventually got round to cleaning the valves - tried the lazy route first - soaking in solvents which worked fine for all the exhaust valves and allowed two of the inlet valves to be wire-brushed clean but #'s 5 & 8 needed a chisel and a lot of forceful but careful scraping. Thankfully, none of them are burnt, though there are some discolourations on the undersides as well as some tiny pits on all the sealing faces (where the deposits were) as well as a few minute dents/distortions on the very edges of the piston side seat margin. One exhaust valve even has two small chunks missing from the edge of the centre "bunker" of the underside, if you know where I mean? Hopefully a light lapping should be adequate but it won't remove all the pitting for sure.
MikeT
Posts: 4809
Joined: 11 Jun 2007, 16:17
x 233

Unread post by MikeT »

Inspector Jim has given his thumbs up on the bores and pistons 8)

I relented and sent the head to a machine shop where it got a ~10 thou shave. I'm not overly impressed to be honest but at least it's flatter and cleaner than before and the prechamber cracks have gone too. :lol:

I'm now in the process of valve lapping. Just a minute or two of light lapping with the fine paste. Here's one I done earlier.

Image


Image
MikeT
Posts: 4809
Joined: 11 Jun 2007, 16:17
x 233

Unread post by MikeT »

Xac wrote:That brown discolouration and crusty bits either sides are the remnants of the sealant.
Don't forget to use some when you put it back together!
I'm close to that point now and wondering what sort of sealant I should use? Is silicone sealant ok?
User avatar
Xaccers
Posts: 7654
Joined: 07 Feb 2007, 23:46
x 185

Unread post by Xaccers »

MikeT wrote:
Xac wrote:That brown discolouration and crusty bits either sides are the remnants of the sealant.
Don't forget to use some when you put it back together!
I'm close to that point now and wondering what sort of sealant I should use? Is silicone sealant ok?
If you can wait until I've had some sleep I can tell you what I used. Pretty sure it was hamerite red though.
1.9TD+ SX Xantia Estate (Cassy) running on 100% veg
1.9TD SX Xantia Hatchback (Jenny) running on 100% veg for sale
Laguna II 2.0dCi Privilege (Monty)

DIY sphere tool
MikeT
Posts: 4809
Joined: 11 Jun 2007, 16:17
x 233

Unread post by MikeT »

Stay in bed xac, I've done it now, thanks :lol: . I used some "motorcycle" silicone gasket that's proving to be quite versatile and reliable for many applications.
User avatar
CitroJim
A very naughty boy
Posts: 51023
Joined: 30 Apr 2005, 23:33
x 6676

Unread post by CitroJim »

Xac wrote: If you can wait until I've had some sleep I can tell you what I used. Pretty sure it was hamerite red though.
Blue Hylomar or Wellseal does the job a treat. I've used both with perfect results..

Be careful with it. Both products are incredibly toxic. Don't use a bare fingertip to spread it :twisted:
Jim

Runner, cyclist, duathlete, Citroen AX fan and the CCC Citroenian 'From A to Z' Columnist...
MikeT
Posts: 4809
Joined: 11 Jun 2007, 16:17
x 233

Unread post by MikeT »

Thought I better check the valve clearances (before refitting the head) and glad I did. In fact I realise I should have measured them before doing any work to use as a comparison. According to BoL, Inlet should be 0.15mm +- 0.08 and Exhaust 0.30 +- 0.08mm

All four exhaust valves measure 0.35 but the inlets...

#
1 = 0.18
4 = 0.08
5 = 0.12
8 = 0.23

... are within tolerance. Just.
MikeT
Posts: 4809
Joined: 11 Jun 2007, 16:17
x 233

Unread post by MikeT »

Not making much headway owing to family matters taking up much of my energy and time. At least it's given me time to save a few pennies to buy some odd n sods I need to make some improvements although finding the right suppliers has been a real challenge too.

Tools, you can never have enough of them it seems! :? Particularly when there's no power outlets near the car so when Maplins reduced the price of their rechargeable dremel type rotary tool I snapped it up. It's proved to be very useful (although I had to return and swap it when the switch failed). I've used it to flute an old head bolt in readiness for chasing the block threads (thanks for that tip Jim 8) ) and cut off the heads of two other bolts to act as locators when refitting the head. I also plan to use it to remove the IP armour in-situ though I haven't decided the strategy yet - do I cut a hole in the armour or grind off the security boltheads?

Although not perfect, I've decided the valve clearances are good enough without having to source other shims so the head is now wrapped in protective material ready to go back on allowing me to turn my attention to the manifolds, which leave a lot to be desired IMO.

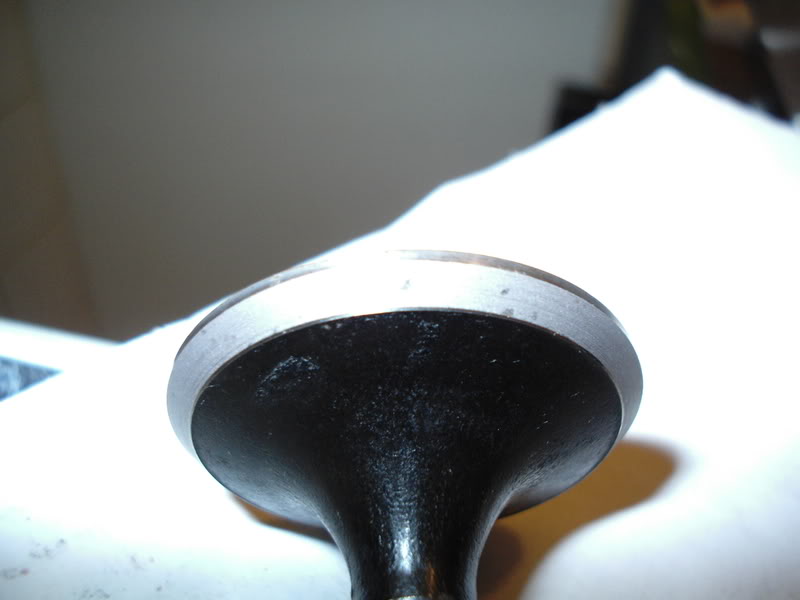
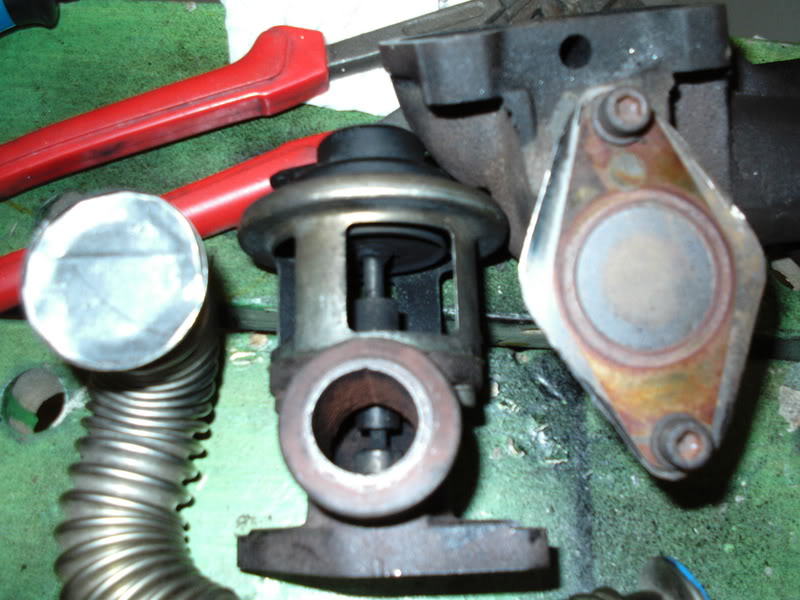
The EGR will blanked off as per John's (jgra) blog using sheet steel plates. Just as well, as it appears the valve wasn't seating fully allowing gases to pass at all times :roll: I've also added a temperature probe as a tuning aid should I eventually get this engine back together.

The first items to refit will be the turbo and exhaust fittings but I want to modify them also and am currently awaiting delivery of parts.
KP
Posts: 3980
Joined: 10 Jul 2006, 12:11
x 27

Unread post by KP »

Have you thought about swaping around 4 and 8 to get them a bit more within tolerance and seeing how it affects it?

Seems like your being a little busy bee with your Xantia.

All these rebuilds that seem to be going on i wish i had the time, money and ability to do it as i dont have a 2nd car i can use to get to work everyday unless i use the bike and the train at £2.10 a day and a hour of travel instead of 15-20mins...
MikeT
Posts: 4809
Joined: 11 Jun 2007, 16:17
x 233

Unread post by MikeT »

I omitted to add, (though it is in another thread in the Citroen Section) after trying various combinations, I decided to settle on
1. 0.18mm (+0.03)
2. 0.34mm (+0.04)
3. 0.33mm (+0.03)
4. 0.14mm (-0.01)
5. 0.14mm (-0.01)
6. 0.34mm (+0.04)
7. 0.34mm (+0.04)
8. 0.14mm (-0.01)

Although the job's overall time has been several months so far, I've spent little of that time working on the car and my thinking it best to get all mods done before rebuild has further delayed the job.
I certainly wouldn't have contemplated tackling this job if I didn't already have the Ford on the road (which was forced after having to sell my old xantia) and the support of the good people on this forum has given me the encouragement and help needed. I like to think that by blogging our endeavours, we encourage others to attempt DIY jobs rather than scrapping their cars on the balance of cost of repair.

Fingers crossed, I've got all the parts I need and once I've cleaned up the block, will begin the rebuild. Might be finished before Christmas, who knows? :lol:
MikeT
Posts: 4809
Joined: 11 Jun 2007, 16:17
x 233

Unread post by MikeT »

Thanks to jgra for this idea, I've fabricated sheet steel plates to ensure no exhaust gases enter the inlet nor boost pressure escaping to the exhaust as would have been the case with my leaking EGR. I'll also be diverting the breather so no oil mist enters the inlet either.

Image
User avatar
CitroJim
A very naughty boy
Posts: 51023
Joined: 30 Apr 2005, 23:33
x 6676

Unread post by CitroJim »

Mike,

Think of all those nasty Oxides of Nitrogen you are ejecting into the atmosphere through your deliberate disablement of the very fine EGR system on your engine :twisted:

Have you no feelings at all for this poor old planet of ours?

I tell you, as a result of this, there'll be acid rain fairly pouring it down in Christchurch. Trees will wilt, buildings will dissolve and all because you disabled your EGR.

Shame on you :twisted: :twisted:

(now were is the emoticon for tongue in cheek?) :roll: :?

Seriously Mike, good work :D I really must get round to disabling it on my 2.1. Sometimes I can actually hear the EGR valve fluttering :shock:
Jim

Runner, cyclist, duathlete, Citroen AX fan and the CCC Citroenian 'From A to Z' Columnist...
MikeT
Posts: 4809
Joined: 11 Jun 2007, 16:17
x 233

Unread post by MikeT »

That's assuming the engine will start and run; isn't it allowed if I offset it by running on veg oil?
joss
Posts: 18
Joined: 15 Mar 2008, 17:53

Unread post by joss »

any chance you made up a spare Mike? My ZX is still having a lot of trouble starting after I disconnected the EGR, could be it is leaking...