It seems to have been a long time again between blog updates. The main reason is that I'm not well at the moment. I fell sick on Thursday and am only now beginning to come out of it, hence my relative absence from the forum.
Despite not being well, I did perk up for a visit from Sid the Squid on Saturday to replace his delaminating crank pulley. He is now squeak-free and we were both shocked at how the two halves of the pulley could be rotated freely with just finger pressure

It could have let go at any time... I had a drive of Sid's Green Goblin which heighted suspicions that all is not well with my V6

but more on that later...
Despite not being able to wake up on Sunday morning, I did get enough enthusiasm raised to go to the tranquil depths of Hertfordshire to visit Lawrence1973 and do a bit of electrical wiring on his 406. He is currently transplanting a low mileage Xantia engine into it following the destruction of his old engine by a stray piece of metal from a badly executed pump dearmouring job getting into the inlet tract. It was interesting to see the carnage that resulted. Here's a couple of shots:
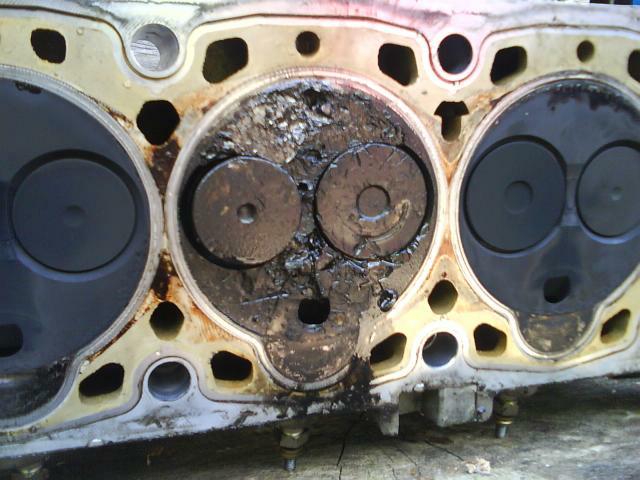

Nasty! We suspect the air ducting was removed for the dearmouring that resulted in a lump of armour leaping straight into the inlet manifold.
My V6 has been in constant use and sadly, a few faults have made an appearance which means it'll be off the road for a bit and even worse, the engine will have to be lifted again

The more minor faults are a leaky LHM pump from one of the piston covers and a very leaky pressure regulator; leaking from the end where the flat bracket bolts on. Both jobs I shall have a word with Pleiades about. The major issue is that both the pump and pressure regulator are not easy to remove but as the engine has to come out anyway...
The other problem is the rear trailing arm bearings have had it. I can see a bit of negative camber on the rear wheels and there are a lot of clonks and groans emanating from the rear over bumps. I've never done this job on a Xantia but I soon will be!
I'm wondering if the car was out of use for a long period and the rear bearings suffered? I had to replace the rear hydractive block to cure a leaky electrovalve that had failed due to corrosion. Yesterday, being bored and needing a bit of stimulation, I looked closely at the old block and electrovalve. The corrosion on the alloy of the electrovalve is very plain to see; so bad that you can just see the green of the O ring poking through the corroded alloy...
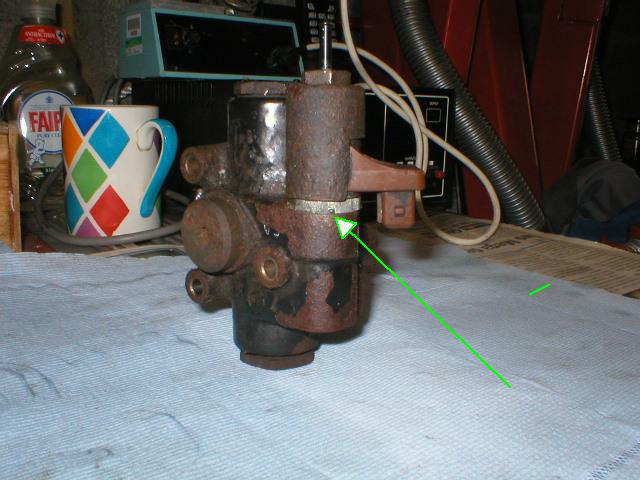
I'm not even sure the new electrovalve is good as I have a rather high tick rate in soft mode (10-15S) but an almost infinite one in hard mode

This car really is keeping me busy

So why has the engine to come out again? Well, firstly it'll make access to the HP pump and PR easier but yesterday I realised I made a fundamental error in rebuilding the gearbox

I did a mix and match of good bits from the two gearboxes and it was only today in reassembling the remains of both into one gearbox that I realise I did not take sufficient care in checking or setting the input shaft end-float. It should only be 0.02mm +/- 0.01mm and in reassembling the bits, that one has a negative float of about 2mm so goodness knows what the other 'box has

In driving Sid's Green Goblin, I know mine is not as smooth on gearchanges as it should be and I reckon the 'box has excessive end-float. Only one thing to do.... Luckily the end cover only has to come off and the whole 'box will not need stripping.
I've had to make up a special tool to measure end-float accurately rather than guessing it as I did previously

I needed something to clamp on the end of the input shaft that would allow the shaft to be pushed and pulled. I hit on the idea of using a die-stock with a specially made insert inside it that worked like a die. Screwing up the screws compresses the insert and makes it grip the shaft. I made the insert from hard nylon on my lathe..
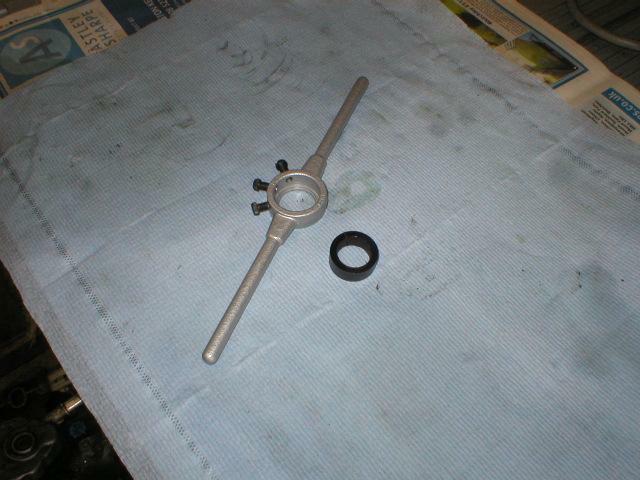
This is the tool in use on the spare gearbox:

I've also looked at the aircon water leak on the Activa and found the drain spout was indeed broken as Richard suspected. This spout being broken will allow all aircon condensate straight into the pasenger footwell.
Following Richard's advice, I sleeved the spout with some very close-fitting plastic tube and popped the spot black in place with a liberal dose of silicone RTV all over the new sleeve and left it to set before replacing the drain pipe.
Here's a shot of the broken spout, the repair sleeve and the drain pipe proper:

And here is a picture of the spout in place before fitting the drain pipe. Access is not that good

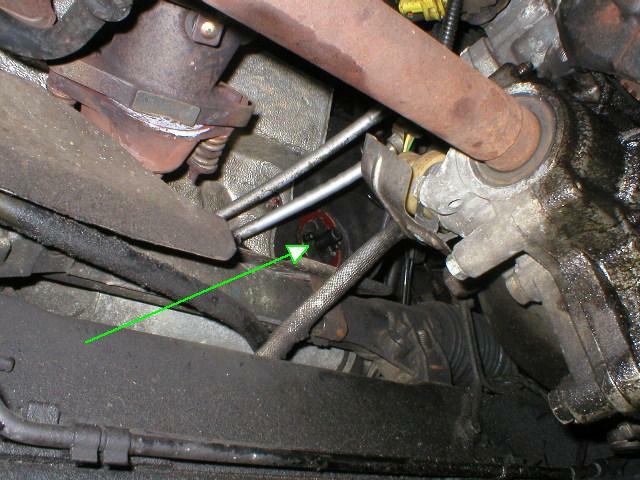
I just need some nice hot weather now to test the quality of this job!!!
That's it for now. That represents light duties by my standards. I'll have to be fully recovered before the engine out job is attempted on the V6 though


