
Latest purchase blog
-
MikeT
- Posts: 4808
- Joined: 11 Jun 2007, 16:17
- x 233
I'm not sure how messy a steam cleaner is but I have cleaned the engine bay using a petrol forecourt jetwash rinse after soaking in GUNK and it worked very well but this oil saturation is all behind the engine, below the head joint, running down anything and everything and settling on the lowest frame under the steering. To clean all that, access must be from underneath meaning I'll likely get covered in it and I don't relish that thought.
-
myglaren

- Forum Admin Team
- Posts: 27360
- Joined: 02 Mar 2008, 13:30
- x 5304
-
MikeT
- Posts: 4808
- Joined: 11 Jun 2007, 16:17
- x 233
Yes, I did think it may be possible to keep out the way of the most of it, but I think, inevitably, it will run down the lance, my arm etc. and I'll at least have to lie in some of it  I'll leave the decision for when the head is off. If it's not a HG fault, I'll have better visibility and access then.
-
MikeT
- Posts: 4808
- Joined: 11 Jun 2007, 16:17
- x 233
Beginning the head gasket repair has been delayed this week but I began preparation today after surveying the site more intimately.( I have to say, xantia's make it fun jacking up the car 8) )
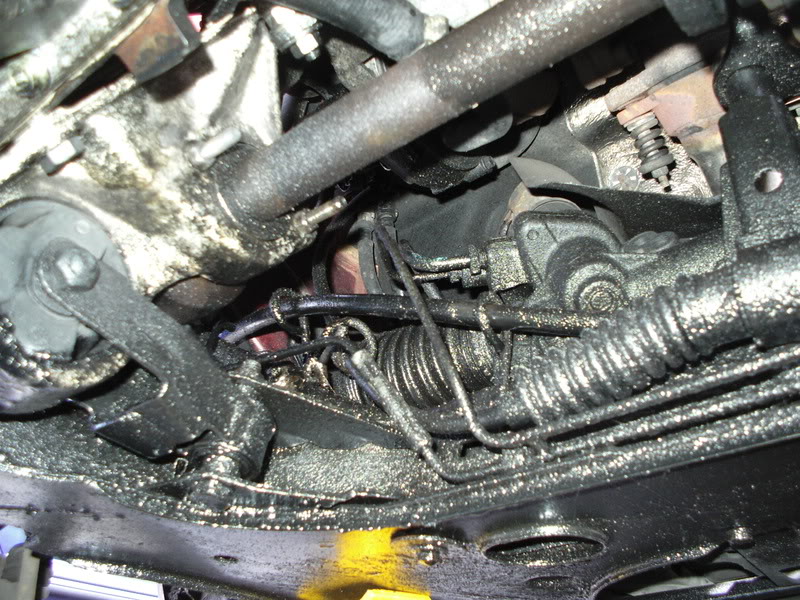
Though, it was difficult to ignore the contrast between the clean & dry areas....
...(for example). And the sodden, oily areas....

And when it spreads, it spreads!
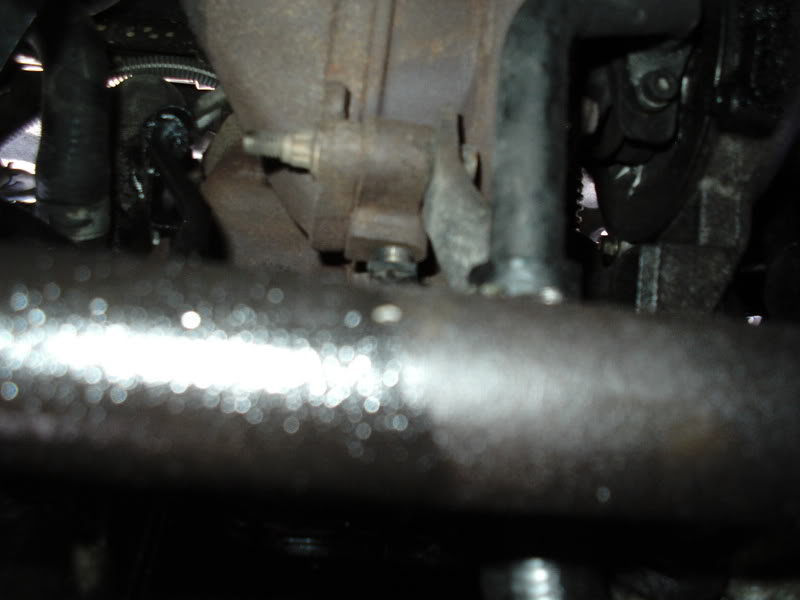
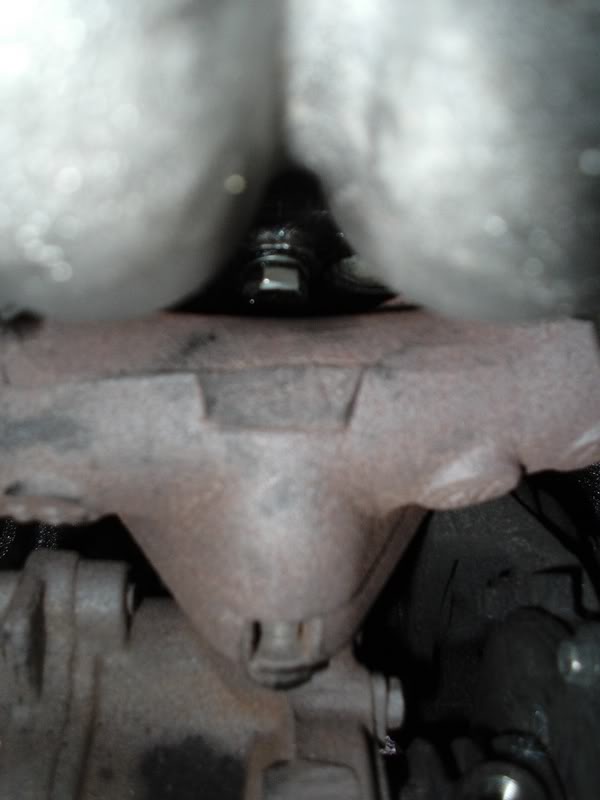
Now, looking up the block toward the exhaust manifold shows the "tide mark" around the level of the head gasket. This made me consider the head gasket might be leaking (spraying?) oil as well as pressurising the coolant.
I really hope that's diesel, not oil. Time will tell.
Though, it was difficult to ignore the contrast between the clean & dry areas....
...(for example). And the sodden, oily areas....
And when it spreads, it spreads!
Now, looking up the block toward the exhaust manifold shows the "tide mark" around the level of the head gasket. This made me consider the head gasket might be leaking (spraying?) oil as well as pressurising the coolant.
I really hope that's diesel, not oil. Time will tell.
-
MikeT
- Posts: 4808
- Joined: 11 Jun 2007, 16:17
- x 233
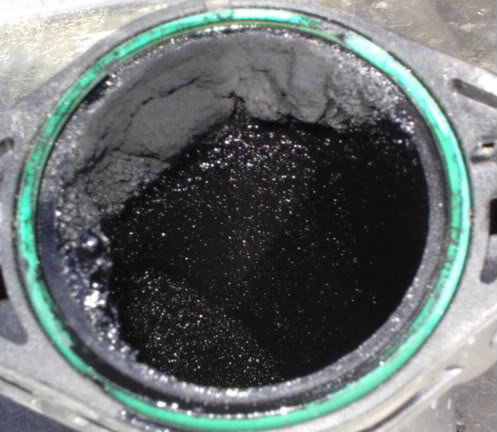
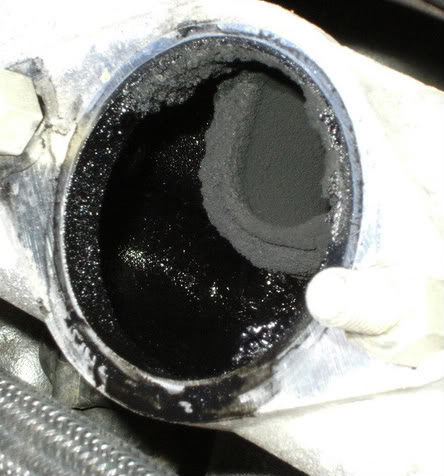
During the strip down, I was amazed to see just how bad an idea the EGR and crankcase recirculation is for an engine. People have told me how it causes fouling but I didn't expect to see it this bad.... this is the part that attaches directly to the inlet manifold. You probably can't tell from this picture but I would estimate this is restricting the breathing by up to 20% at this entrance. The inside is also thickly caked with an oily goo.
This is the inlet manifold that the above part was bolted to... again, a very thick coating of both dry and oily gunk. Looking deep inside, it looks like the whole manifold is fouled this way. I'm dreading to think what the state of the valves must be like.
This is the inlet manifold that the above part was bolted to... again, a very thick coating of both dry and oily gunk. Looking deep inside, it looks like the whole manifold is fouled this way. I'm dreading to think what the state of the valves must be like.
-
MikeT
- Posts: 4808
- Joined: 11 Jun 2007, 16:17
- x 233
No progress since last post except to have cleaned that goo out of the pipe. There was a good tablespoon full in there so I'm really looking forward to cleaning the inlet manifold.
I also removed and cleaned the filthy LHM filters and reservoir and I think I've diagnosed the low coolant temperature issue. The thermostat is stamped 83 and is still slightly open around 70 degrees or lower so seeing an average 71/2 degrees on the dash while driving over 30mph is quote normal, apparently. I also picked off a piece of material from one of the coolant sensor tips which may have affected readings slightly.
Besides lack of opportunity, I can't undo the last inlet manifold bolt which is clearly different to that pictured by Haynes so will have to find a solution before I can proceed.
Signs of previous work done badly include a broken reinforced boltholder still attached to the bolt at the back of the head (presumably off the turbo trunking) yet my trunking is not missing any. The trunking does look poorly made with obvious plastic welding/melting at the 90 degree bends and fuel pump feed spigot - are they replacements? The cam cover bolt is missing it's rubber washer (at the cambelt end). Both upper cambelt covers are missing. Two bolts are wedged between the block and the fuel pump mounting plate. Three washers are missing from the glowplugs and one nut was a nylon locknut which hadn't been fully tightened.
-
MikeT
- Posts: 4808
- Joined: 11 Jun 2007, 16:17
- x 233
Two weeks later......
My back had eased up last weekend but had to wait for delivery of my new obstructions spanners.... they didn't help.
I had better success using a straight open ender but there was no room to lever it unless I want to completely round it off
I get the impression that a bent spanner is the solution here. Removing the EGR made no difference to access but at least I accomplished something for my troubles this evening.
-
Spud
- Posts: 50
- Joined: 23 Jun 2007, 14:09
-
MikeT
- Posts: 4808
- Joined: 11 Jun 2007, 16:17
- x 233
Oh yeah, I'm having fun alright. 8) Some of it's a pain but as long as I'm learning and making progress I'm happy.
I am now convinced that Haynes have never worked on the MK2 manifolds. I've tried everything I can to undo that last inlet bolt but the best I got was a slight purchase but no room to rotate it. The obstruction spanners don't even get that far and my custom bent combi spanner wasn't much better. However, the latter did give me a clue when it slipped behind the exhaust manifold and head, proving there is a gap with possible access from below.
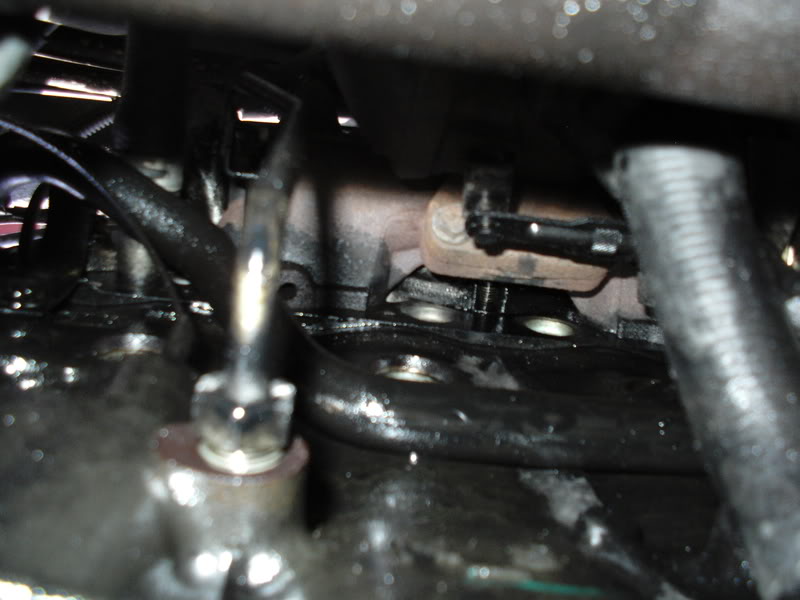
If you look at the last picture in the post five above this one - with the caption below that reads "I really hope that's diesel, not oil. Time will tell." - you can see the gap (between the two core plugs on the engine, the turbo flange and actuator arm) where I slid one of my normal spanners in and got an immediate purchase on the offending bolt, swung it and undone it Well, not completely but it's now loose.
As that bolt won't come out completely because it butts up to the manifold, I set about trying to remove the remaining inlet manifold studs but there's not enough thread to fit two nuts as locknuts.
Using thinner nuts, I did remove one stud but the rest either won't allow spanner purchase or lever space so I then decided to try and loosen the exhaust manifold thinking it would slide back and allow me to fully retrieve that bolt - but oh no. it's stuck fast and I don't know why - perhaps the turbo is holding it all rigid? Haynes says to remove the turbo but I can't see how exactly and even if I did there's no space to withdraw it from the engine bay.
I'm getting there slowly but surely but it doesn't bode well for the rebuild!
I am now convinced that Haynes have never worked on the MK2 manifolds. I've tried everything I can to undo that last inlet bolt but the best I got was a slight purchase but no room to rotate it. The obstruction spanners don't even get that far and my custom bent combi spanner wasn't much better. However, the latter did give me a clue when it slipped behind the exhaust manifold and head, proving there is a gap with possible access from below.
If you look at the last picture in the post five above this one - with the caption below that reads "I really hope that's diesel, not oil. Time will tell." - you can see the gap (between the two core plugs on the engine, the turbo flange and actuator arm) where I slid one of my normal spanners in and got an immediate purchase on the offending bolt, swung it and undone it
As that bolt won't come out completely because it butts up to the manifold, I set about trying to remove the remaining inlet manifold studs but there's not enough thread to fit two nuts as locknuts.
Using thinner nuts, I did remove one stud but the rest either won't allow spanner purchase or lever space so I then decided to try and loosen the exhaust manifold thinking it would slide back and allow me to fully retrieve that bolt - but oh no. it's stuck fast and I don't know why - perhaps the turbo is holding it all rigid? Haynes says to remove the turbo but I can't see how exactly and even if I did there's no space to withdraw it from the engine bay.
I'm getting there slowly but surely but it doesn't bode well for the rebuild!
-
MikeT
- Posts: 4808
- Joined: 11 Jun 2007, 16:17
- x 233
I can now confirm there is at least one brace holding the turbo to the block which explains why I can't shift the exhaust manifold back.
The inlet studs are my biggest pain right now now and I'm sorely tempted to call out a mobile mechanic to pull them if my last ditch attempts fail.
Interestingly, having removed the EGR and seperated the two parts, I notice the thin gasket between the diaphragm and valve has failed. In fact it disintegrated when touched and I can see tell-tale signs that it's been leaking allowing gases to escape and water to corrode the mating surface. I can't be sure it also looks like the valve side mating surface is beginning to crack or has two deep scoring marks
-
MikeT
- Posts: 4808
- Joined: 11 Jun 2007, 16:17
- x 233
Several weeks later.... good news and bad news. I finally found a locknut combination and method that worked - five of the six inlet manifold studs gave themselves up to me  . That's the good news, the bad news is I'll have to wait for my back to recover again before I start on the turbo and exhaust manifold Hopefully tomorrow.
The book of lies strikes again - it says both manifolds share the same gasket but that's not true in this case. There are three seperate gaskets for the inlet alone (which is going to make replacement an interesting task ). Talking of BOL, I noticed there's a third version of manual number 3082 on sale. covering Xantia's from 98 to 01 I think it was.
So here it is, the inlet manifold....
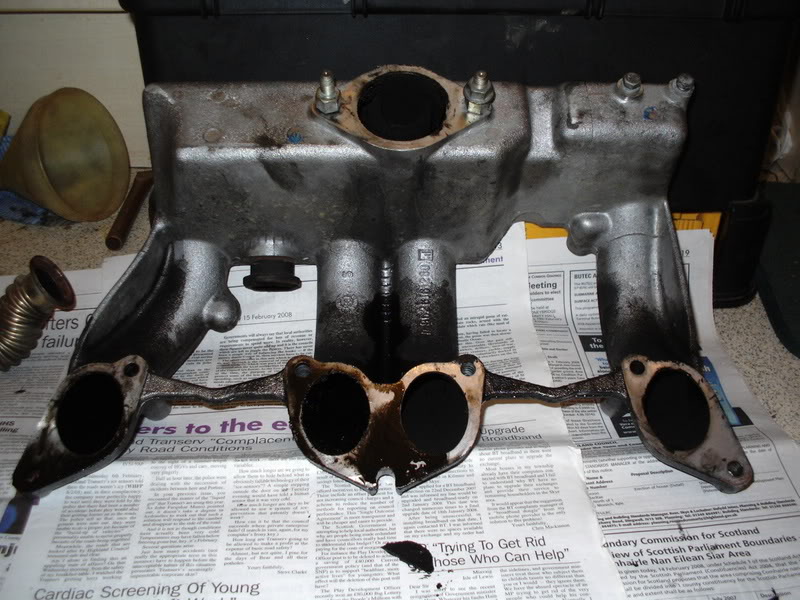
It's not a very good design for air flow IMO, though under turbo boost I suppose it makes little difference? What is very obvious is the oil leak clues, particularly the inner valley between the the two middle runners. The photo shows oil running over the mating surfaces and tell-tale dirt clinging to each runner where it's been wetted with oil. Maybe the cam cover gasket was leaking?
What the above photo doesn't show is how the two left runners are coated with wet oily gunk while the two on the right are dry and sooty. Here's a close up of the centre two for comparison. The outers look identical on their respective side.
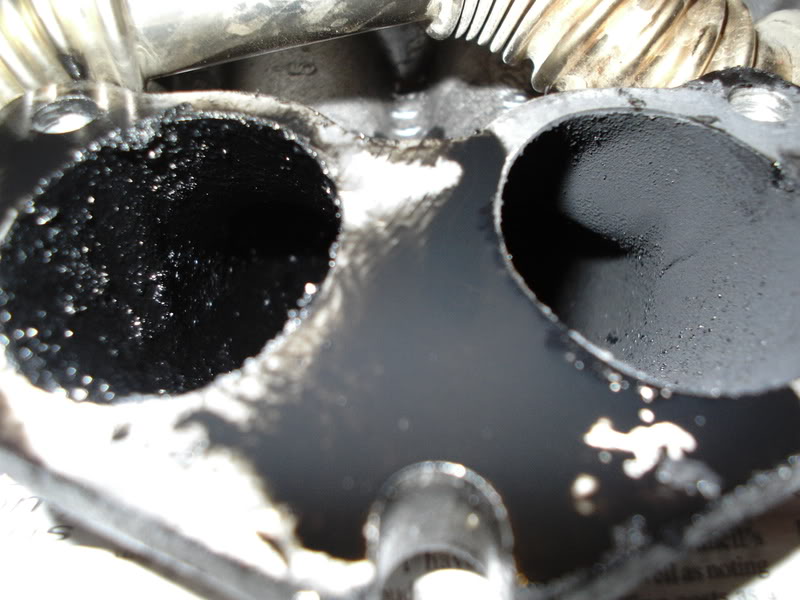
If this were a petrol engine I'd be alarmed to see this. Even for a diesel I don't like the idea of gunked up inlets but what's the dry vs wet all about? That EGR has got to go! In fact, the manifold can go with it if possible!
The book of lies strikes again - it says both manifolds share the same gasket but that's not true in this case. There are three seperate gaskets for the inlet alone (which is going to make replacement an interesting task
So here it is, the inlet manifold....
It's not a very good design for air flow IMO, though under turbo boost I suppose it makes little difference? What is very obvious is the oil leak clues, particularly the inner valley between the the two middle runners. The photo shows oil running over the mating surfaces and tell-tale dirt clinging to each runner where it's been wetted with oil. Maybe the cam cover gasket was leaking?
What the above photo doesn't show is how the two left runners are coated with wet oily gunk while the two on the right are dry and sooty. Here's a close up of the centre two for comparison. The outers look identical on their respective side.
If this were a petrol engine I'd be alarmed to see this. Even for a diesel I don't like the idea of gunked up inlets but what's the dry vs wet all about? That EGR has got to go! In fact, the manifold can go with it if possible!
-
CitroJim

- A very naughty boy
- Posts: 53209
- Joined: 30 Apr 2005, 23:33
- x 7395
Well done Mike Plain sailing now  The exhaust manifold will give up easily in comparason..
The early XUDs used a one-piece gasket but as you found later ones used individual gaskets. You'll likely find the gasket set you get will have a single one. Don't worry, it'll work fine but you may have to notch it out around the heater hose pipe to make it fit. Xac has one of these and it's standing the test of time. In the kit, you may also find a gasket with square holes. Thats for the early non-turbo one.
The inlet manifold flow is largely irrelevant on a turbo. If you think the inlet is bad, wait until you see the exhaust
Hope the back soon sorts itself out so you can continue the good work
Jim
Runner, cyclist, duathlete, Citroen AX fan and the CCC Citroenian 'From A to Z' Columnist...
Runner, cyclist, duathlete, Citroen AX fan and the CCC Citroenian 'From A to Z' Columnist...
-
MikeT
- Posts: 4808
- Joined: 11 Jun 2007, 16:17
- x 233
For those that are interested, I apologise for the lack of progress - my spinal injuries decide when I can and cannot work (mostly not) and I've recently had a crippling episode lasting well over two weeks which I thought was recovering, only to suffer a relapse last weekend which I'm still recovering from now.
My plans haven't changed; I still want to inspect the head etc, but it's liable to take a long time. At least I won't have to worry about the non-working A/C at this rate!
My plans haven't changed; I still want to inspect the head etc, but it's liable to take a long time. At least I won't have to worry about the non-working A/C at this rate!
-
MikeT
- Posts: 4808
- Joined: 11 Jun 2007, 16:17
- x 233
Slowly getting there What appeared to be an obstacle (triple-square nut) was easily defeated by a 10mm ring spanner - easy when you know how that is, but it had me worried it might round off using the "wrong" tool. As Anders advised, you have to try something and Malcolms' previous experience led me to the right tool, thankfully.
Also thanks to my nephew for getting the locknuts tight on the last exhaust stud, the manifold and turbo are now detached and resting to one side on account of being too bulky to get past the firewall and head so will leave that until the head is off.
Also thanks to my nephew for getting the locknuts tight on the last exhaust stud, the manifold and turbo are now detached and resting to one side on account of being too bulky to get past the firewall and head so will leave that until the head is off.
-
CitroJim
- A very naughty boy
- Posts: 53209
- Joined: 30 Apr 2005, 23:33
- x 7395