
Thanks for the Masking Tape tip there, that's Saved & Put Aside for next time I weld.
Tidy bit of welding indeed, me thinks you have a Dremel and the benefit of the smaller tool is obvious - I manage with a couple of Angle Grinders and an assortment of variously part-worn cutting discs
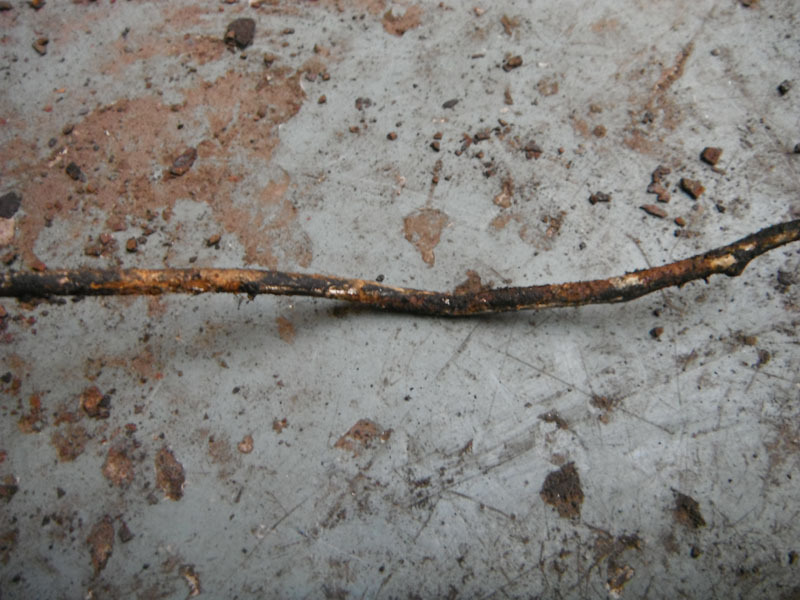
Is the steel the same as that on my 405: 0.9mm on the light Outer stuff and 1.2mm on the heavier stuff? IIRC the 0.9mm is '21 Gauge'
Looks like you're not using a Weld Thru Primer? I can vouch for XC-90, its very good. You do need to wear a Breathing Mask with it though
1987 BX 17RD "Bleriot"
Moderator: RichardW
-
Pug_XUD_KeenAmateur
- (Donor 2018)
- Posts: 1168
- Joined: 22 Apr 2013, 17:24
- Location: South Midlands / M4 / M5
- My Cars: 405 naD Est
- x 232
-
vulgalour
- Posts: 228
- Joined: 05 Jul 2014, 22:32
- Location: Stockton-on-Tees and Kent
- My Cars: 1980 Austin Princess HL
1987 Citroen BX 17RD - x 36
- Contact:
Re: 1987 BX 17RD "Bleriot"
I'm using weld through on the side you can't see, I find if I use it on the whole piece it doesn't weld as nicely so I only apply it to bits I know I can't get to, or will struggle to get to, before welding. Everything then gets zinc-rich primer after the welds are dressed, then seam sealer where required, then more primer, then colour coat, then lacquer and, if needed, underseal to finish. I'm not entirely certain on the steel thickness, I've just been matching as best I can to what steel I've got. Mostly I'm using bits of new repair panels that I've not needed for the repairs they were bought for and finding that the BX steel is thinner than you'd expect for each area. The structural bits seem to be about the same thickness as the bodywork on my Princess and the outer panels are thinner steel than the bodywork on my Rover, so the patches I'm putting in are generally slightly heavier guage than the BX is made of. I don't think anything I've welded so far is as heavy as 1.2mm. The metal on the Xantia, Saxo, and Picasso is thicker than the metal on the BX, to give some sort of context, at least the ones I've worked on have been.
-
vulgalour
- Posts: 228
- Joined: 05 Jul 2014, 22:32
- Location: Stockton-on-Tees and Kent
- My Cars: 1980 Austin Princess HL
1987 Citroen BX 17RD - x 36
- Contact:
Re: 1987 BX 17RD "Bleriot"
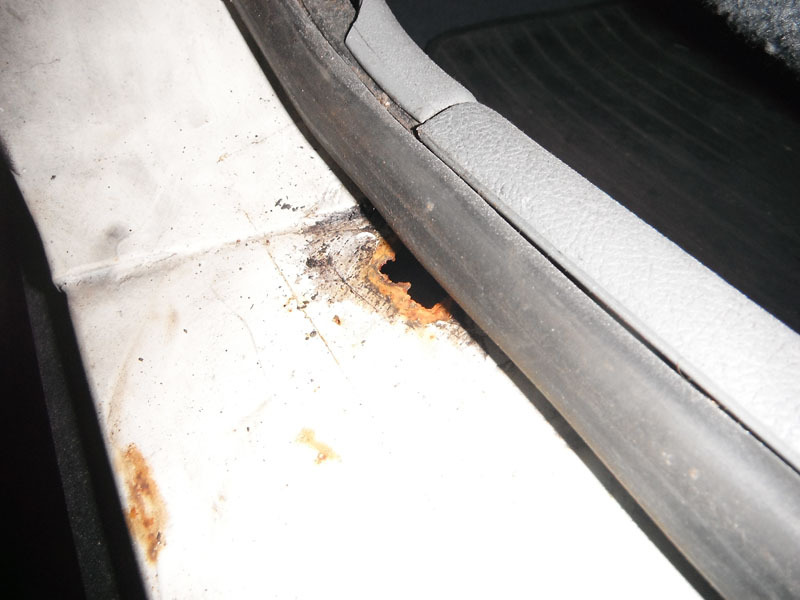
Had a good long day on the BX today. First off was to attack the pinholes on the A pillar strengthener arm thing, which turned into rather a large hole to cut out because of the way the pinholes were spread out.
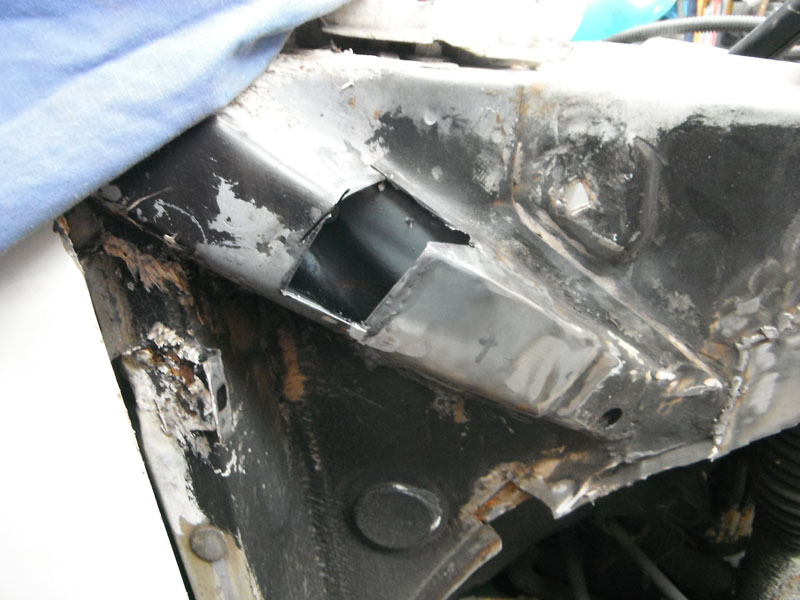
Unsurprisingly, the inner wing need a large piece chopped out which turned out to be easier to repair than three separate patches.
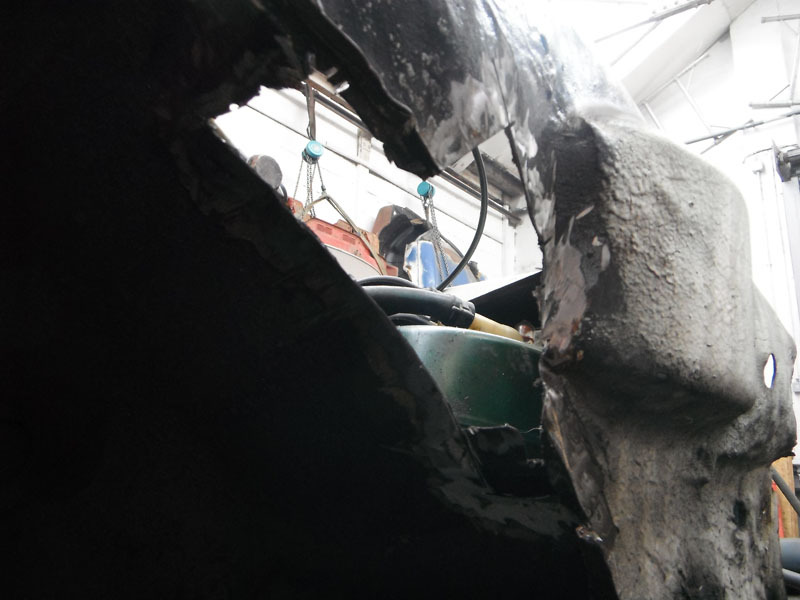
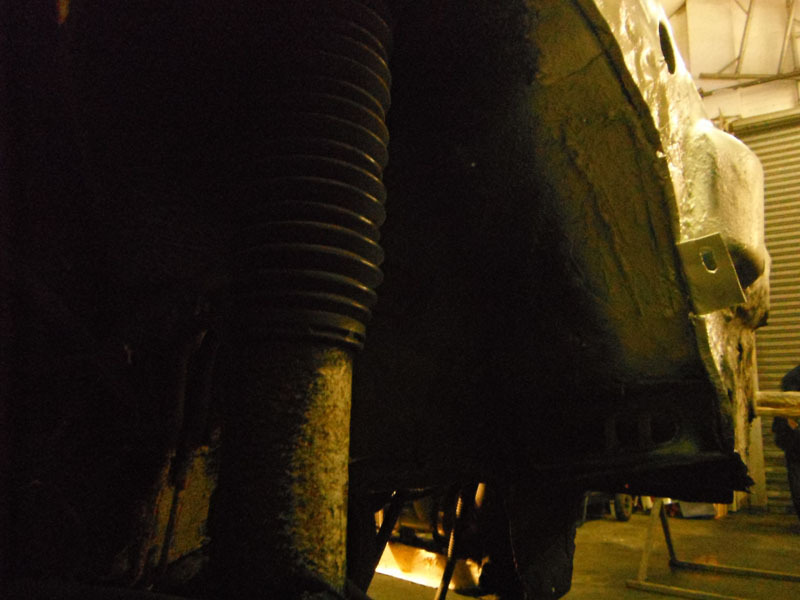
I also chopped out the bit below the washer bottle and drilled out the drain hole under the washer bottle that had been filled with body filler for reasons unknown.
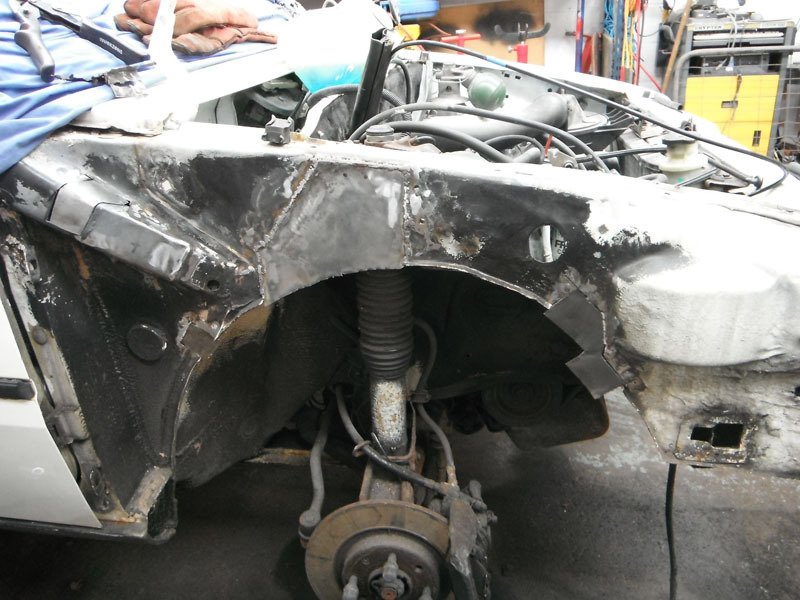
With all the pieces made up I could clean, shape, and prepare them before welding them in. The repairs went fairly smoothly for the most part and very soon I had it all seam sealed, primed, painted, and ready for underseal. I also welded in a captive nut for the washer bottle bracket since the original was missing.
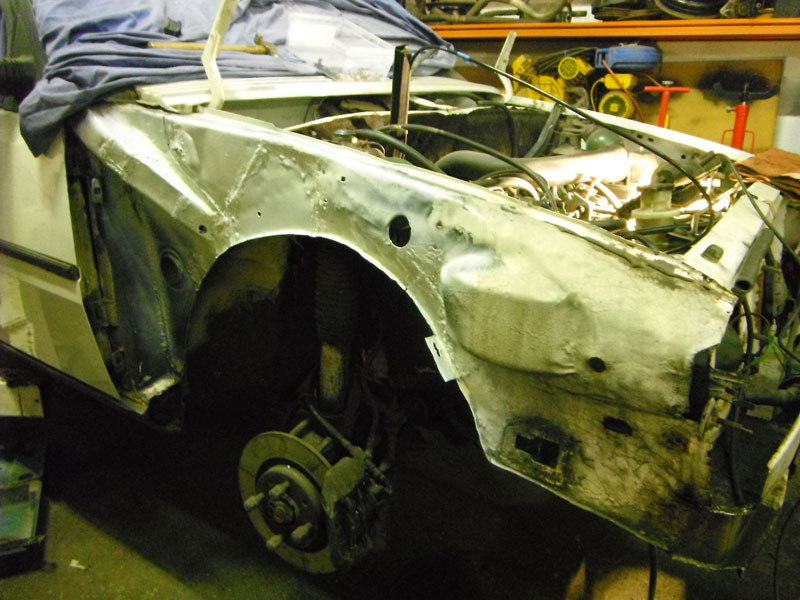
Mike helped with doing some jobs in tandem, like undersealing the back of the outer wing, which meant I could get a little bit more done in the time available. I did have the fixings for the arch liner this side so that went in much easier than the other side.
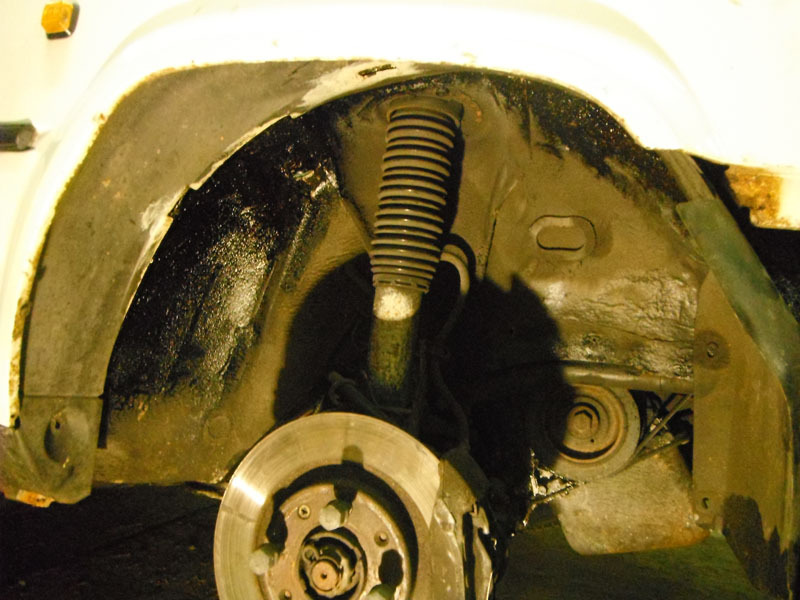
On cleaning back the crossmember I found much of what looked like it would need welding didn't, it was just rust-stained paint for the most part. The only exception was the passenger side strengthener which I trimmed back and added a new piece of metal to. Very much a functional repair rather than an attractive one, especially so since this is all hidden by the bumper.

With everything that needed to be in paint and underseal, Mike helped me refit the wing after I'd refitted the LHM reservoir. The lights went in very easily, as they always do.
The wheel and a trim was refitted to draw a line under this corner being completed, and the bonnet was refitted with Mike's help. Happily, the car looks much more like a car again and all that work I've done you'd never know about if I hadn't reported it here. The only job I didn't get as far as doing was rivetting the identity plate back on the inner wing, an item I had to remove because the rust had just got underneath it.
Unsurprisingly, the inner wing need a large piece chopped out which turned out to be easier to repair than three separate patches.
I also chopped out the bit below the washer bottle and drilled out the drain hole under the washer bottle that had been filled with body filler for reasons unknown.
With all the pieces made up I could clean, shape, and prepare them before welding them in. The repairs went fairly smoothly for the most part and very soon I had it all seam sealed, primed, painted, and ready for underseal. I also welded in a captive nut for the washer bottle bracket since the original was missing.
Mike helped with doing some jobs in tandem, like undersealing the back of the outer wing, which meant I could get a little bit more done in the time available. I did have the fixings for the arch liner this side so that went in much easier than the other side.
On cleaning back the crossmember I found much of what looked like it would need welding didn't, it was just rust-stained paint for the most part. The only exception was the passenger side strengthener which I trimmed back and added a new piece of metal to. Very much a functional repair rather than an attractive one, especially so since this is all hidden by the bumper.
With everything that needed to be in paint and underseal, Mike helped me refit the wing after I'd refitted the LHM reservoir. The lights went in very easily, as they always do.
The wheel and a trim was refitted to draw a line under this corner being completed, and the bonnet was refitted with Mike's help. Happily, the car looks much more like a car again and all that work I've done you'd never know about if I hadn't reported it here. The only job I didn't get as far as doing was rivetting the identity plate back on the inner wing, an item I had to remove because the rust had just got underneath it.
-
vulgalour
- Posts: 228
- Joined: 05 Jul 2014, 22:32
- Location: Stockton-on-Tees and Kent
- My Cars: 1980 Austin Princess HL
1987 Citroen BX 17RD - x 36
- Contact:
Re: 1987 BX 17RD "Bleriot"
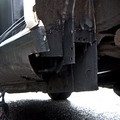
Cracked on and got the towing eye surrounding metal replaced and then the towing eye itself welded back in. I cleaned the whole crossmember back, which was difficult because whatever it was painted in was seriously tough stuff. After that, doused it all with rust treatment, then paint. Looked loads better after that too.
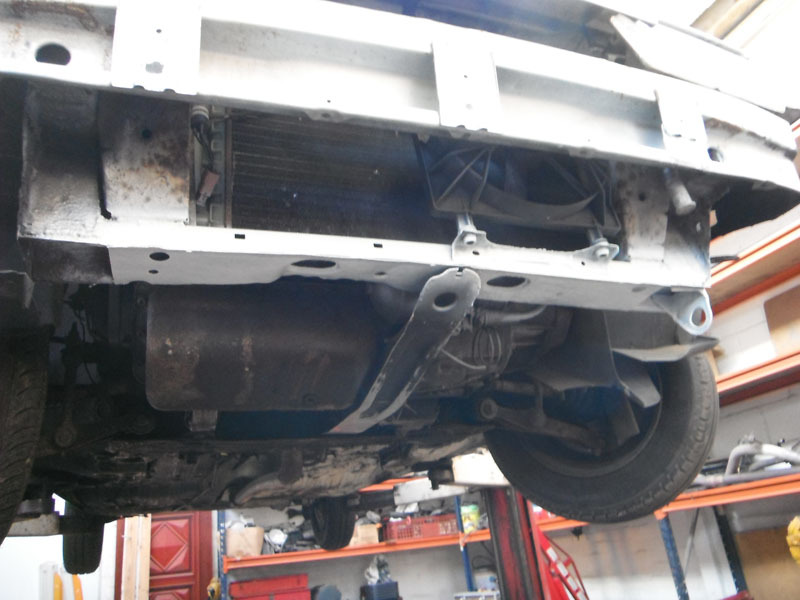
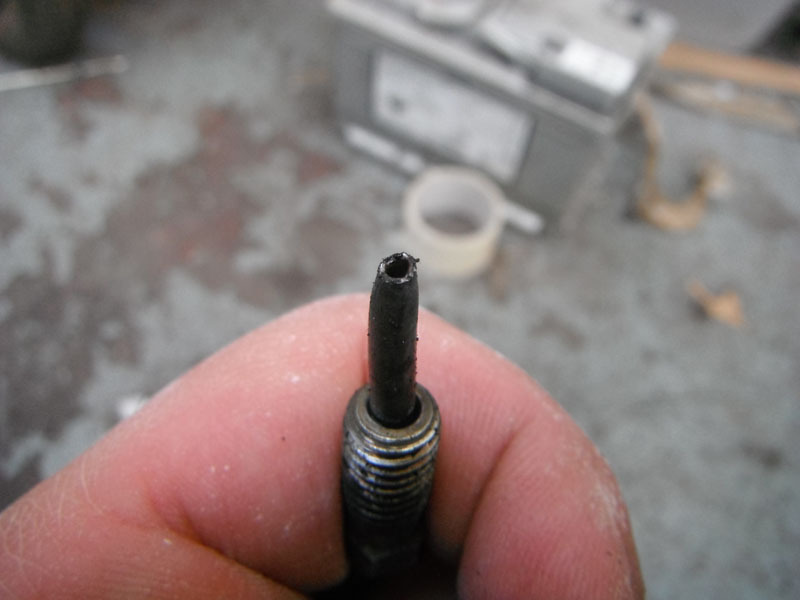
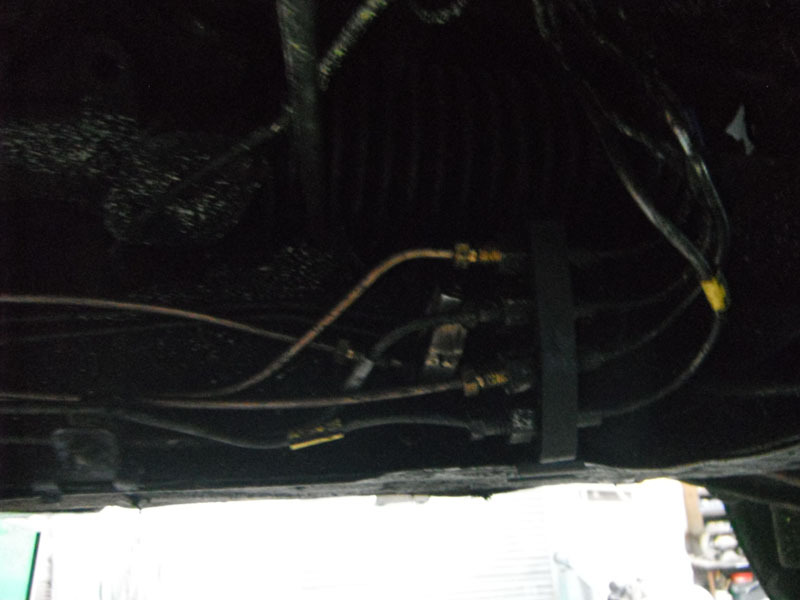
While the paint was drying I had a look at the front-to-back pipes. Removing them without taking off the rear subframe is possible and since I wasn't keeping these, I just snipped through them where it was difficult to get them out. This made removing them annoying, but possible. I also checked around the rear axle mounting points as much as I could and there was nothing particularly terrifying to see, it all looked pretty reasonable. Then the first casualty when trying to remove the pipe that goes into the hardline connector, somehow I managed to snap the pipe and the stub of it is left in the union. This is very annoying and I don't know how to fix it.
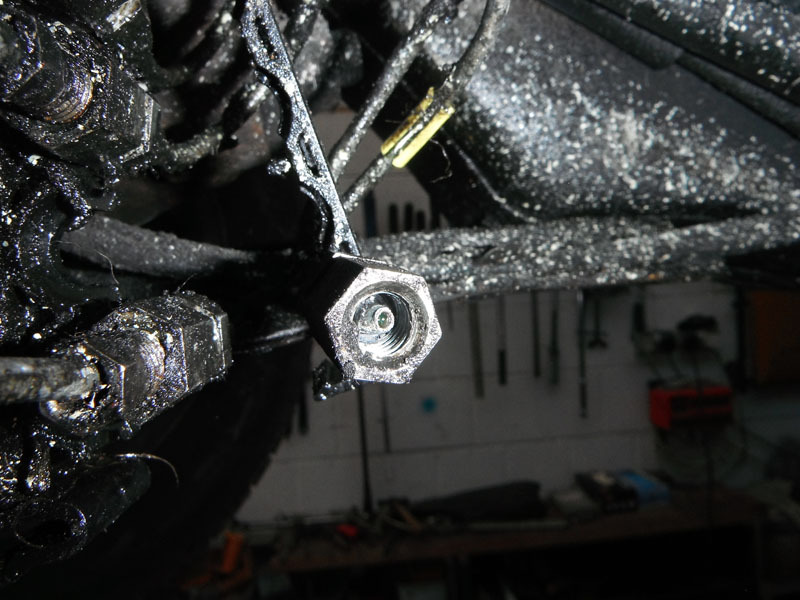
Then the next annoying problem was the union at the back, which decided to round off. Access to this particular union is terrible and I can see me having to dismantle quite a lot of stuff that has nothing wrong with it, just to get in with a tool big enough to undo this union. The union in question is the top right one on the four-way block.
The pipes themselves are a bit scabby in places, so they definitely needed replacing. However, I couldn't find where either of them had failed so I begin to wonder if it was one of these pipes that had burst. Before putting LHM in I'll be dismantling the suspension on this side rear corner to see if I can find anything else that might have failed because while the pipes are actually quite dry, the displacer and surrounding area is still a bit wet with LHM that's leaking from above them somewhere.
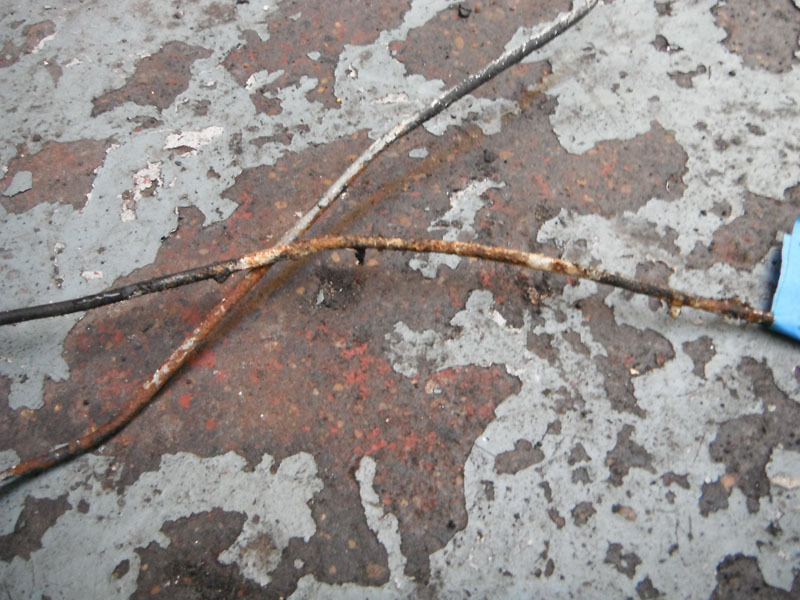
The only other thing of note was a slightly squashed section. I couldn't figure out what had caused this, so I assume it was a manufacturing defect.
I'll get some fresh pipes made up by Dean, if the offer still stands, now that I know what length these need to be. With that done, I couldn't really do anything else on the suspension, I didn't want to get into dismantling the rear corner because I hadn't got enough time to be getting into that if it became an involved job. Instead, I finished off the work at the front with lashings of underseal.
That should keep things happy for some time to come. Then I made an attempt to fit the bumper. I'm pretty sure this is a two person job because I can't seem to get the side blocks on the bumper to go into their respective holes without another part of the bumper coming out of alignment somewhere. I also have to think about a solution for fixings since the bumper was previously held on mostly with cableties, a perfectly adequate solution, just not really the way I want to put this back together. I'll probably use bolts/screws and trim edge clips looking at how Citroen have put everything together. The bumper is essentially decorative at any rate, so it doesn't need a lot to hold it in place since there's not really anything to it.
I do have one bit of welding left to do. I would have done it today if I hadn't chosen to do battle with the pipes, because to fix this little bit of rust I've got to remove quite a few trim pieces to access it properly. There's also a little bit on the rear arch to sill join in the usual Citroen place that needs cleaning up and might need a little patch, depending if it's pinholed or not. Flash makes these areas look far worse than they are.
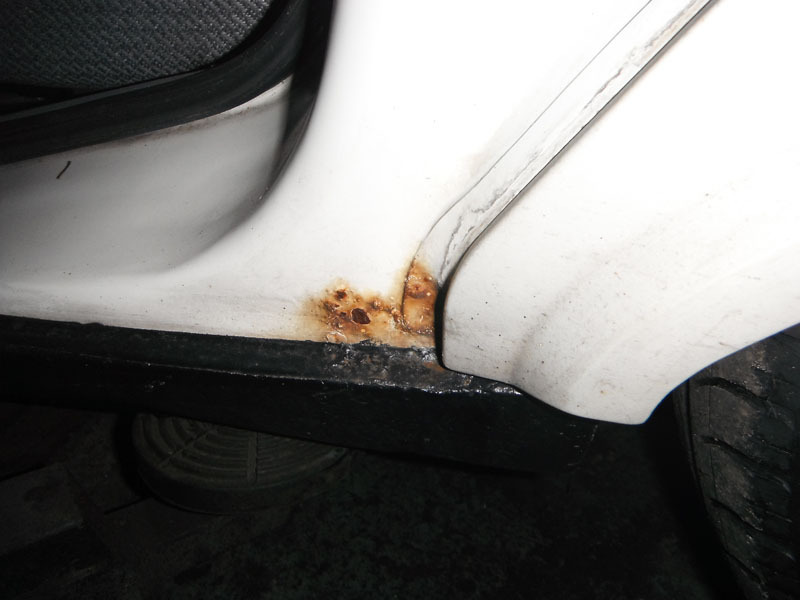
Another little job was putting the rear wiper back on straight.
While not quite finished, it does at least look like a car again.
While the paint was drying I had a look at the front-to-back pipes. Removing them without taking off the rear subframe is possible and since I wasn't keeping these, I just snipped through them where it was difficult to get them out. This made removing them annoying, but possible. I also checked around the rear axle mounting points as much as I could and there was nothing particularly terrifying to see, it all looked pretty reasonable. Then the first casualty when trying to remove the pipe that goes into the hardline connector, somehow I managed to snap the pipe and the stub of it is left in the union. This is very annoying and I don't know how to fix it.
Then the next annoying problem was the union at the back, which decided to round off. Access to this particular union is terrible and I can see me having to dismantle quite a lot of stuff that has nothing wrong with it, just to get in with a tool big enough to undo this union. The union in question is the top right one on the four-way block.
The pipes themselves are a bit scabby in places, so they definitely needed replacing. However, I couldn't find where either of them had failed so I begin to wonder if it was one of these pipes that had burst. Before putting LHM in I'll be dismantling the suspension on this side rear corner to see if I can find anything else that might have failed because while the pipes are actually quite dry, the displacer and surrounding area is still a bit wet with LHM that's leaking from above them somewhere.
The only other thing of note was a slightly squashed section. I couldn't figure out what had caused this, so I assume it was a manufacturing defect.
I'll get some fresh pipes made up by Dean, if the offer still stands, now that I know what length these need to be. With that done, I couldn't really do anything else on the suspension, I didn't want to get into dismantling the rear corner because I hadn't got enough time to be getting into that if it became an involved job. Instead, I finished off the work at the front with lashings of underseal.
That should keep things happy for some time to come. Then I made an attempt to fit the bumper. I'm pretty sure this is a two person job because I can't seem to get the side blocks on the bumper to go into their respective holes without another part of the bumper coming out of alignment somewhere. I also have to think about a solution for fixings since the bumper was previously held on mostly with cableties, a perfectly adequate solution, just not really the way I want to put this back together. I'll probably use bolts/screws and trim edge clips looking at how Citroen have put everything together. The bumper is essentially decorative at any rate, so it doesn't need a lot to hold it in place since there's not really anything to it.
I do have one bit of welding left to do. I would have done it today if I hadn't chosen to do battle with the pipes, because to fix this little bit of rust I've got to remove quite a few trim pieces to access it properly. There's also a little bit on the rear arch to sill join in the usual Citroen place that needs cleaning up and might need a little patch, depending if it's pinholed or not. Flash makes these areas look far worse than they are.
Another little job was putting the rear wiper back on straight.
While not quite finished, it does at least look like a car again.
-
Hell Razor5543
- Donor 2023
- Posts: 13745
- Joined: 01 Apr 2012, 09:47
- Location: Reading
- My Cars: C5 Mk2 VTX+ estate.
- x 3008
Re: 1987 BX 17RD "Bleriot"
She has DEFINITELY fallen on her wheels when you took her on.
James
ex BX 1.9
ex Xantia 2.0HDi SX
ex Xantia 2.0HDi LX
Ex C5 2.0HDi VTR
Ex C5 2.0HDi VTR
C5 2.2HDi VTX+
Yes, I am paranoid, but am I paranoid ENOUGH?
Out amongst the stars, looking for a world of my own!
ex BX 1.9
ex Xantia 2.0HDi SX
ex Xantia 2.0HDi LX
Ex C5 2.0HDi VTR
Ex C5 2.0HDi VTR
C5 2.2HDi VTX+
Yes, I am paranoid, but am I paranoid ENOUGH?
Out amongst the stars, looking for a world of my own!
-
vulgalour
- Posts: 228
- Joined: 05 Jul 2014, 22:32
- Location: Stockton-on-Tees and Kent
- My Cars: 1980 Austin Princess HL
1987 Citroen BX 17RD - x 36
- Contact:
Re: 1987 BX 17RD "Bleriot"
I doubt anyone else would care enough to put the effort in on a non-sporting BX. I'm hoping that I can keep this one for a very long time, just like I have the Princess, and continue to improve it as time goes on. I only wish I had more money and time available to make and keep everything pristine, I'll just have to do the best with what I've got instead.
-
white exec

- Moderating Team
- Posts: 7445
- Joined: 21 Dec 2015, 12:46
- Location: Sayalonga, Malaga, Spain
- My Cars: 1996 XM 2.5TD Exclusive hatch RHD
1992 BX19D Millesime hatch LHD
previously 1989 BX19RD, 1998 ZX 1.9D auto, 2001 Xantia 1.8i auto
and lots of Rovers before that: 1935 Ten, 1947 Sixteen, 1960 P5 3-litre, 1966 P6 2000, 1972 P6 2000TC, and 1975 P6B 3500S - x 1752
Re: 1987 BX 17RD "Bleriot"
Our '89 19RD was 'non-sporting', and a lot more relaxing to drive than the other one in the family, our son's BX19GTi. Lovely though the latter was - metallic green with green velour upholstery, black dash and green-tint windows - the ride quality was never so nice: much firmer, and less roll. (Knowing what I do today, that could have been tweaked, along with all the appalling earthing points!)
Non-turbo, she would fly along, and corner as if on railway lines, returning 44mpg on average. Took us all over Europe and the UK, with a good deal of towing. Photo above was following the Duero valley, near the Spain-Portugal border, in 1996. Two-and-a-half years later, we bought the 2.5 XM.
I think a non-sporty S2 BX is an under-rated thing, especially the diesel, with a ride-quality and cabin quite outstanding in terms of airiness, space and comfort. And to think (at the time) they were regarded as "complex"!
I think a non-sporty S2 BX is an under-rated thing, especially the diesel, with a ride-quality and cabin quite outstanding in terms of airiness, space and comfort. And to think (at the time) they were regarded as "complex"!
Chris
-
vulgalour
- Posts: 228
- Joined: 05 Jul 2014, 22:32
- Location: Stockton-on-Tees and Kent
- My Cars: 1980 Austin Princess HL
1987 Citroen BX 17RD - x 36
- Contact:
Re: 1987 BX 17RD "Bleriot"
Comfort should be as equally praised as any other attribute and the non-sporty BX excels at that particular field. That's a great picture of yours with the caravan, it makes it look like a huge caravan but I imagine the BX handled towing it with no complaints.
---
Finally got some time available to do some work on the BX and Mike was available to help too. The new pipes from Dean were just the job and it was surprisingly easy to feed them through the gap between the body and the rear axle, it was actually more difficult getting them to route tidily at the front than at the back. They were very easy to locate in the clips on the inner sill. We did get the broken pipe out of the front union with the application of heat, because we got a bit desperate. As far as we can tell there's no harm done but we'll know for certain when the LHM goes in. For the other union that I'd rounded off, cutting the pipe short and using a hex socket was just possible, though I did have to use a short pry bar to brace between the block the union goes into and the axle tube to stop the whole thing moving as I tried to undo the union. Got there in the end, no harm done. New pipes were refitted with the proper little rubber tubes.

On looking around the back end for leaks, it looks like it could be something to do with the boot on the rear sphere on the passenger side, it's difficult to tell without dismantling everything, but the LHM doesn't seem to be coming from any of the hard lines. I don't regret replacing the two lines we did, they definitely needed doing sooner rather than later. I'm not sure whether to dismantle the suspension on the back now or fill with LHM and see what happens.
There was a minor hiccup after reconnecting the battery in that at first, things behaved like no battery was connected. I'm sure Dean had mentioned the cut-off switch on the positive clamp being a bit dicky sometimes and since I'm not planning on using it, we removed it. That cured the lack of power. Next was the lack of glowplug light. At first I thought it might just be a blown bulb so to be sure, Mike got the multimeter out and we found there was no power going to the glowplugs. A wiggle of the relay on the inner wing and power was restored. It's probably either corrosion on the relay connections or a less than perfect earth since this is the area I'd done lots of bodywork in. Something to keep an eye on for the future. With that sorted, the BX could escape the unit, slowly, and loudly, because there's no working footbrake and the backbox hasn't been refitted yet. I'll put the backbox back on once I know nothing is leaking at the back, it makes access a lot easier since there's somewhere for my head to go when I'm looking at stuff.
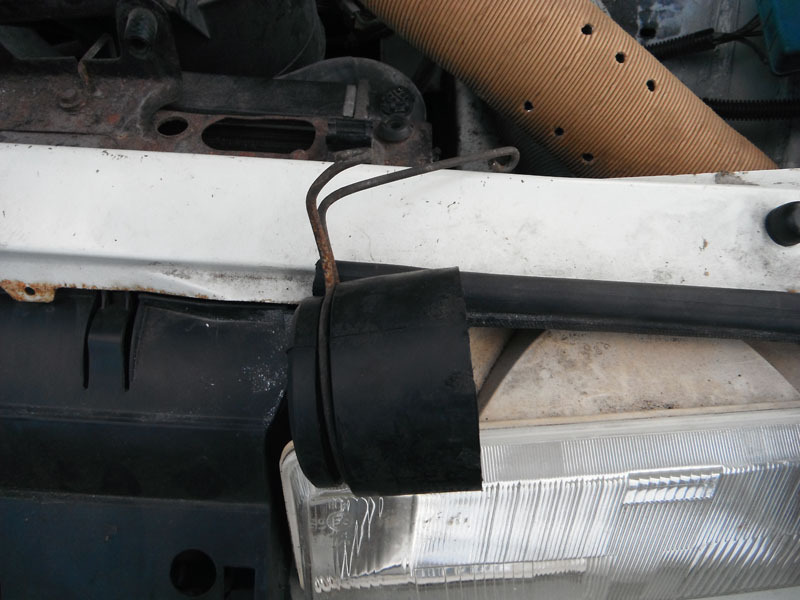
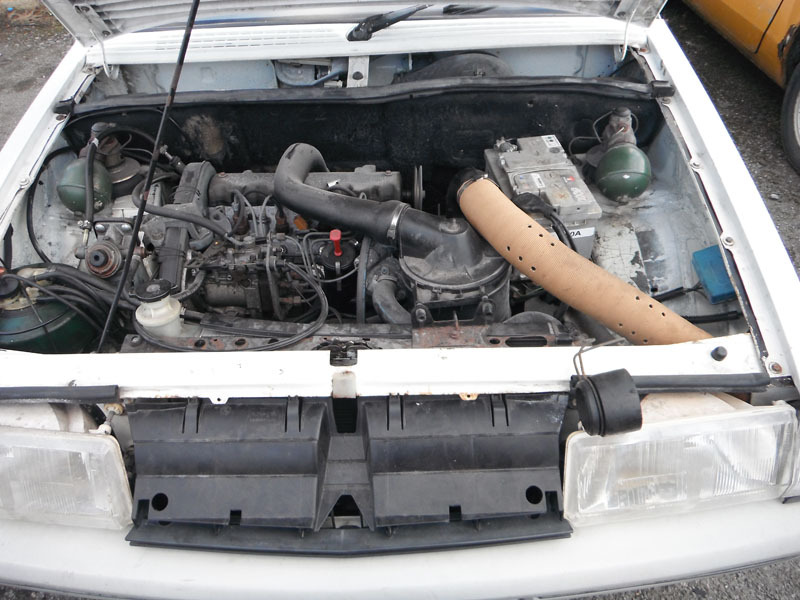
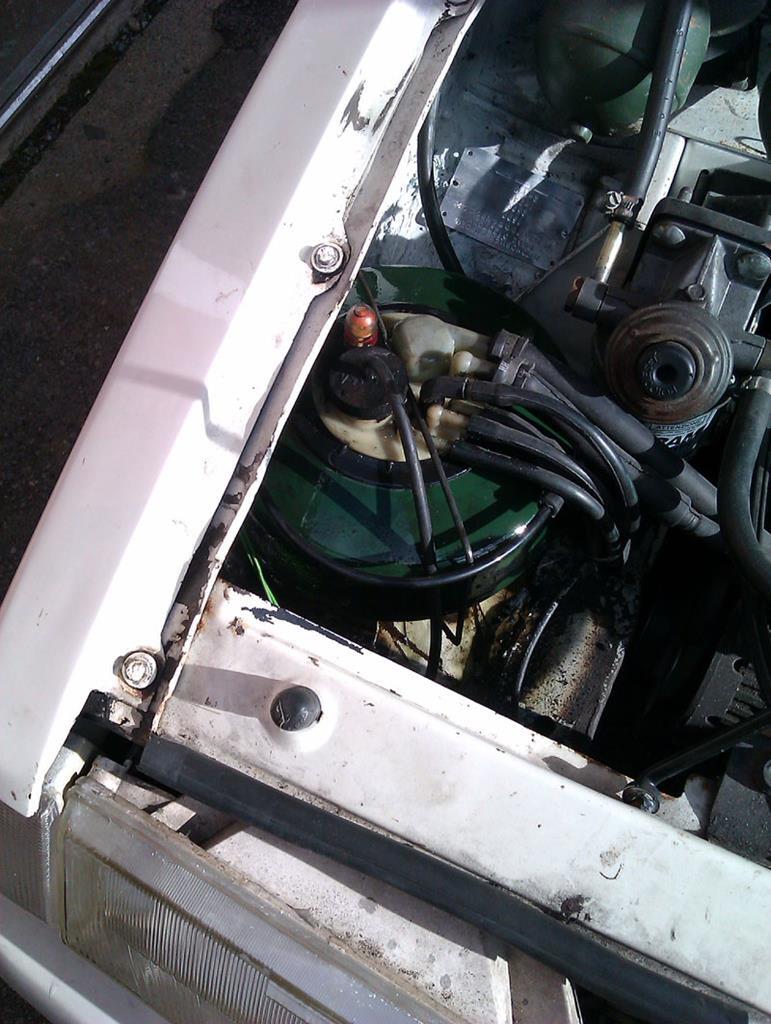
Next challenge is to try and figure out where this clamp/bracket goes. I'm pretty sure it's to hold up the end of the beige air intake tube, I just can't figure out where exactly it's supposed to mount. You can see from the engine bay shot where the beige tube is supposed to run, which would suggest the clamp should fit to one of the front wing bolts, it just doesn't seem to be quite right when I try that. Ideas welcome.
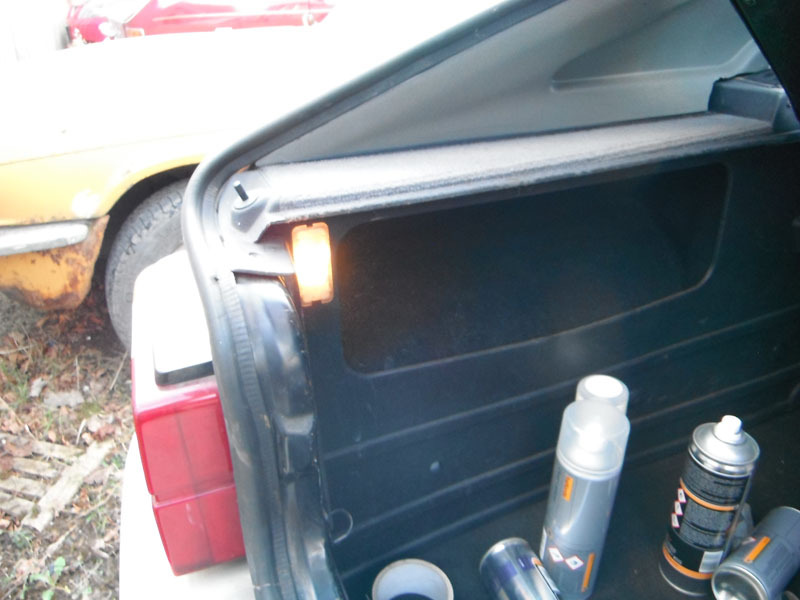
Importantly, the boot interior light works.
Annoyingly, the bonnet now seems to be slightly warped and I have no idea why. It's not the bump stop or the headlight making it look like it's sticking up on the driver's side here, that whole corner of the bonnet now actually bends up slightly. The bonnet was stored well away from heat and welding and kept safe until it was ready to go back on the car so either I didn't notice this before, or it's magically done it all on its own, which is entirely plausible for French plastics. Ideas on how to fix this also welcome.

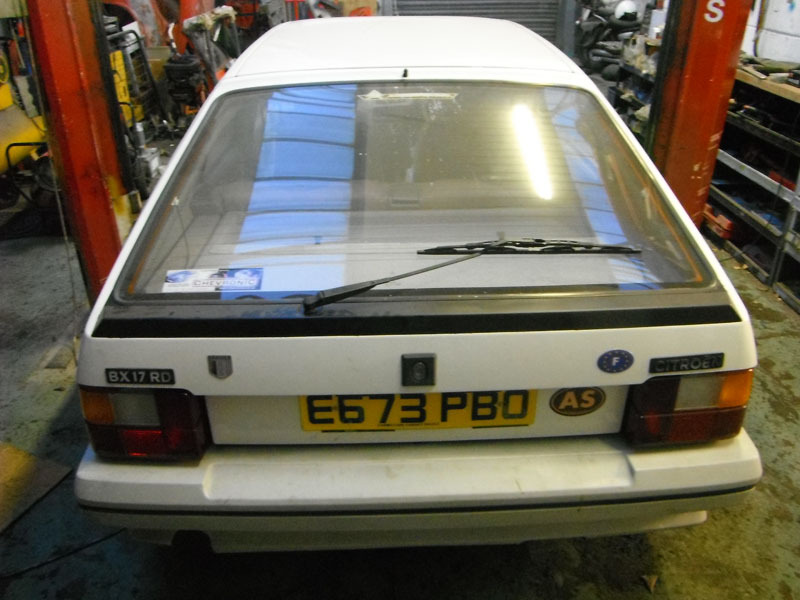
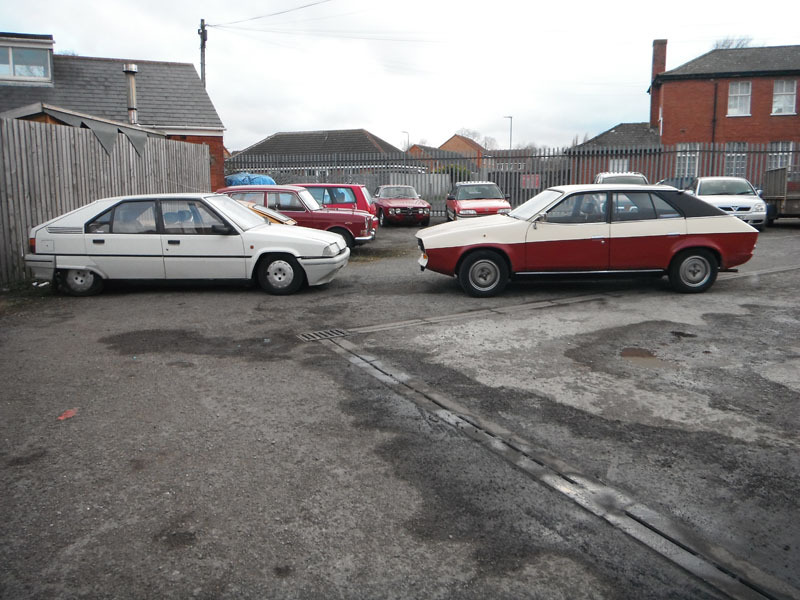
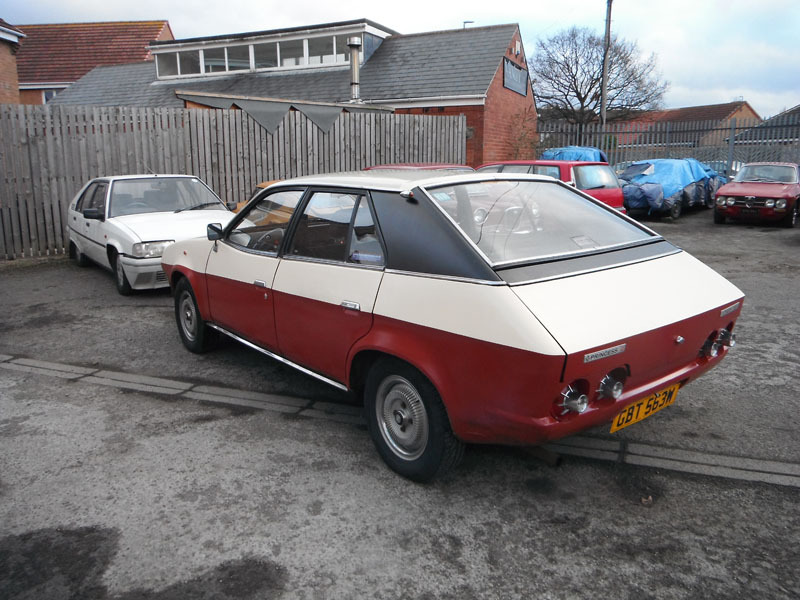
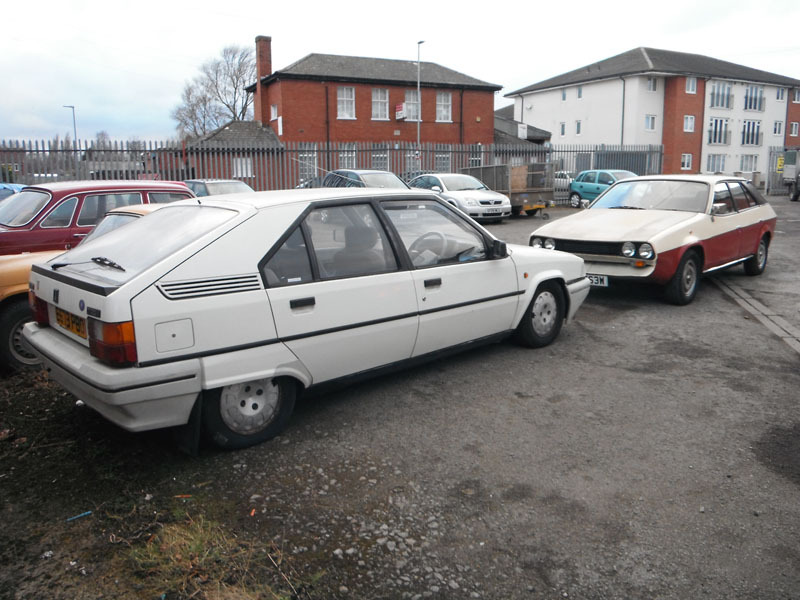
Finally, I got some shots of the BX with the Princess because I like to do that and it's conclusive proof that when it comes to cars, I've got a type.
---
Finally got some time available to do some work on the BX and Mike was available to help too. The new pipes from Dean were just the job and it was surprisingly easy to feed them through the gap between the body and the rear axle, it was actually more difficult getting them to route tidily at the front than at the back. They were very easy to locate in the clips on the inner sill. We did get the broken pipe out of the front union with the application of heat, because we got a bit desperate. As far as we can tell there's no harm done but we'll know for certain when the LHM goes in. For the other union that I'd rounded off, cutting the pipe short and using a hex socket was just possible, though I did have to use a short pry bar to brace between the block the union goes into and the axle tube to stop the whole thing moving as I tried to undo the union. Got there in the end, no harm done. New pipes were refitted with the proper little rubber tubes.
On looking around the back end for leaks, it looks like it could be something to do with the boot on the rear sphere on the passenger side, it's difficult to tell without dismantling everything, but the LHM doesn't seem to be coming from any of the hard lines. I don't regret replacing the two lines we did, they definitely needed doing sooner rather than later. I'm not sure whether to dismantle the suspension on the back now or fill with LHM and see what happens.
There was a minor hiccup after reconnecting the battery in that at first, things behaved like no battery was connected. I'm sure Dean had mentioned the cut-off switch on the positive clamp being a bit dicky sometimes and since I'm not planning on using it, we removed it. That cured the lack of power. Next was the lack of glowplug light. At first I thought it might just be a blown bulb so to be sure, Mike got the multimeter out and we found there was no power going to the glowplugs. A wiggle of the relay on the inner wing and power was restored. It's probably either corrosion on the relay connections or a less than perfect earth since this is the area I'd done lots of bodywork in. Something to keep an eye on for the future. With that sorted, the BX could escape the unit, slowly, and loudly, because there's no working footbrake and the backbox hasn't been refitted yet. I'll put the backbox back on once I know nothing is leaking at the back, it makes access a lot easier since there's somewhere for my head to go when I'm looking at stuff.
Next challenge is to try and figure out where this clamp/bracket goes. I'm pretty sure it's to hold up the end of the beige air intake tube, I just can't figure out where exactly it's supposed to mount. You can see from the engine bay shot where the beige tube is supposed to run, which would suggest the clamp should fit to one of the front wing bolts, it just doesn't seem to be quite right when I try that. Ideas welcome.
Importantly, the boot interior light works.
Annoyingly, the bonnet now seems to be slightly warped and I have no idea why. It's not the bump stop or the headlight making it look like it's sticking up on the driver's side here, that whole corner of the bonnet now actually bends up slightly. The bonnet was stored well away from heat and welding and kept safe until it was ready to go back on the car so either I didn't notice this before, or it's magically done it all on its own, which is entirely plausible for French plastics. Ideas on how to fix this also welcome.
Finally, I got some shots of the BX with the Princess because I like to do that and it's conclusive proof that when it comes to cars, I've got a type.
-
white exec
- Moderating Team
- Posts: 7445
- Joined: 21 Dec 2015, 12:46
- Location: Sayalonga, Malaga, Spain
- My Cars: 1996 XM 2.5TD Exclusive hatch RHD
1992 BX19D Millesime hatch LHD
previously 1989 BX19RD, 1998 ZX 1.9D auto, 2001 Xantia 1.8i auto
and lots of Rovers before that: 1935 Ten, 1947 Sixteen, 1960 P5 3-litre, 1966 P6 2000, 1972 P6 2000TC, and 1975 P6B 3500S - x 1752
Re: 1987 BX 17RD "Bleriot"
The bonnet is GRP (iirc), so able to flex/twist. It should be possible to get it seated properly.
All the body earthing points should be detached and thoroughly cleaned up. If they are push-on connectors, best to replace them with eye connectors and bolt-down. BX suffered the same PSA cost-cutting grounding connectors as early XM, where cars modified under warranty.
All the body earthing points should be detached and thoroughly cleaned up. If they are push-on connectors, best to replace them with eye connectors and bolt-down. BX suffered the same PSA cost-cutting grounding connectors as early XM, where cars modified under warranty.
Chris
-
vulgalour
- Posts: 228
- Joined: 05 Jul 2014, 22:32
- Location: Stockton-on-Tees and Kent
- My Cars: 1980 Austin Princess HL
1987 Citroen BX 17RD - x 36
- Contact:
Re: 1987 BX 17RD "Bleriot"
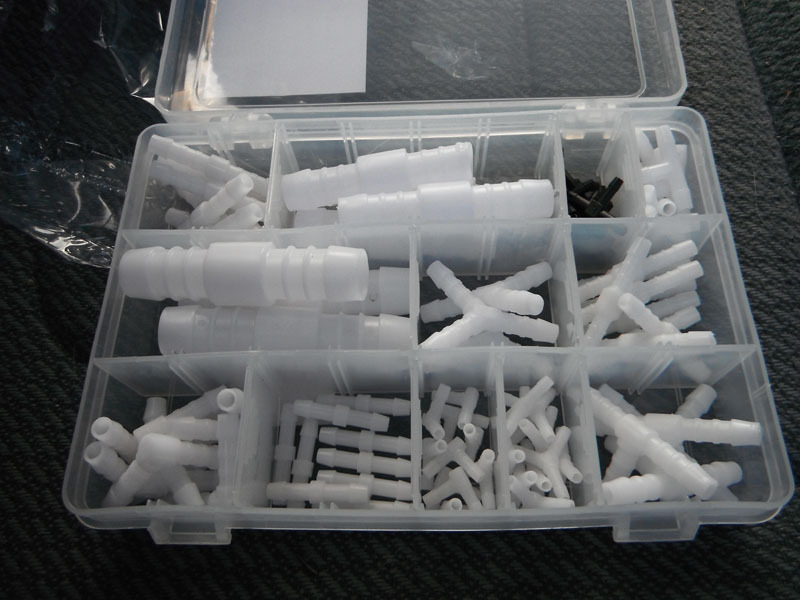
The other day I acquired a box of hose connectors. It was significantly cheaper per unit than ordering the one I needed separately and I'm sure they'll be useful in the future.
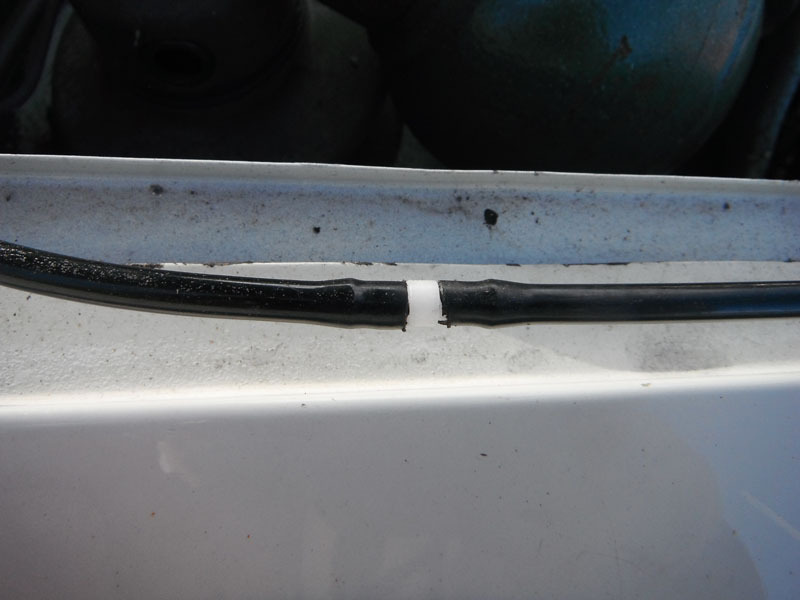
Reason being, I wanted to get that return line repaired. This was nice and straight forward. I just finished the cut I accidentally started with the angle grinder, using decent clippers this time, and then gently warmed the snipped ends of the plastic line before insert a double-ended barbed connector. A nice clean repair and is also quite effective. To help it seal, I wafted the heat gun over the whole thing afterwards so the pipe conformed closer to the shape of the connector.
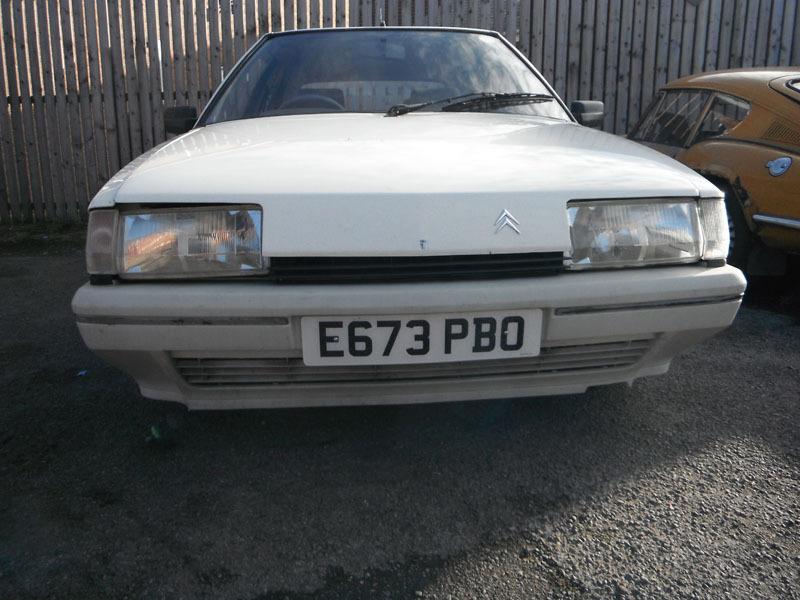
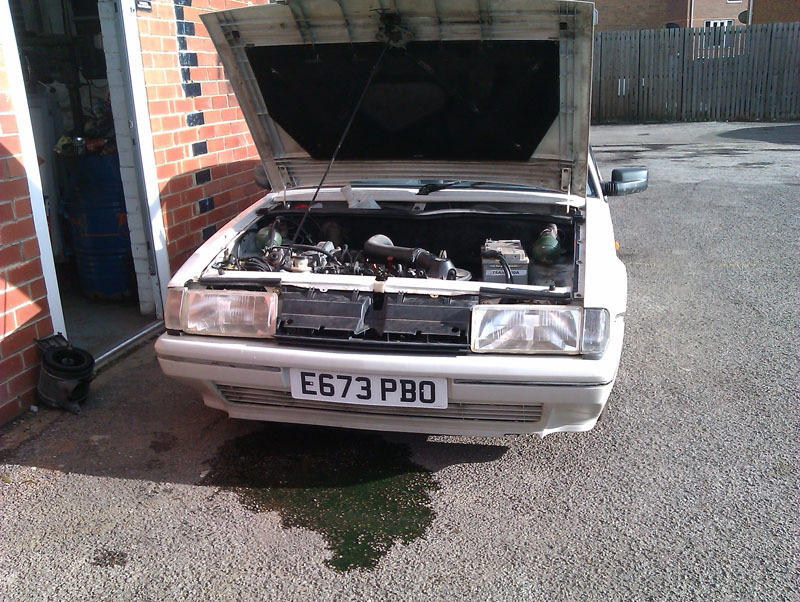
That was important to do so I could fill the car up with LHM. The bonnet is sorting itself out, slowly, and even though I've had a fiddle with what little alignment is available I've come to the conclusion it's definitely the bonnet itself at fault, not the surrounding bits and pieces. Shown here is after a few days in regular weather, I did notice at the end of today's efforts with some temperature in the engine, it had improved further. I'm hopeful a few hot engine cycles will persuade the panel back to a better alignment.
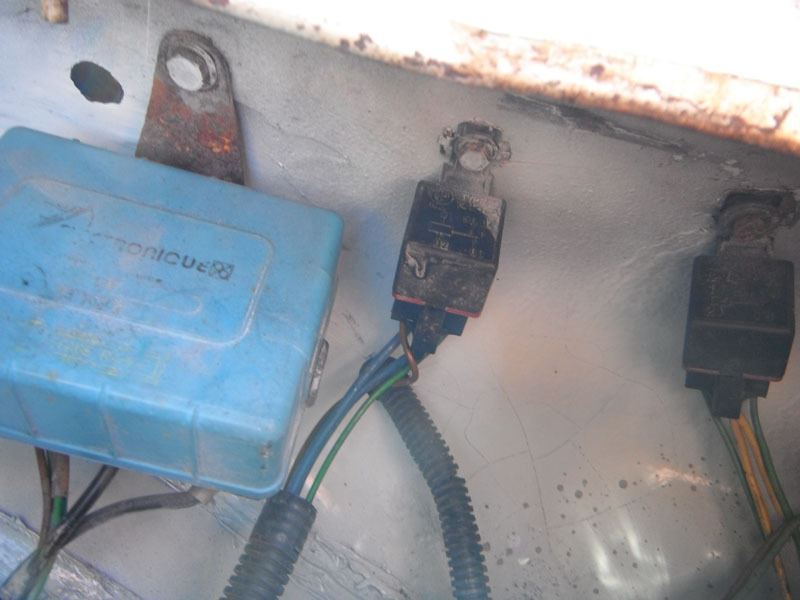
Another minor issue was one of dirt. The glow plug light hadn't come on and it turned out that all the bodywork I'd been doing had ended up getting quite a bit of dust into the connection for the glow plug relay. It's the one next to the blue box. Disconnected, cleaned out the socket and plug, reconnected and all systems normal again. Additionally, there appears to be no drain on the battery even with the car sat idle for long periods, so that's reassuring.
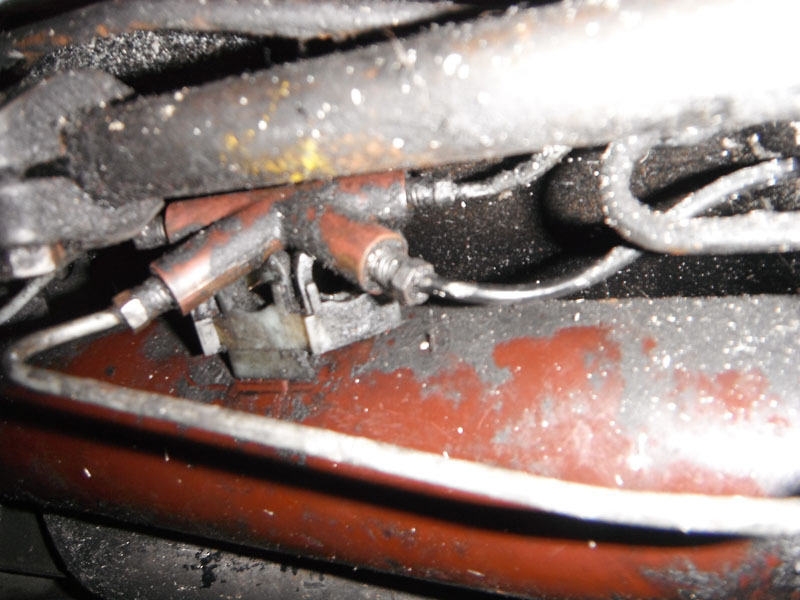
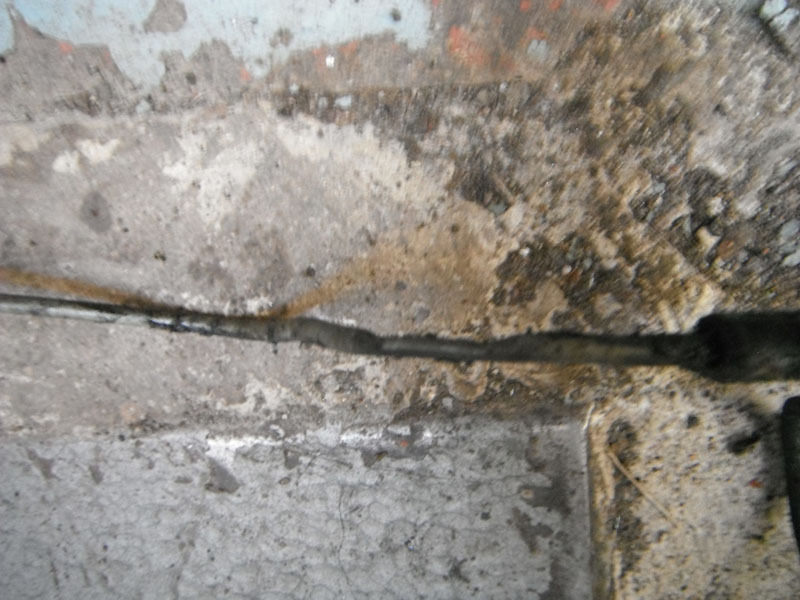
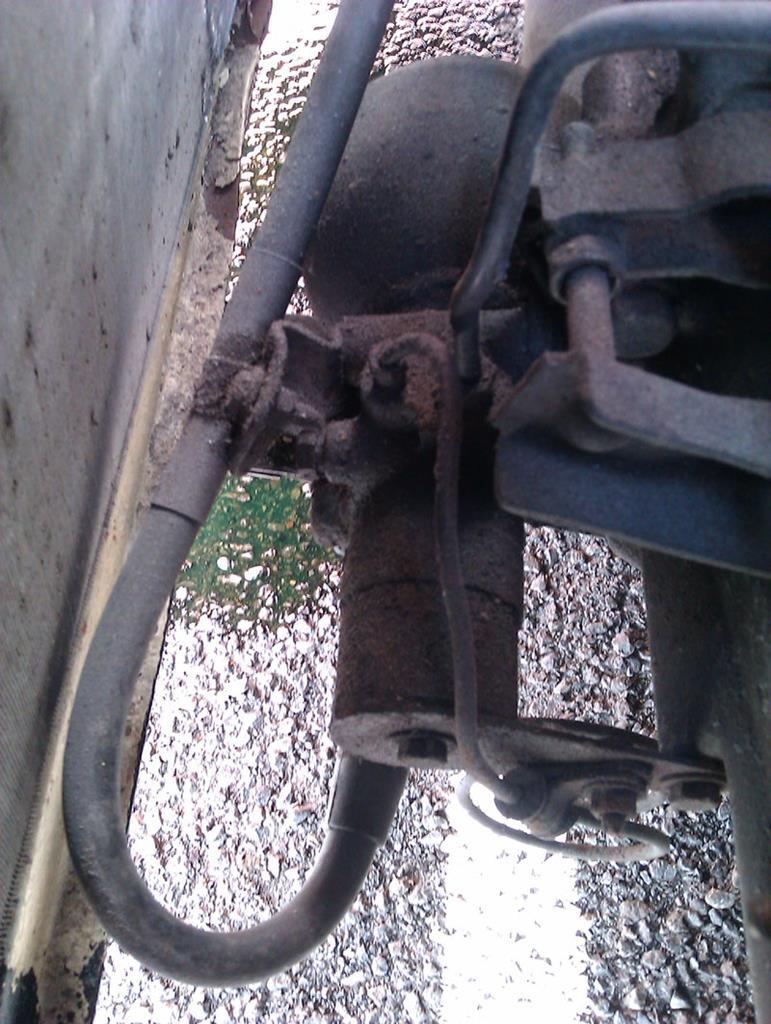
Today, the LHM arrived. I was eager to get that done to find out if replacing those pipes really had cured the leak. On putting the LHM in not a lot really happened, the brake pedal improved but the car was unwilling to rise and the brakes themselves didn't really do a great deal of anything. It's been a few years since I did anything with LHM so Mike and I had a look through the HBoL to see if there were pointers and there was; bleed valve on the accumulator sphere. It's the bolt to the radiator side of the sphere, obscured slightly by that rusty bracket. After following the instructions the system was successfully bled, except for one instruction...
... we did it with the car on high. I had been a bit puzzled at how much LHM it was drinking and put it down to having empty lines. So we put the car on low, as per the instructions we didn't read the first time and predictably enough the car barfed LHM everywhere.
I'd put about a litre too much in. Luckily I'd made use of a GSF sale to grab 5 litres of Total brand LHM stock they were clearing at about £5 per litre, so it wasn't like I flushed too much LHM and I suppose it'll be good rust proofing for that corner. Happily the STOP light functions correctly, lighting and extinguishing when it should.
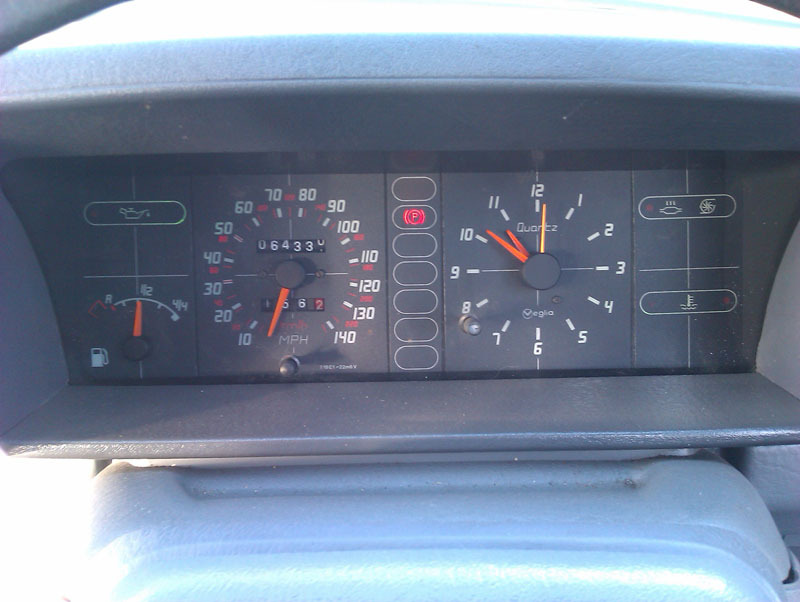
I remembered to knock out the wooden spacer blocks at the back before going for a test drive around the yard. The brakes surprised me, even though I was expecting them to be sharp, the steering feels very nice, the car is very comfortable. I'm incredibly happy. Most important of all, we had to find out if the car goes up and down.
It is a very silly car, I like it very much.
Reason being, I wanted to get that return line repaired. This was nice and straight forward. I just finished the cut I accidentally started with the angle grinder, using decent clippers this time, and then gently warmed the snipped ends of the plastic line before insert a double-ended barbed connector. A nice clean repair and is also quite effective. To help it seal, I wafted the heat gun over the whole thing afterwards so the pipe conformed closer to the shape of the connector.
That was important to do so I could fill the car up with LHM. The bonnet is sorting itself out, slowly, and even though I've had a fiddle with what little alignment is available I've come to the conclusion it's definitely the bonnet itself at fault, not the surrounding bits and pieces. Shown here is after a few days in regular weather, I did notice at the end of today's efforts with some temperature in the engine, it had improved further. I'm hopeful a few hot engine cycles will persuade the panel back to a better alignment.
Another minor issue was one of dirt. The glow plug light hadn't come on and it turned out that all the bodywork I'd been doing had ended up getting quite a bit of dust into the connection for the glow plug relay. It's the one next to the blue box. Disconnected, cleaned out the socket and plug, reconnected and all systems normal again. Additionally, there appears to be no drain on the battery even with the car sat idle for long periods, so that's reassuring.
Today, the LHM arrived. I was eager to get that done to find out if replacing those pipes really had cured the leak. On putting the LHM in not a lot really happened, the brake pedal improved but the car was unwilling to rise and the brakes themselves didn't really do a great deal of anything. It's been a few years since I did anything with LHM so Mike and I had a look through the HBoL to see if there were pointers and there was; bleed valve on the accumulator sphere. It's the bolt to the radiator side of the sphere, obscured slightly by that rusty bracket. After following the instructions the system was successfully bled, except for one instruction...
... we did it with the car on high. I had been a bit puzzled at how much LHM it was drinking and put it down to having empty lines. So we put the car on low, as per the instructions we didn't read the first time and predictably enough the car barfed LHM everywhere.
I'd put about a litre too much in. Luckily I'd made use of a GSF sale to grab 5 litres of Total brand LHM stock they were clearing at about £5 per litre, so it wasn't like I flushed too much LHM and I suppose it'll be good rust proofing for that corner. Happily the STOP light functions correctly, lighting and extinguishing when it should.
I remembered to knock out the wooden spacer blocks at the back before going for a test drive around the yard. The brakes surprised me, even though I was expecting them to be sharp, the steering feels very nice, the car is very comfortable. I'm incredibly happy. Most important of all, we had to find out if the car goes up and down.
It is a very silly car, I like it very much.
-
white exec
- Moderating Team
- Posts: 7445
- Joined: 21 Dec 2015, 12:46
- Location: Sayalonga, Malaga, Spain
- My Cars: 1996 XM 2.5TD Exclusive hatch RHD
1992 BX19D Millesime hatch LHD
previously 1989 BX19RD, 1998 ZX 1.9D auto, 2001 Xantia 1.8i auto
and lots of Rovers before that: 1935 Ten, 1947 Sixteen, 1960 P5 3-litre, 1966 P6 2000, 1972 P6 2000TC, and 1975 P6B 3500S - x 1752
Re: 1987 BX 17RD "Bleriot"
That bonnet should seat down properly; something is holding it up on one side.
The early photos of the car show it sitting as it should.
Bonnets on these are quite flexy - open one, and you can twist it with a hand on each side.
If held down properly by the central catch, both sides should seat on the stops.
Stops and catch are all adjustable.
The big blue electrical box is the GP relay, not the small one next to it. Maybe I misread you, though.
Don't forget to blitz the grounding points; BX ones were dreadful.
Looking good - congratulations on all that hard work!
Chris
-
vulgalour
- Posts: 228
- Joined: 05 Jul 2014, 22:32
- Location: Stockton-on-Tees and Kent
- My Cars: 1980 Austin Princess HL
1987 Citroen BX 17RD - x 36
- Contact:
Re: 1987 BX 17RD "Bleriot"
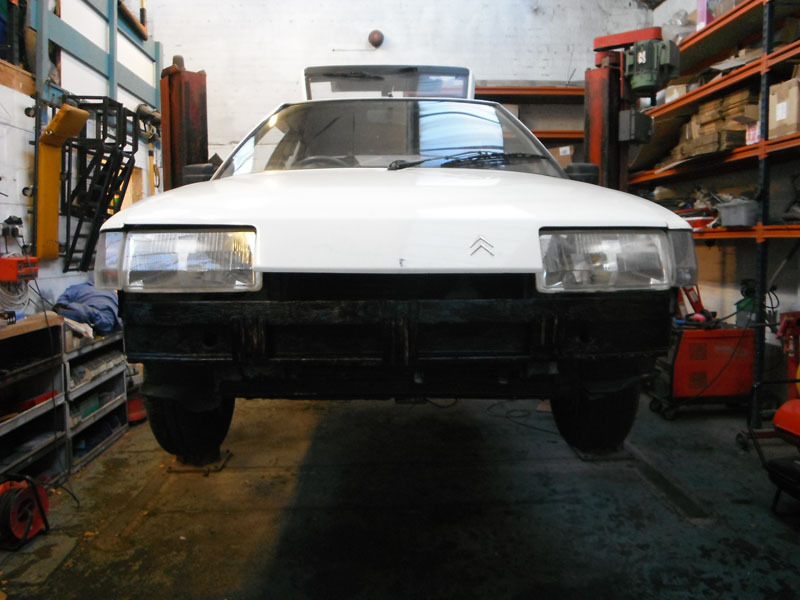
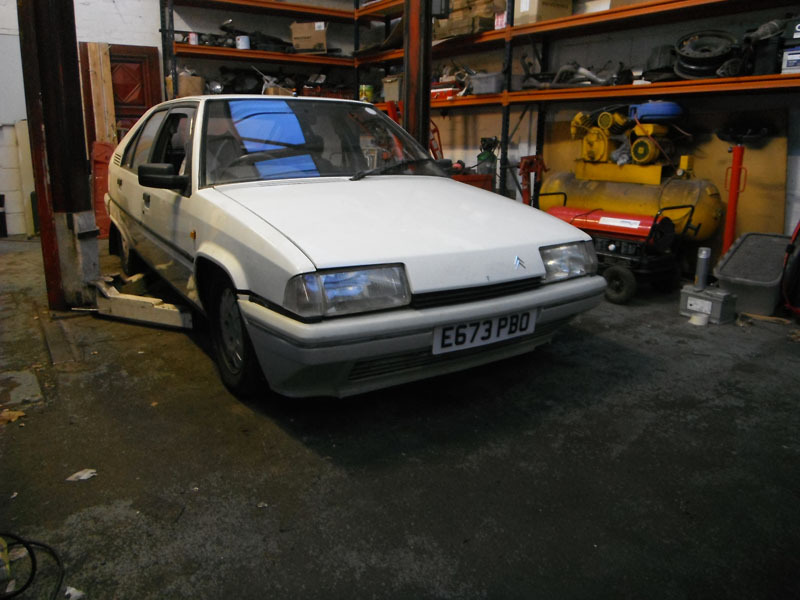
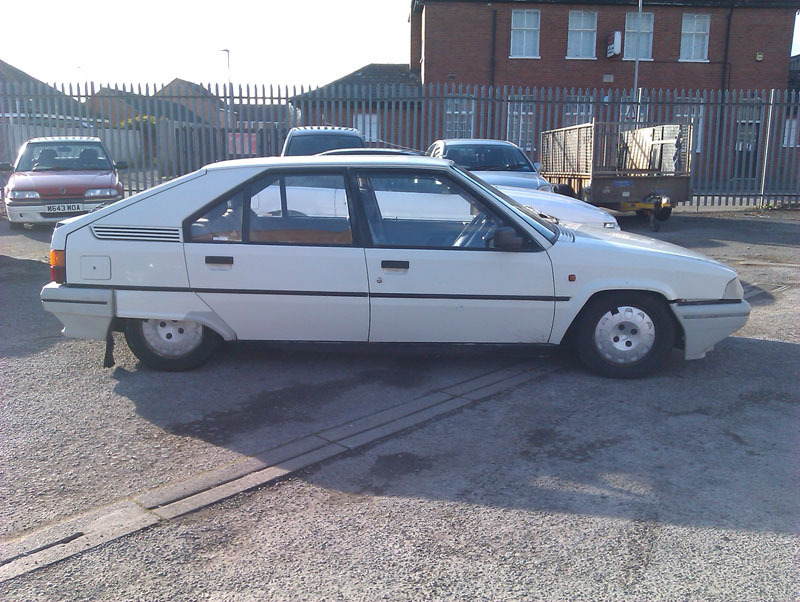
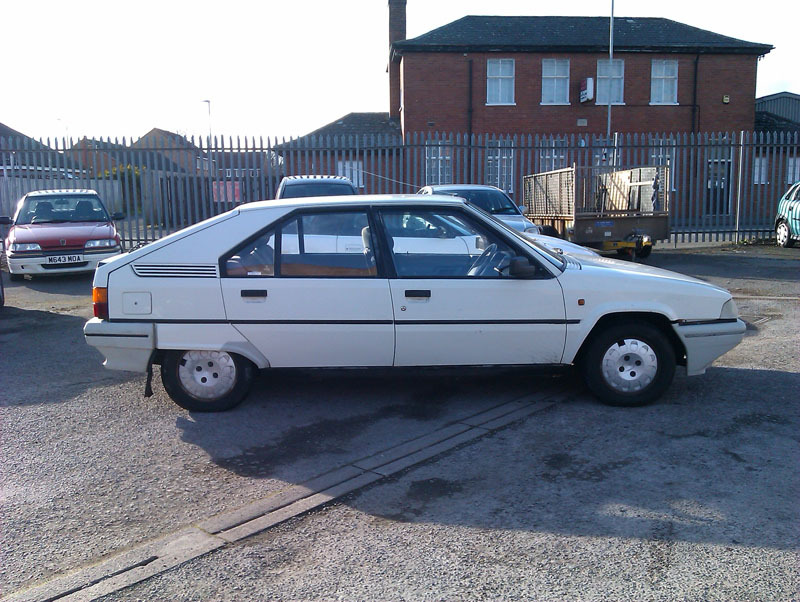
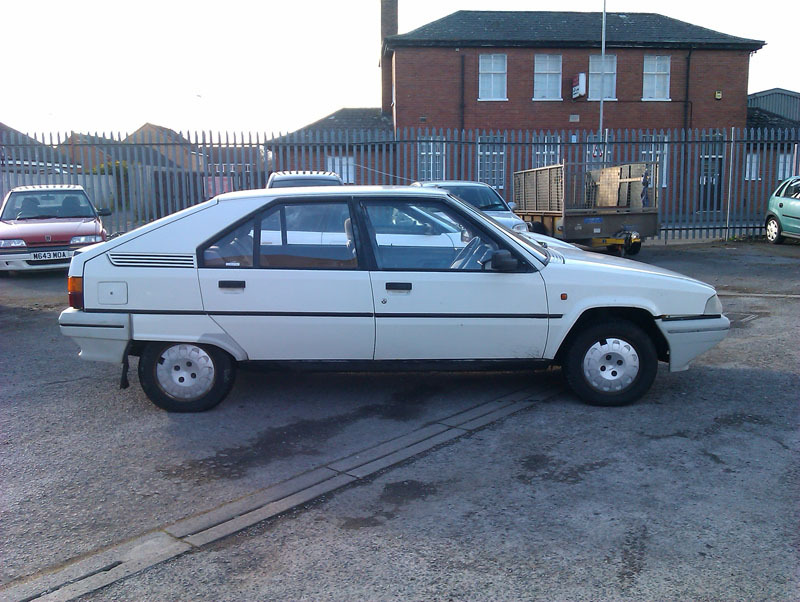
I agree, the bonnet *should* sit down on its own, but it's not. I've tried adjusting at the hinges, latch, catch, and bumpstops to no avail. I've removed the bump stops and the catch and it sits just the same. You can push that corner of the bonnet down to meet with the bumpstop and make it align where it should go, take off your hand and it springs back to where it is in the photograph. The bonnet is warped, trust me. How it warped remains a mystery since it was set aside with nothing on it, or leaning against it, and away from heat sources. It shouldn't have changed shape, but it has.
Odd that you should say the blue box is the GP relay because if you disconnect the black relay next to it, the glowplugs and the light on the dash stop working. Plug that relay back in (cleaned), and normal service is resumed. The earth fault there is between the relay and the pins that plug together rather than the earth point on the body. The blue box appears to be more to do with ignition than glow plugs. I haven't investigated in depth what does what because I found cleaning the contacts and socket for the black relay resolved the problem, so there was no need to look further.
The brake light is most liikely a blown or unseated bulb rather than an earth issue since it's the only liight affected. All earth points I disturbed when welding have been cleaned, I see no need to hunt out other earth points that are working until a problem arises. A case of letting sleeping dogs lie.
-
white exec
- Moderating Team
- Posts: 7445
- Joined: 21 Dec 2015, 12:46
- Location: Sayalonga, Malaga, Spain
- My Cars: 1996 XM 2.5TD Exclusive hatch RHD
1992 BX19D Millesime hatch LHD
previously 1989 BX19RD, 1998 ZX 1.9D auto, 2001 Xantia 1.8i auto
and lots of Rovers before that: 1935 Ten, 1947 Sixteen, 1960 P5 3-litre, 1966 P6 2000, 1972 P6 2000TC, and 1975 P6B 3500S - x 1752
Re: 1987 BX 17RD "Bleriot"
Haynes is pretty good on BX (one book for the Diesel engine, another for everthing else) - probably one of the last that was! - and includes a decent selection of circuit diagrams for the car. Should enable that small relay to be identified.
Neither of the bolts on those (and other relays) are earthing points. All earthing is done by separate wire fixing down to body/engine. Reason for my banging on about earthing points is just that they are known dreadful on BX, and so well worth doing a preventative clean on.
Neither of the bolts on those (and other relays) are earthing points. All earthing is done by separate wire fixing down to body/engine. Reason for my banging on about earthing points is just that they are known dreadful on BX, and so well worth doing a preventative clean on.
Chris
-
Pug_XUD_KeenAmateur
- (Donor 2018)
- Posts: 1168
- Joined: 22 Apr 2013, 17:24
- Location: South Midlands / M4 / M5
- My Cars: 405 naD Est
- x 232
Re: 1987 BX 17RD "Bleriot"
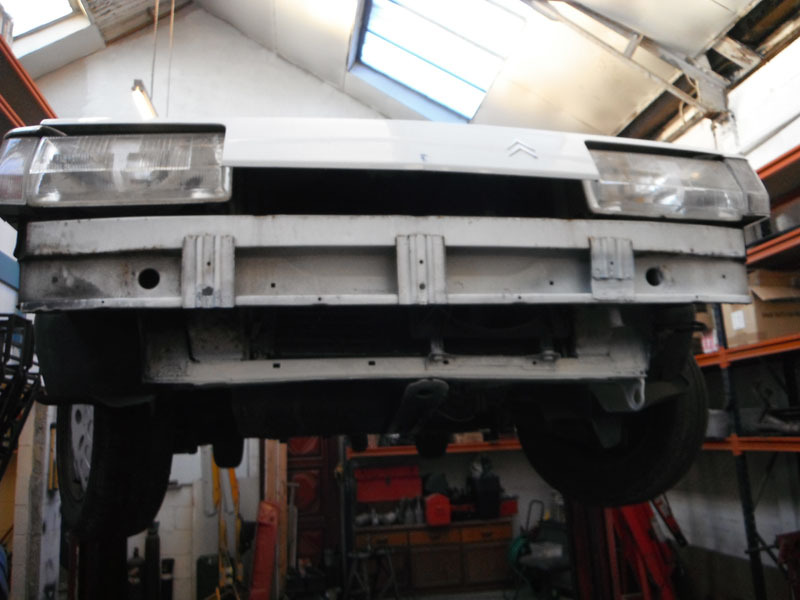
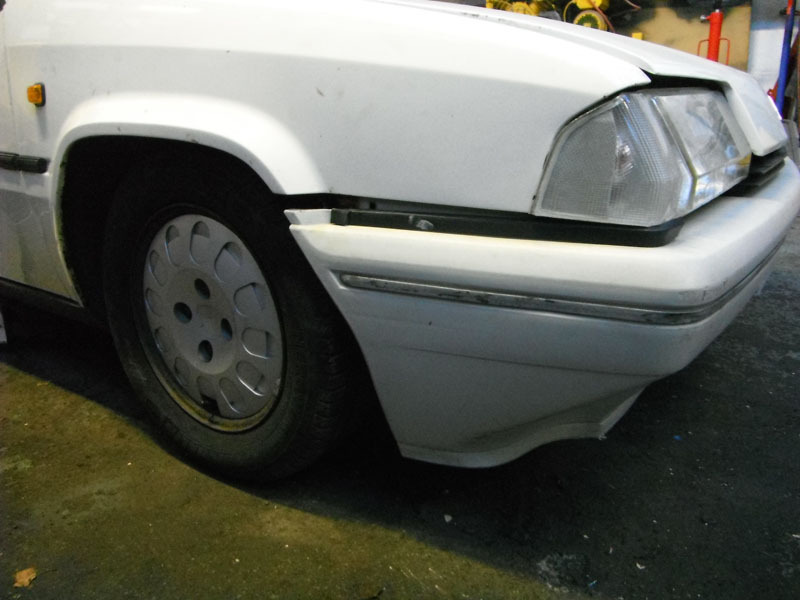
Re Bonnet Alignment... there appears to be something wrong with the fitment of the OS Headlight
....could be me, or the angle of the pic but
...there does appear to be a much bigger 'Bottom of OS Headlight to Bumper' Gap on the NS, than there is on the OS
ie the Headlight unit looks a bit 'Diagonal' therefore creating a 'kick up' at the top NS which could potentially raise the Bonnet line.
It definitely isn't symmetrical with the NS
Also possibly (much less confident on this point) the Gap beneath the OS Indicator (to Bumper Top) is bigger than that on the NS.
The NS looks fine, but two sides don't 'match'
Maybe the Headlight has been fitted incorrectly resulting in the issue with the Bonnet?
Or possibly the vehicle structure to which the headlight is fitted has been leant on or similar and pushed out of place
Might be worthwhile comparing the reading of a Spirit Level on each of the Headlight tops
Happy to be proven incorrect, but looks that way from my viewpoint
Ironically, that area of my 405 has never been right following a prang about 4 years ago, my Bonnet Shut line is too low to meet the tip of the wing properly and the clearance on my OSF wing is all wrong on its back edge (where it meets the Drivers Door); I once tried to replace that Wing and the fit on the new one, believed genuine; it was so impossible I gave up and put the old one back on. Maybe one day I'll work out some Datums and see what the issue is, but its a very long way down my list of priorities and there's a real chance I'll never bother.
Puxa
-
white exec
- Moderating Team
- Posts: 7445
- Joined: 21 Dec 2015, 12:46
- Location: Sayalonga, Malaga, Spain
- My Cars: 1996 XM 2.5TD Exclusive hatch RHD
1992 BX19D Millesime hatch LHD
previously 1989 BX19RD, 1998 ZX 1.9D auto, 2001 Xantia 1.8i auto
and lots of Rovers before that: 1935 Ten, 1947 Sixteen, 1960 P5 3-litre, 1966 P6 2000, 1972 P6 2000TC, and 1975 P6B 3500S - x 1752
Re: 1987 BX 17RD "Bleriot"
Agree - several items look out of line at the front.
Try removing the headlights/sidelights, and see whether the bonnet will then sit flat.
Try removing the headlights/sidelights, and see whether the bonnet will then sit flat.
Chris