
Changing C5 tourer (2010) rear brake pads
Moderator: RichardW
Changing C5 tourer (2010) rear brake pads
I need to change the rear pads on my C5 tourer (2010 model, with the electric handbrake). Is it the same as the old C5 - i.e. mostly common sense, or is there some new procedure for dealing with the electric handrake? I don't want to render the car undriveable, as I need it to get to work - I'm too old and fat to go on my trusty Halfords Commodore bicycle as it's a 33 mile trip!
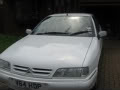
Citroen C5 exclusive tourer 2010 (160hp diesel)
-
OnlineGiveMeABreak

- Forum Admin Team
- Posts: 37323
- Joined: 15 Sep 2015, 19:38
- Location: West Wales
- My Cars: C3 Aircross SUV HDi Flair Peperoncino Red (The Chili Hornet)
C5 X7 2.0 HDi Exclusive Mativoire Beige (The Golden Hornet)
C3 1.6 HDi Exclusive Aluminium Grey (The Silver Hornet)
C5 MK II 2.0 HDi Exclusive Obsidian Black
C5 MK I 2.0 HDi SX Wicked Red
Xantia S2 2.0 HDi SX Hermes Red
C15 Romahome White
XM 2.0 Turbo Prestige Emerald Green Pearlescent
XM 2.0 Turbo Prestige Polar White
XM 2.0 SX Polar White
CX 20 Polar White
GS 1220 Geranium Red
CX 2.4 Prestige C-Matic Nevada Beige
GS 1000 Cedreat Yellow - x 5720
Re: Changing C5 tourer (2010) rear brake pads
It is recommended that the Electric handbrake be disabled in the released position whilst changing the pads, so that it doesn't automatically kick in again while you are doing the job. This can be done with a Lexia - but I think others have managed it without performing this. It is important that the car is positioned where you are going to do the job, then switch off the engine and then release the handbrake. You are then supposed to disconnect the battery so that it doesn't engage again.
Anyway - here's the Citroen Procedure to do the rear pads (X7 Rear Pad Procedure) - let me know when you have the document - and remember on the Hydractive X7, if you are raising the car off the ground, wheels hanging, always remove the LDS fluid cap first.
Anyway - here's the Citroen Procedure to do the rear pads (X7 Rear Pad Procedure) - let me know when you have the document - and remember on the Hydractive X7, if you are raising the car off the ground, wheels hanging, always remove the LDS fluid cap first.
Please Don't PM Me For Technical Help
Marc
Marc
Re: Changing C5 tourer (2010) rear brake pads
Thanks for the document - I will give it a go next weekend.
Citroen C5 exclusive tourer 2010 (160hp diesel)
Re: Changing C5 tourer (2010) rear brake pads
I don't know what I was worried about! I released the handbrake using the nylon pull-strap under the rubber mat in the centre console, and it relaxed the handbrake cables enough to remove them from the calipers. Then it was just like any other sliding caliper. I had one brake pad that was worn down to almost nothing, and the rest had plenty meat on them. I had to tap the caliper off the upper sliding pin on the worn down side. The pin wasn't rusty, just covered in crap. I cleaned it all off, smeared a thin coat of copper based grease on, and rea ssembled. A few slow presses of the brake pedal, followed by a long pull on the handbrake control, and it was all back to normal.
Citroen C5 exclusive tourer 2010 (160hp diesel)
-
Alangale
- Posts: 3
- Joined: 15 Jan 2017, 14:43
- Location: Dumfries
- My Cars: Currently - C5 tourer 2013.
Around 1990...F Reg BX 1.6 petrol!
Numerous 309's over the years
2009 Peugeot 308 Hdi. 120k miles in a few years. Great car.
Re: Changing C5 tourer (2010) rear brake pads
Hello and thank you for your posts which are very helpful indeed.
I need to change the rear pads on 2013 c5 tourer with electronic handbrake.
I've managed to deactivate the electronic handbrake by ignition on, foot on foot brake, and flick handbrake switch. Handbrake deactivates until next time I start the car. Guess this is ok.
Did you use diagnostic tool to recalibrate the electronic handbrake or simply use traditional wind back tool?
Thank you in advance for your help.
Alan
-
RichardW
- Forum Treasurer
- Posts: 10868
- Joined: 07 Aug 2002, 17:12
- Location: United Kingdom
- My Cars: MK2 '17 C4GP 1.6 BlueHDi 120
'13 3008 1.6 HDi GripControl - x 994
Re: Changing C5 tourer (2010) rear brake pads
If it's got cables and a central unit then it is OK just to release it and change the pads. If it's the type with built in motors in the calipers then you need a diag computer to do it.
Richard W
-
Alangale
- Posts: 3
- Joined: 15 Jan 2017, 14:43
- Location: Dumfries
- My Cars: Currently - C5 tourer 2013.
Around 1990...F Reg BX 1.6 petrol!
Numerous 309's over the years
2009 Peugeot 308 Hdi. 120k miles in a few years. Great car.
Re: Changing C5 tourer (2010) rear brake pads
Thanks for the reply. Indeed it has got cables going to the calliper. See photo attached
I'll give it a shot, thanks again
Alan
PS - here is a photo of the cable going to caliper...not attached a photo before, hope this works.
PPS - Tourer is fab car...20k miles in the last year....no probs!!!!
I'll give it a shot, thanks again
Alan
PS - here is a photo of the cable going to caliper...not attached a photo before, hope this works.
- cable to calliper on 2013 C5 Tourer
-
KennyW
- Donor 2024
- Posts: 2506
- Joined: 17 Jan 2006, 21:22
- Location: Letham, Fife
- My Cars: Current Citroen's
C5 x7 2010
SWMBO C3 2012
Previous Citroen's
Xantia 2.0 90hp estate
Xantia 1.9 TD estate - x 132
Re: Changing C5 tourer (2010) rear brake pads
I'm curious, I've checked citroen service and it would appear that my 2010 x7 does not have motors attached to the caliper.
When did this get introduced and what do they look like?
Kenny
When did this get introduced and what do they look like?
Kenny
C5 x7 2.0 HDi 160 hp Estate exclusive, the newbie
Xantia 2.0 Hdi 90hp 1999 only 189,000 and rising!!!!!!! Moved on to a new home
C3 1.4 petrol (SWMBO)
Xantia TD 1.9 Mk 2 Estate LX 1998 model over 210,000 miles now and still rising!!!!!!!!!!!!! now deceased 17/12/2010.
Xantia 2.0 Hdi 90hp 1999 only 189,000 and rising!!!!!!! Moved on to a new home
C3 1.4 petrol (SWMBO)
Xantia TD 1.9 Mk 2 Estate LX 1998 model over 210,000 miles now and still rising!!!!!!!!!!!!! now deceased 17/12/2010.
-
RichardW
- Forum Treasurer
- Posts: 10868
- Joined: 07 Aug 2002, 17:12
- Location: United Kingdom
- My Cars: MK2 '17 C4GP 1.6 BlueHDi 120
'13 3008 1.6 HDi GripControl - x 994
Re: Changing C5 tourer (2010) rear brake pads
Actually I don't think the C5 X7 does - the current version of the C4 Picasso does, as probably do some of the DS models.
Richard W
-
OnlineGiveMeABreak
- Forum Admin Team
- Posts: 37323
- Joined: 15 Sep 2015, 19:38
- Location: West Wales
- My Cars: C3 Aircross SUV HDi Flair Peperoncino Red (The Chili Hornet)
C5 X7 2.0 HDi Exclusive Mativoire Beige (The Golden Hornet)
C3 1.6 HDi Exclusive Aluminium Grey (The Silver Hornet)
C5 MK II 2.0 HDi Exclusive Obsidian Black
C5 MK I 2.0 HDi SX Wicked Red
Xantia S2 2.0 HDi SX Hermes Red
C15 Romahome White
XM 2.0 Turbo Prestige Emerald Green Pearlescent
XM 2.0 Turbo Prestige Polar White
XM 2.0 SX Polar White
CX 20 Polar White
GS 1220 Geranium Red
CX 2.4 Prestige C-Matic Nevada Beige
GS 1000 Cedreat Yellow - x 5720
Re: Changing C5 tourer (2010) rear brake pads
There aren't any rear calipers with built in electric motors on the X7 - all hydraulic X7s have the electronic parking brake and the metallically sprung versions have a standard handbrake. The Electronic handbrake just acts on the rear calipers as a normal brake, except that it is linked to the ESP system for hill start functionality etc. The cables are controlled by a separate electronic box unit mounted at the rear which electronically pulls and releases the calipers via cables.KennyW wrote:I'm curious, I've checked citroen service and it would appear that my 2010 x7 does not have motors attached to the caliper.
When did this get introduced and what do they look like?
Kenny
Please Don't PM Me For Technical Help
Marc
Marc
-
KennyW
- Donor 2024
- Posts: 2506
- Joined: 17 Jan 2006, 21:22
- Location: Letham, Fife
- My Cars: Current Citroen's
C5 x7 2010
SWMBO C3 2012
Previous Citroen's
Xantia 2.0 90hp estate
Xantia 1.9 TD estate - x 132
Re: Changing C5 tourer (2010) rear brake pads
Thanks Marc and Richard,
I thought so but wanted to make sure.
Kenny
I thought so but wanted to make sure.
Kenny
C5 x7 2.0 HDi 160 hp Estate exclusive, the newbie
Xantia 2.0 Hdi 90hp 1999 only 189,000 and rising!!!!!!! Moved on to a new home
C3 1.4 petrol (SWMBO)
Xantia TD 1.9 Mk 2 Estate LX 1998 model over 210,000 miles now and still rising!!!!!!!!!!!!! now deceased 17/12/2010.
Xantia 2.0 Hdi 90hp 1999 only 189,000 and rising!!!!!!! Moved on to a new home
C3 1.4 petrol (SWMBO)
Xantia TD 1.9 Mk 2 Estate LX 1998 model over 210,000 miles now and still rising!!!!!!!!!!!!! now deceased 17/12/2010.
Changing C5 tourer (2010) rear brake pads
Thanks for the postings. I have just renewed mine - C5 X7 Tourer Exclusive 2.0 HDI with electronic parking brakes. On my car this handbrake module is linked to the rear calipers by two cables one to each side. The module itself is located inside the rear axle tunnel (across the car). If we get under the car and look upward we will see this rectangular box sitting deep inside the alloy tunnel. In this posting I share my rear brakepad renewal steps which is done without diagnostic computer (Lexia software on Windows computer with OBDII adaptor).
The original posting reported the steps that I have taken to change rear brake pads. Due to improvements, it is re-written to avoid using the emergency handbrake release. Instead the "electronic release" method is illustrated<Gratitude towards member Marc's repsonse posting>:
The original posting reported the steps that I have taken to change rear brake pads. Due to improvements, it is re-written to avoid using the emergency handbrake release. Instead the "electronic release" method is illustrated<Gratitude towards member Marc's repsonse posting>:
- Preventive safety
The rear brake pads are pushed by the caliper against the brake disc by the handbrake. To be able to tilt the caliper followed by retrieving the old brake pads then inserting the new brake pads and refitting, the parking brakes needs to be released. Before disengage the parking brakes, we must observe all safety prcedures - ensure car is on level ground so it will not tend to roll forward or backward after the parking brakes had been disengaged. Put wheel chocks front and aft on all wheels except the one that we are going to remove (3 pairs = 6 chock blocks). Make sure no one and no vehicles can approach and disturb our vehicle. Pay attention of your location if strong wind, for example, can exert a push. Alert, evaluate, always keep a willingness to abort (safety).
- Wheel removal
Jack one wheel at a time - change the brake pads one corner at a time. Only after refitting has completed on the corner should we release the jack and start working on the other one. Loosen the wheel nuts half turn while the wheel is still on the ground. Bearing in mind that the handbrakes are going to be released next, the initial torque exeerted to loosen our wheel nuts will cause our car to roll. Perhaps we can consider loosening both sides at this time before the parking brake is released.
Do not rely solely on the jack, use axial stand for extra safety. I used a two tonne jack. The C5 weighs around 1750Kg so the jack capacity has to be minimum two tonnes (at least equal to the full weight of the vehicle). Check and push the wheel chocks towards each wheels after jacking up. Jack at designated positions, and placement of axial stand must be at a strong point of the under structure of the car - I picked pivot axials and never rest suspension swing arms or link rods on the axial stand.
- Disengage the handbrake
Once car is chocked - switch ignition on, keep foot firmly on the footbrake, push the electronic down handbrake control and let go. We expect to hear the motor whine sound of brake disengaging and correspondingly on the instrument cluster a message will be displayed confirming release. If you have not pressed hard enough on the footbrake, a message asking you to press the footbrake will appear. When this is the case, attempt the aforementioned steps to release the electronic brake again. Once a positive confirmation of handbrake release is obtained, switch off the ignition and then we will proceed to disconnecting the battery. This "electronic release" method minimizes the risk of the handbrake system not restoring itself properly when we reconnect the battery towards the end of our brake pad replacement steps.
- Isolate battery
Retrieve the ignition key from the key barrel. Do not lock the car. Pop the bonnet. Wait 15 minutes. If the car had run, this time period will allow for temperature to cool down naturally. More importantly this time is given for the ECUs on the car to save parameters. After this we can disconnect the battery using the quick release lever on the positive terminal. Insert a piece of dry cloth or a folded plastic carrier bag between the battery terminal and the connector which is now isolated from it. The insert prevents the terminal touching the electrode ensuring isolation throughout our procedure. This is to completely eliminate the possibility of the electronic handbrake being reapplied automatically when we will be working on the brakes.
While we are still at the engine bay, take notice of the brake fluid level. Ensure that fluid will not overflow since we will push in the pistons on the brake caliper(s). Fluid in the caliper cylinder will be displaced back into the brake fluid reservoir. Loosen the cap to facilitate air pressure equalization. As a precaution, put cloth (or absorbant material) around the reservoir bottle. I did not detach the cap since doing so increases the risk of contaminating the brake fluid.
- Retrieve rear brake pads
Follow the steps in the PDF link given in one of the earlier postings.
- Re-gap the caliper
The piston on the caliper need to recede since the new pads are thicker (have more "meat" on them). A pusher tool will not work since PSA brake piston is to be turned to retract them. Twist the piston clockwise taking care not to damange the rubber boot around it. It needs more than a few turns to get back the space for accommodating the thicker new pads. Check brake fluid level in the reservoir in the engine bay since it will rise by us pushing the piston in. Make sure the rising fluid level does not overflow causing a spill. After pushing in both rear pistons, the level on my car just came back up to near the "full" mark on the reservoir so I was fine without having to drain excess brake fluid from the system. The piston is not hollow and it has a flat top. On this surface there are two rounded holes. PSA tool will have correspond studs that mate with these which we can use to turn the piston. I was without this tool so I use large jaw pliers.
- Clean the wheel hub assembly
Put a collecting pan below the wheel hub. Spray brake cleaner and use this pan to collect the drip. We do not use air nozzle since brake dust will be blown and disperse in air around us. Due to particle size is small, when these dust gets airborne there is possibility that we inhale them bearing in mind that they do not settle readily.
- Fit new brake pads
Before fitting the new brake pads, check the edges and locate the places on them where there will be contact with the caliper. Apply very small amount of copper grease along these lengths. Apply similarly small amount of copper grease around the raised circle on the piston.
- Prepare to run the electric handbrake
When I have finished, I kept the wheel chock since the car is yet to be retained by the handbrakes. Back in the engine bay, tight up the brake reservoir bottle cap. Check everything then reconnect the battery. Use the footbrake (depress and let go of the footbrake padel) a few times. This is to close up excessive gap between the brake pads and the brake disc. Put the car back to neutral. Start the engine. Apply the electronic handbrake.
- Recalibrate handbrake without Lexia
In my case, I heard the handbrake motor running for two seconds - it has run longer than the regular time required to fully engage the handbrake electronically. I believe the handbrake cables from the calipers to the electric handbrake module are still slack. After this motor whine the instrument cluster gave a warning that the handbrake was not applied. In the second attempt to apply the handbrake, this time the slack is compensated and the handbrake is applied successfully. This would have been equivalent to Lexia re-calibration of the handbrake. Pull the handbrake switch and hold it. The instrument cluster will report that maximum handbrake has been applied.
- Driving with new brake pads just installed
Before driving the car, double check the tightening torque of the wheel nuts on both sides. The car is driven a few miles bearing in mind that new brake pads need bedding in. When they are running-in brake performance is reduced. Brake early, keep extra distance in front, use slow speed and be vigilant. In the following days, by visually inspecting the brake disc, I can see the shiny surface increases over time. This is an indicator of how much the pads have been bedded in.
- Set date time
Since we have isolated the battery we will have to re-enter the correct data/time into the radio.
Last edited by coarist on 30 Apr 2017, 13:34, edited 2 times in total.
-
Hell Razor5543
- Donor 2023
- Posts: 13743
- Joined: 01 Apr 2012, 09:47
- Location: Reading
- My Cars: C5 Mk2 VTX+ estate.
- x 3007
Re: Changing C5 tourer (2010) rear brake pads
Nice write up. Might I suggest loosening the cap on the brake fluid reservoir to that you do not get an increase in pressure there, which could cause the split you warn against. Don't remove it (as you do not want any dirt to fall in), but loosening it should allow air to get past.
James
ex BX 1.9
ex Xantia 2.0HDi SX
ex Xantia 2.0HDi LX
Ex C5 2.0HDi VTR
Ex C5 2.0HDi VTR
C5 2.2HDi VTX+
Yes, I am paranoid, but am I paranoid ENOUGH?
Out amongst the stars, looking for a world of my own!
ex BX 1.9
ex Xantia 2.0HDi SX
ex Xantia 2.0HDi LX
Ex C5 2.0HDi VTR
Ex C5 2.0HDi VTR
C5 2.2HDi VTX+
Yes, I am paranoid, but am I paranoid ENOUGH?
Out amongst the stars, looking for a world of my own!
-
ekjdm14
- (Donor 2020)
- Posts: 1817
- Joined: 19 Jan 2015, 17:42
- Location: Manchester
- My Cars: '95 Xantia 1.9D automatic - 118k one of two? remaining
'97 306 1.6 XS, 24k, The ex-Haynes "Max Power" display car. Bought after being written off & stripped, now being rebuilt without the wide body
('96 ZX 1.9TD SX, ??k roller due to collect at weekend) - x 213
Re: Changing C5 tourer (2010) rear brake pads
I think it may be a case of the write-up being written/edited after completion of the job and this is one of the minor typo's presumably due to being the end of the day. Hence the "split" you read is actually written "spilt" which I take to mean spillage of brake fluid.
Good advice nonetheless to loosen the cap slightly, and can't do any harm. There ought to be a small bleed hole in the cap anyway to avoid negative pressure building in the system as pads/discs wear but I wouldn't expect it to be up to passing any volume of air over a short time.
Good advice nonetheless to loosen the cap slightly, and can't do any harm. There ought to be a small bleed hole in the cap anyway to avoid negative pressure building in the system as pads/discs wear but I wouldn't expect it to be up to passing any volume of air over a short time.
'95 Xantia LX 1.9D-auto, Black, 118k
'97 306 XS 1.6i, Blaze Yellow, 24k
'96 ZX SX 1.9TD rolling shell, White, ??k
'97 306 XS 1.6i, Blaze Yellow, 24k
'96 ZX SX 1.9TD rolling shell, White, ??k
-
OnlineGiveMeABreak
- Forum Admin Team
- Posts: 37323
- Joined: 15 Sep 2015, 19:38
- Location: West Wales
- My Cars: C3 Aircross SUV HDi Flair Peperoncino Red (The Chili Hornet)
C5 X7 2.0 HDi Exclusive Mativoire Beige (The Golden Hornet)
C3 1.6 HDi Exclusive Aluminium Grey (The Silver Hornet)
C5 MK II 2.0 HDi Exclusive Obsidian Black
C5 MK I 2.0 HDi SX Wicked Red
Xantia S2 2.0 HDi SX Hermes Red
C15 Romahome White
XM 2.0 Turbo Prestige Emerald Green Pearlescent
XM 2.0 Turbo Prestige Polar White
XM 2.0 SX Polar White
CX 20 Polar White
GS 1220 Geranium Red
CX 2.4 Prestige C-Matic Nevada Beige
GS 1000 Cedreat Yellow - x 5720
Re: Changing C5 tourer (2010) rear brake pads
I'd like to just correct this paragraph as it contradicts official advice. There is a way to deactivate the handbrake manually, without using the emergency brake release (see below) - but if you are using the emergency release, the manual clearly states that when re-applying the brake you must not switch on the ignition until the parking brake has re-engaged (flashing of the warning lamp, then warning lamp lit permanently) in order to avoid damage to the parking brake. It should be done without the engine running or ignition on once the battery has been reconnected. The first long pull on the brake control should trigger the flashing warning on the control panel, then the second long pull should light the warning lamp permanently. Then the ignition can be switch on.coarist wrote:
- Prepare to run the electric handbrake
When I have finished, I kept the wheel chock since the car is yet to be retained by the handbrakes. Check everything then reconnect the battery. Use the footbrake (depress the footbrake padel) a few times. This is to close up excessive gap between the brake pads and the brake disc. Put the car back to neutral. Start the engine. Apply the electronic handbrake.
To release the handbrake without using the emergency release:
Once car is chocked - switch ignition on, keep foot firmly on the footbrake, push the electronic handbrake control down and let go. If successful, you will hear the brake disengage and the message will confirm release on the control panel. If you have not pressed hard enough on the footbrake, a message asking you to press the footbrake will appear, then release the electronic brake again. Once done switch off the ignition and then you can disconnect the battery. This method reduces the risk of the emergency handbrake release system not restoring itself properly.
Please Don't PM Me For Technical Help
Marc
Marc