XM 2.1 Rebuild

This is the Forum for all your Citroen Technical Questions, Problems or Advice.

Moderator: RichardW

Post Reply
steelcityuk
Posts: 1053
Joined: 03 Jul 2006, 21:51
Location: not applicable
My Cars: not applicable
x 1

XM 2.1 Rebuild

Post by steelcityuk »

Hi All,

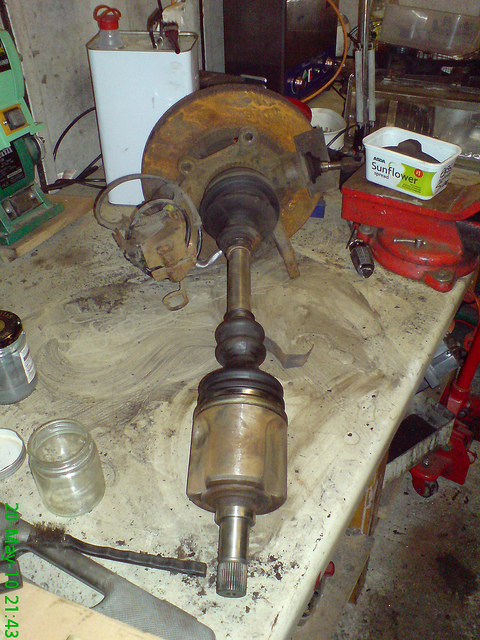
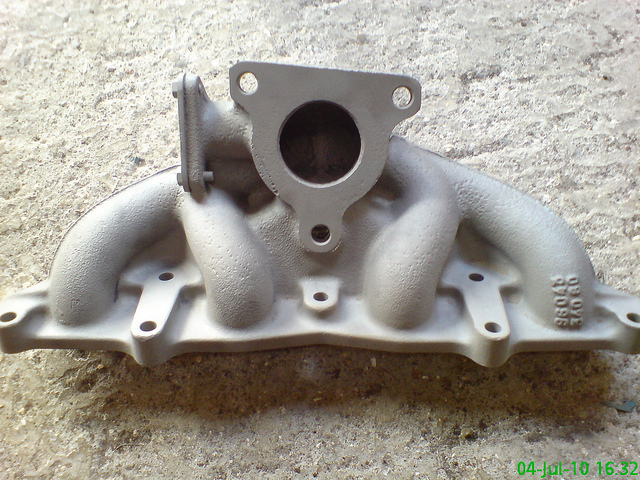
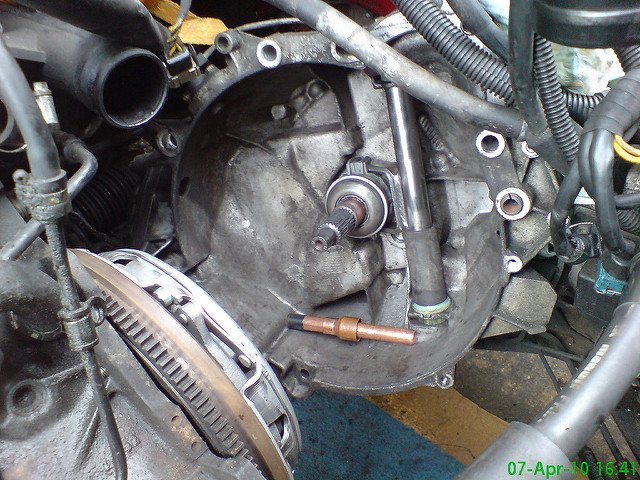
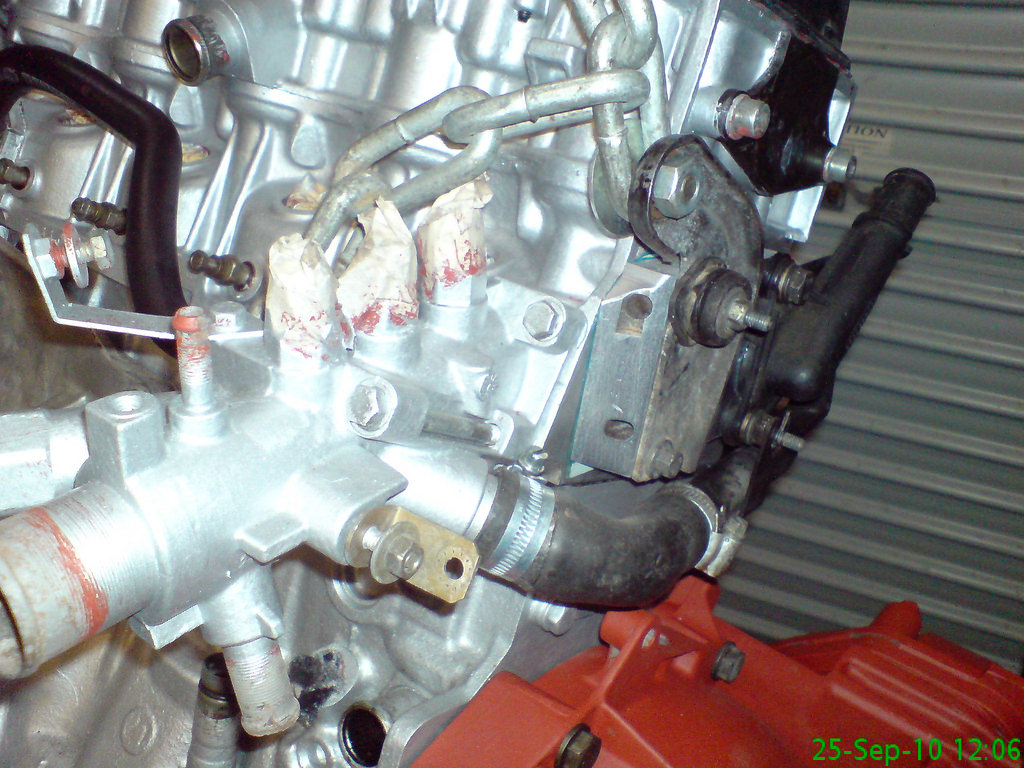
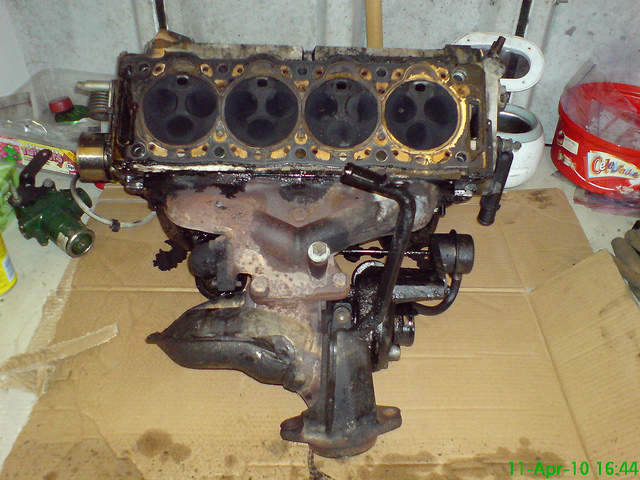
Here's a few photos showing the progress on the engine rebuild. They may have details in them that others may find useful - hopefully.

The decision to rebuild was based on the scruffy engine bay, increasingly hard starting and a leak from the injector pump (causing the hard starting). The clutch was a bit heavy too so I though a top end rebuild and a clutch would do the job but I've got a bit carried away.

Image

Image

Image

Image

Image

Image

Image


Steve.
not applicable
steelcityuk
Posts: 1053
Joined: 03 Jul 2006, 21:51
Location: not applicable
My Cars: not applicable
x 1

Post by steelcityuk »

Which led to me pulling the whole lump out -
Image

So I decided on a few mods, such as blanking off the EGR -
Image

A head port and polish after a test and skim, the port above No10 is the final finish-
Image

A full seal kit in the injection pump-
Image

From this-
Image

To this-
Image

And these-
Image


Steve.
Last edited by steelcityuk on 13 Sep 2010, 23:30, edited 1 time in total.
not applicable
User avatar
CitroJim
A very naughty boy
Posts: 49626
Joined: 30 Apr 2005, 23:33
Location: Paggers
My Cars: Bluebell the AX, Polly the C3 Picasso, Pix the Nissan Pixo, Propel the duathlon bike, TCR Pro the road bike and Fuji the TT bike...
x 6185
Contact:

Post by CitroJim »

That's looking good Steve :D

Going for a concours XM by the looks of it 8-)

You'll have to bring it to next years CXM rally....
Jim

Runner, cyclist, time triallist, duathlete, Citroen AX fan and the CCC Citroenian 'From A to Z' Columnist...
steelcityuk
Posts: 1053
Joined: 03 Jul 2006, 21:51
Location: not applicable
My Cars: not applicable
x 1

Post by steelcityuk »

Thanks Jim.

At this rate it won't be ready for next year! I'm not sure about the concours thing either, mechanicals I can sort out but bodywork/paintwork I'm pretty poor at.

Steve.
not applicable
steelcityuk
Posts: 1053
Joined: 03 Jul 2006, 21:51
Location: not applicable
My Cars: not applicable
x 1

Post by steelcityuk »

After spending hours cleaning up parts with emery cloth I decided to buy a spot blast gun to see what finish it gave on rusty/corroded parts. It was a big mistake, brilliant finish in even the smallest nook or cranny so I went out and bought a small blast cabinet. Unfortunately this led to complaints about compressor noise so I started to look at ways of silencing the compressor or making a compressor setup using freezer parts and a big tank. There's lots of conflicting info about this kind of setup and oil mist in the air so I looked elsewhere. Eventually I found out about Hydrovane compressors, they're relatively quiet, powerful and top quality. They can be either constant running or stored air, single phase, 3 phase, 4 or 8 CFM. I found one on eBay, single phase, 2.2kW, 8CFM with a 100 Ltr tank. The only snag was that I then needed to upgrade the power supply to the garage. So a new armoured cable was run to the garage, 40A MCB in the main board then into a RCCD then the armoured then a metal clad fuseboard in the garage. So after more wiring I've ended up 5 individually switched fluorescent lights, 2 ring circuits and one circuit dedicated to the Hydrovane that terminates in a 'commando' socket. Hence the very slow progress on the rebuild.

Here's the Hydrovane in the back of my A Class-
Image

All I can say is that finding out about these was a complete revelation, all that air and about as noisy as a vacuum cleaner!

So back to the rebuild.

Here's the result on a few parts-
Image

Image

Steve
not applicable
steelcityuk
Posts: 1053
Joined: 03 Jul 2006, 21:51
Location: not applicable
My Cars: not applicable
x 1

Post by steelcityuk »

After cleaning up the block and parts I started assembling a few pieces.

Block in Silver Hammerite and sump in alloy primer. New Valeo clutch fitted-
Image

With the head fitted and sump painted, all threads cleaned out with a tap, cotton bud and air line. New bolts and a FAI laminated head gasket fitted-
Image

Now with the cam carrier fitted, the polished ports and valves can just be seen, new cam and valve seals fitted from the gasket set and a used set of tappets to replace the very noisy existing ones, these have been emptied of oil and ultrasonically cleaned. All valves polished to a mirror shine-
Image

Turbo bracket and oil return detail-
Image

With the manifolds fitted, retaining studs and bolts clearly visible, all paper gaskets have been lightly coated with Blue Hylomar-
Image

Finally with the turbo fitted after a rebuild-
Image

Steve.
Last edited by steelcityuk on 13 Sep 2010, 23:43, edited 5 times in total.
not applicable
HDI Dave
Posts: 334
Joined: 14 May 2009, 11:20
Location: Bradford,Yorkshire
My Cars:
x 3

Post by HDI Dave »

Image

Flippin eck, no wonder the clutch was stiff, that can't have helped!

Any idea of the mileage on it?

Looks like little or zero grease was applied on fitment.

When I did mine I bunged some grease (not too much ) on the shaft and it's now light as a feather :D

Nice work, there's them that do it properly and them that just chuck stuff together, you are the former 8-)
1999 Xantia LX 2.0 HDI 110 Rusteration project...
steelcityuk
Posts: 1053
Joined: 03 Jul 2006, 21:51
Location: not applicable
My Cars: not applicable
x 1

Post by steelcityuk »

Thanks Dave,

If it's the original clutch then 147,000 but I doubt it. The clutch wasn't slipping or as heavy as the one on the TCT had been before I replaced it's clutch but living in a busy city I thought it would be money well spent, about £150 for the Valeo kit from AEP via eBay.

Here's how it looked after a clean up but before I decided to pull the rest of the engine out. Home made clutch tool in the bottom of the clutch housing. Shaft polished and new plastic bushes fitted along with the Valeo clutch and a light smear of grease in the bushes, hopefully not enough to attract dirt-
Image

Let's hope it runs OK when it's finished.

Steve.
Last edited by steelcityuk on 14 Sep 2010, 00:00, edited 2 times in total.
not applicable
XantiaDaveEire
Posts: 560
Joined: 27 Sep 2008, 02:20
Location: Ireland
My Cars:
x 4

Post by XantiaDaveEire »

You certainly havnt skimped on the polishing detail anyway :lol:

Looks like its coming alone very nicely btw

How many miles on her ?
1998 Xantia 1.9 TD 186k
2008 C4 grand Picasso exclusive 105k #-o
steelcityuk
Posts: 1053
Joined: 03 Jul 2006, 21:51
Location: not applicable
My Cars: not applicable
x 1

Post by steelcityuk »

Hi Dave,

She's done about 147,000 miles and according to the RP number was built in December 1992 and regsitered early in 1993.

I don't normally go to all this trouble but after having done top end rebuilds on the 2.5 and the TCT I couldn't wait to get my teeth into a 2.1. Hopefully this will be with me for a good few years when finished. Over the last couple of years I've been to various local 'classic' car shows and not a single Citroen is ever shown, so maybe I can change that, if so I won't be entering to win just to add variety to the usual line up.

Steve.
not applicable
jgra1
(Donor 2021)
Posts: 4625
Joined: 27 Nov 2005, 19:07
Location: Kent / Susssex
My Cars: 2010 C5 X7 2.0 hdi 160 exc auto
MG TF 135
Boxer II 2.2 camper conversion
BMW R1200RT
BMW K1300 R
Honda V F R 800 5thG / MT500 Armstrong
x 39

Post by jgra1 »

grea stuff Steve, looks damn good.. :D think I will have same issue wih compressor.. although only one neighbour, I will be reluctant to use mine except when he is mowing

John
Xantidote
Posts: 1146
Joined: 03 May 2009, 22:07
Location: Merseyside
My Cars:
x 5

Post by Xantidote »

Super job Steve - hope it rewards you with many years of reliable service.

It's so much more pleasant doing work on a smart & tidy engine :D
Martin

1995 Xantia TDLX (deceased :( )
steelcityuk
Posts: 1053
Joined: 03 Jul 2006, 21:51
Location: not applicable
My Cars: not applicable
x 1

Post by steelcityuk »

After a clean up of the engine bay I found a split gaiter on the lefthand side of the rack. I may have caused this to happen by turning the wheel too far for the old gaiters to cope.
Image

So the rack was removed and the subframe & bulkhead given a very thorough clean. The height corrector and Hydractive block were removed, stripped and ultrasonically cleaned.

HC and Hydractive block before cleaning - I've got a replacement sphere to fit too.
Image

Although the LHM in the tank was bright green the height correctors 'store' alot of grime
Image

Rack stripped, cleaned and painted. New Citroen gaiters fitted and a replacement track rod end - the gaiters were covered with bubble wrap and masking tape to protect them. Subframe thoroughly cleaned, painted and Waxoyled. Height Corrector and Hydractive Block stripped cleaned and refitted. Wiring loom tidied up using self amalgamating tape then clipped and cable tied into place.
Image

As a finishing touch I decided to polish the steering rack cover. In the end I polished both sides hoping this will help keep it cleaner.
Image

Steve.
not applicable
steelcityuk
Posts: 1053
Joined: 03 Jul 2006, 21:51
Location: not applicable
My Cars: not applicable
x 1

Post by steelcityuk »

Just a couple more photos no real progress.

Here's the fuel heater I cut up a few weeks ago today I finally remembered to take a photo, here's how it looks in situ, Blue Hylomar clearly visible on the gasket
Image

Here it is with the gearbox in primer
Image

Steve.
not applicable
steelcityuk
Posts: 1053
Joined: 03 Jul 2006, 21:51
Location: not applicable
My Cars: not applicable
x 1

Post by steelcityuk »

The injector pump is back on, the last nooks and crannies of the gearbox casing painted. I'm just in the process of getting together a cam belt kit. A genuine tensioner came off Ebay for just over £20 which is handy. The idler pulley from AEP has cost around £28, I did buy one from GSF for £11 but it's going back because it's plastic.

Image

Luckily I've won an auction for a complete XUD11 not far away so that will probably end up donating it's injectors to get mine up and running.

Steve.
not applicable
Post Reply